2. Disconnect the cooling hoses from the intake manifold.
3. Disconnect the fuel hoses (chapter 4).
4. For 3.0L engines only - if you haven't already done so - remove the distributor and coil with bracket as described in Chapter 5 and pull out the hoses (section 4).
5. For 3.8L engines only - remove the PCV tube (see illustration).
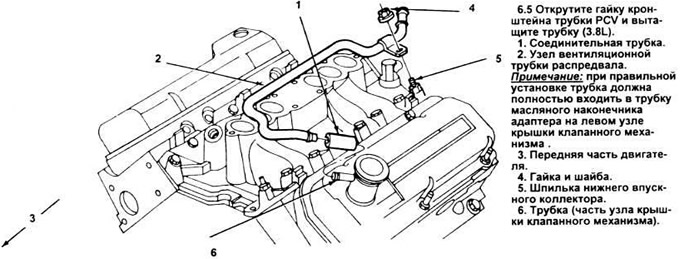
6. Unscrew the lower intake manifold mounting bolts/studs (on 3.0L models, this operation requires the use of a TORX - 50 type screw-in head), remembering the location of the studs for subsequent installation.
7. Remove the intake manifold. Sometimes you may need to use a screwdriver to pry under the edge of the manifold to pry the RTV seal off. Be careful not to damage the machined surfaces
8. Clean off all traces of the old seal. Wash away oil and dirt with a rag soaked in solvent.
9. Lightly oil the bolts and studs that go into the assembly.
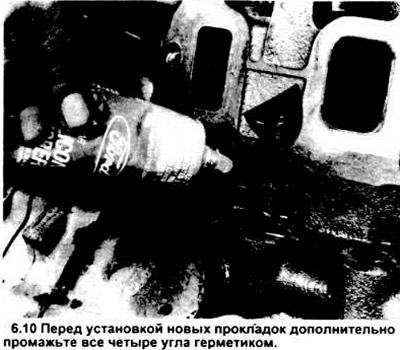
10. Apply a 1/8" thick bead of RTV sealant (such as Ford D6A2 - 19562 or equivalent) to all corners where the head contacts the engine block (see illustration).
11. Position the new gaskets on the engine using Ford D7A2 - 19B508 - A type adhesive or similar. Make sure the centering pins and keys are installed correctly (see pictures).
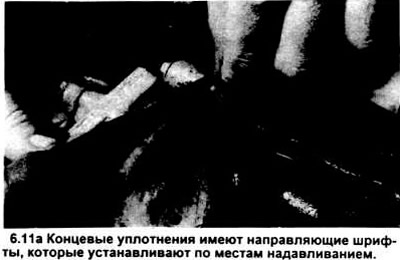
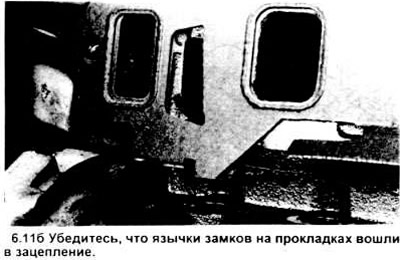
Note: The assembly must be assembled within a few minutes. Do not allow the RTV sealant to dry.
12. Carefully install the lower manifold in place. Make sure that the gaskets have not shifted. Tighten the bolts and studs in their places.
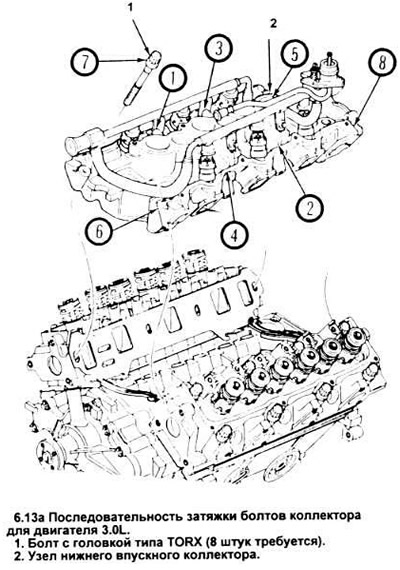
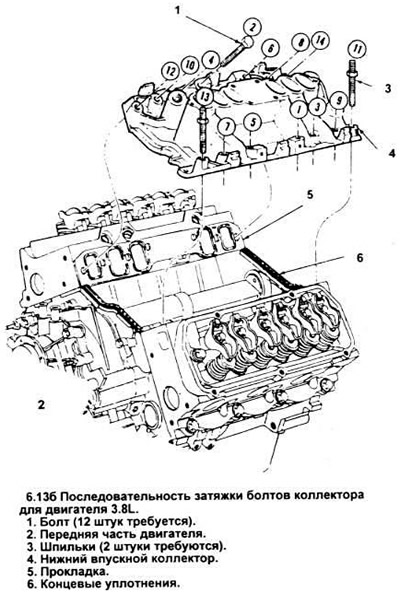
13. Tighten the bolts and studs in the sequence shown (see figure), achieving the desired torque value in several steps.
14. Install the parts removed earlier for better access in the reverse order of assembly.
15. Fill the cooling system and start the engine. Check the ignition timing (if the distributor was removed).
16. Check for possible fuel, air and coolant leaks.
(The full article is on the online resource www.fordbook.ru)