Warning: no part of your body should be under the engine while working, as long as it is only supported by a jack. Failure of the jack may result in injury.
Note: Gearbox suspension replacement is described in chapter 7.
Examination
1. The engine mount can be inspected without removing it from the vehicle.
2. Disconnect the negative battery cable.
3. Raise the vehicle and place it securely on stands
4. Place a jack under the engine, use a block of wood to protect the oil pan.
5. Raise the engine slightly to relieve its suspension. Check the suspension for cracks and delaminations. Sometimes the rubber bursts right in the center. Replace if necessary.
6. Shock absorbers should be replaced if they are leaking, bent or otherwise damaged.
Warning: If you have removed the self-locking nuts, only replace them with new ones.
Replacing shock absorbers
3.0L engine - right side
7. Remove the bolt connecting the lower end of the shock absorber to the engine bracket (see picture).
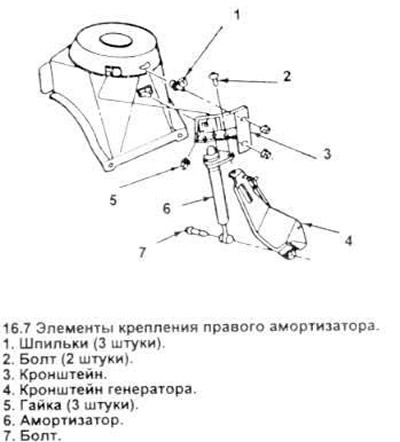
8. Turn off bolts of fastening of the top arm of the shock-absorber.
9. Remove the engine shock absorber.
10. Align the lower shock absorber bushing (on one line) with a notch on the engine bracket. Secure it with a new bolt.
11. Connect upper engine shock absorber bracket to suspension bracket, connect with new bolts.
12. Tighten fasteners to specification.
3.0L engine - left side
13. Remove the speed control system, if the vehicle is equipped with it.
14. Remove the bolt and cap nut connecting the lower end of the shock absorber to the support bracket (see picture).
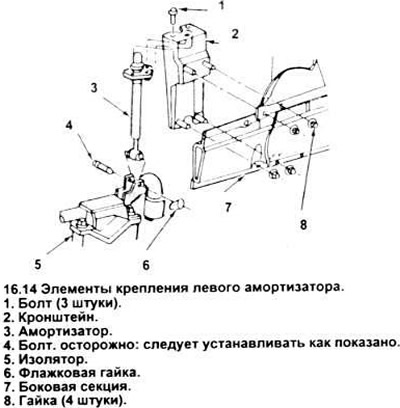
15. Turn off bolts of fastening of the top arm of the shock-absorber to a lateral arm.
16. Remove the shock absorber from the vehicle.
17. Install the lower end of the shock absorber into the engine mount bracket, making sure that the groove in the shock absorber bushing is aligned with the notch on the bracket.
18. Screw the bolt into the bracket and damper. Screw on a new flag nut.
Note: The bolt must be screwed in with the head towards the motor.
19. Pull the shock absorber into position against the side guide bracket. Fasten with three new bolts.
20. Tighten fasteners to specification.
21. Install a speed control system (if she was).
Engine mount replacement
For 3.0L engines - front and rear
22. Unscrew the lower shock absorber bolt on the right side of the engine (see figure 16.7).
23. Raise the car and place it securely on stands.
24. Place a jack under the oil pan. To evenly distribute the weight, place a block of wood between the jack and the pallet.
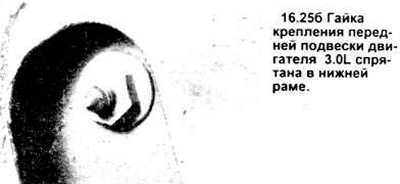
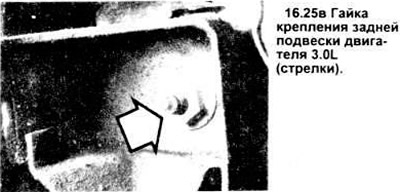
25. Unscrew the nuts securing the engine mount to the lower frame (see picture).
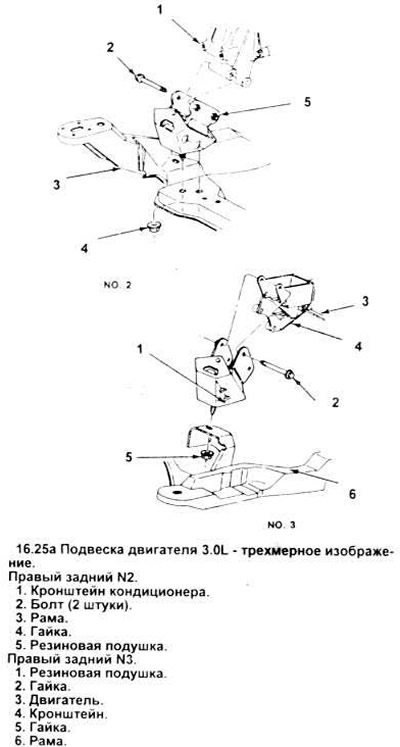
26. Raise the engine with a jack so as to remove the load from the supports.
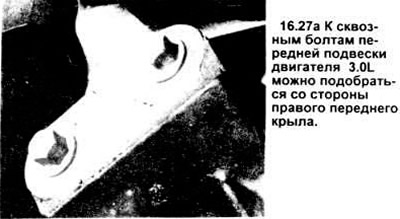
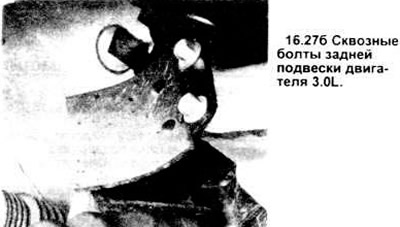
27. Remove through bolts (see picture) and remove the suspension from the car.
28. Connect the new suspension to the engine brackets with two through bolts.
29. Lower the engine into place.
30. Tighten the nuts securing the engine to the frame.
31. Tighten fasteners to the required torque value.
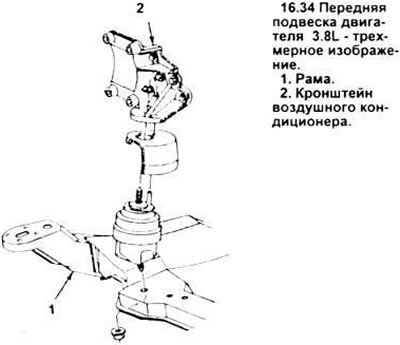
Front engine mount 3.8L
32. On models equipped with air conditioning, remove and set aside the air conditioning compressor (chapter 3), without disconnecting pipelines.
33. Raise the vehicle and place it securely on stands.
34. Unscrew the nut connecting the engine mount to the air conditioner bracket (see picture).
35. Temporarily attach the A/C compressor to its bracket with the two bottom bolts.
36. Jack up the engine through the wood shim under the oil pan.
37. Remove the nuts connecting the engine mount and lower frame.
38. Jack up the engine just enough to take its weight off the suspension mounts.
39. Remove the suspension from the car.
40. Remove the heat shield from the hanger.
41. Installation is carried out in the reverse order. Be sure to tighten the fasteners to the torque specified in the specification.
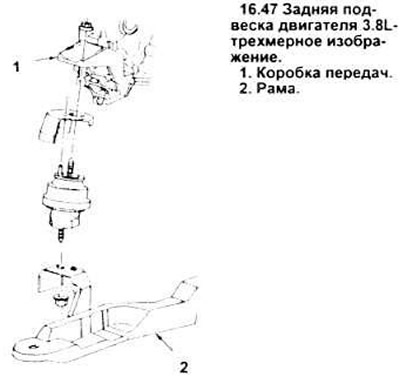
Rear engine mount 3.8L
42. Raise the car, place it securely on stands.
43. Unscrew the nuts securing the engine mount to the lower frame.
44. Remove the front and rear exhaust manifold and swivel bolts. Remove catalytic converter (chapter 6).
45. Remove the racks, lower the car.
46. Use a support beam to support the engine (Ford D79P - 6000 - V or similar). Install a hook on the alternator bracket. Raise the engine about one inch.
47. Loosen rear engine mount nut to heat shield kit (see picture).
48. Raise the car, securely fasten it to the racks.
49. Loosen the 4 bottom frame mounting bolts.
50. Turn off a nut of a back suspension bracket of the engine. Remove the rear suspension.
For all engines
51. Install the hanger and screw the top stud and lock pin onto the gearbox support bracket. Tighten the bottom nut by hand.
52. Tighten the 4 bottom frame bolts to specification (see chapter 7).
53. Remove the racks, lower the car.
54. Tighten the top nut on the rear suspension.
55. Lower the engine, remove the support beam.
56. Raise the car, place it securely on stands.
57. Install the catalytic converter.
58. Tighten the engine mount nuts to the specified torque.
Visitor comments