General description
1. The catalytic converter (see figure) is designed to reduce the content of hydrocarbons, carbon monoxide and nitrogen oxide in the exhaust. The converter "burns" these components, converting them into water and carbon dioxide (by heating, accelerating the chemical reaction between the components of the exhaust gases).
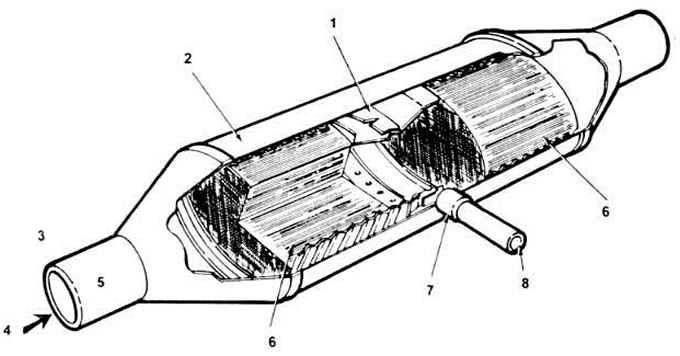
8.1. A typical catalytic converter with a three-stage catalyst (reduces the content of nitrogen oxide) and a convection oxidation catalyst (reduces the content of hydrocarbonates HC and carbon monoxide CO).
1. Mixing chamber (middle).
2. Shell.
3. Exhaust gases from the engine.
4. Flow.
5. Inlet.
6. Three-stage catalyst.
7. Secondary air intake tip.
8. Air from the manifold air intake control system pump.
2. The catalytic converter is very similar to a muffler and is located in the exhaust system just behind the short section of pipe under the exhaust manifold (you will have to lift the car to check and replace it).
3. Warning: If a large amount of unburned gasoline gets into the converter, it may overheat and catch fire. Always take the following precautions:
- use UNLEADED gasoline;
- avoid prolonged idling;
- do not run the engine with a nearly empty tank;
- avoid driving downhill with the ignition off.
Examination
Note: the operation of the catalytic converter can be checked with an infrared sensor. To conduct such a check, contact a specialist. Visually, you can check the condition of the converter by the following signs.
4. Check the bolts on the flange between the horn section of the exhaust pipe and the front end of the catalytic converter, as well as the U-bolt securing the rear end of the converter to the exhaust pipe - they should be tight. Check the tightness of the clamps securing the ends of both hoses from the air intake system to the exhaust manifold to the catalytic converter.
5. Inspect the converter itself for dents (maximum 19 mm (3/4 in) deep) and other damage that may affect its performance.
6. Check the insulation plates located above and below the catalytic converter. There may be damage.
Replacement of elements
Early 4 cylinder engines / 3.8LV6 engines (two stage catalytic converter, under the housing)
Warning: Do not attempt to remove the catalytic converter until the exhaust system has completely cooled.
7. Raise the car and support it securely on stands. Lubricate the clamp bolts with a good penetrating oil and let it soak in.
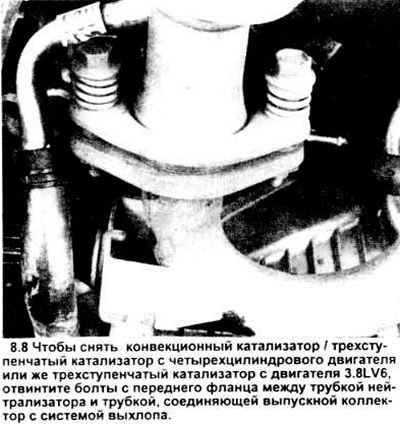
8. Unscrew the flange bolts from the flange between the "horned" (curved) and exhaust pipes (see picture). Remove the old gaskets if they are stuck to the pipes.
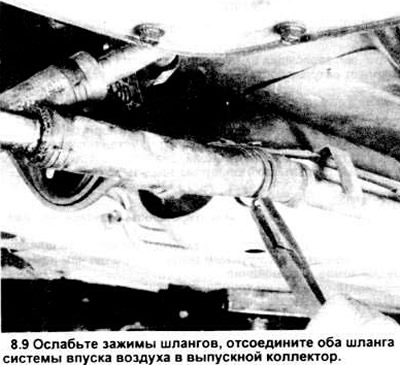
9. Release the hose clamps (see illustration) and disconnect the hoses from the air intake system tubes into the exhaust manifold.
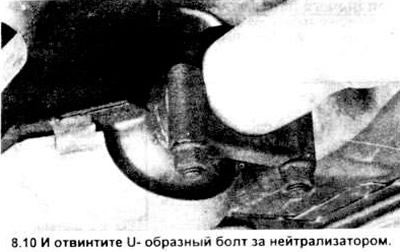
10. Remove the U-bolt (see illustration) from the rear of the catalytic converter and main exhaust pipe assembly connection.
11. Remove the catalytic converter.
12. Install in reverse order. Place a new exhaust pipe gasket on the flange.
13. The rubber exhaust pipe holders should be checked and, if necessary, replaced while the vehicle is raised (see chapter 4).
14. Start the engine and carefully check for leaks in the exhaust system.
Engines 3.0L/3.8LV6 (two-stage catalytic converter, under the engine)
15. Raise the vehicle and support it securely on stands. Lubricate the clamp bolts with a good penetrating oil.
16. Disconnect the electrical wire from the exhaust gas oxygen sensor (EGO).
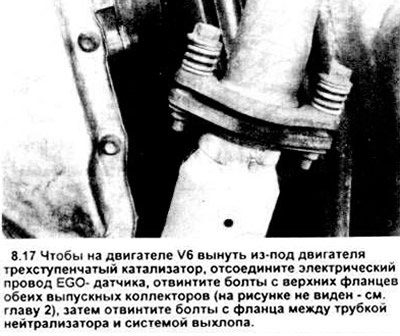
17. Remove the bolts from the flanges at both ends of the catalytic converter tube (see figure).
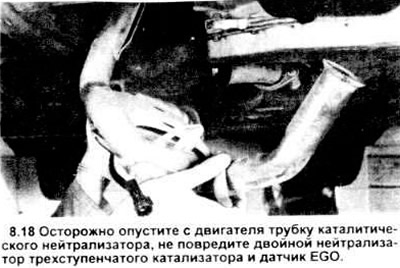
18. Remove the catalytic converter tube (see figure).
19. Install in reverse order. Don't forget to put new gaskets on the flange.
20. Start the engine, check for leaks.