Contents: Removal ↳ Installation ↳
General equipment: Measuring and straightening.
| Name | Specification |
| Reinforcement of the apron panel | |
| Spar with apron panel |
Removal
1. General notes:
- Before starting repairs, remove the front assemblies, seat, instrument panel trim, fender, hood, hood latch panel and crossmember.
- Remove the following components: power steering fluid reservoir, coolant expansion tank, hood front panel, bulkhead damper trim, and A-pillar trim panels.
- Move floor coverings, electrical wiring and hoses away from the work area.
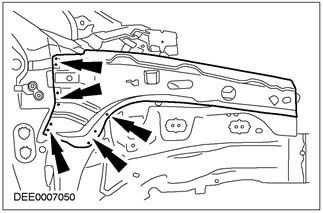
2. Strengthening the apron panel
- Mill spot welds.

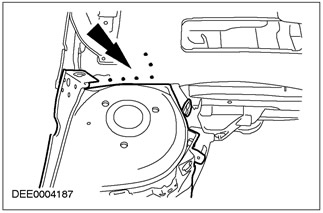
3.
CAUTION: Only rout to a depth equal to twice the panel thickness
Partition
- Mill spot welds.
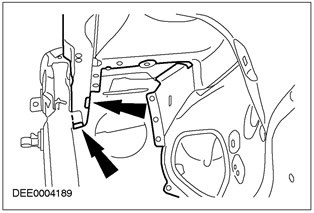
4. Apron panel
- Cut off both protrusions.
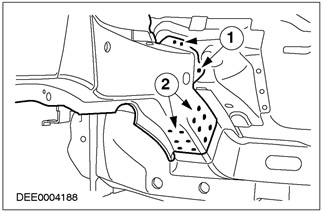
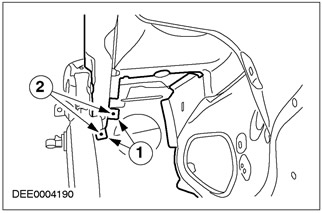
5. Spar
- 1. Mill spot welds.
- 2. Rout the spot welds only to a depth equal to twice the panel thickness using a Ø 10 mm grinding wheel.
Installation
1. Prepare a new side member.
- Disconnect the front side member from the side member assembly at the original joint.
2. Strengthening the apron panel
- 1. Before installation, bend the tabs outward by 180°.
- 2. Perform puddling welding.
3. Spar
- Perform puddling welding.

4. Partition
- Perform puddling welding.

5. Strengthening the apron panel
- Perform puddling welding.