Removal
Remove the gearbox.
Models prior to 8/94: Unclip the release bearing at the top and bottom of the fork and remove it from the transmission input shaft.
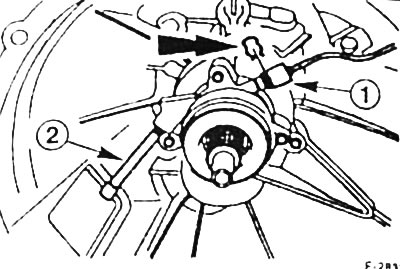
Models from 9/94: remove the locking spring "arrow" from the working cylinder, disconnect the quick-acting coupling "1". Unscrew the air bleed valve "2". Unscrew the 3 bolts securing the working cylinder to the gearbox and remove it together with the clutch release bearing from the input shaft of the gearbox.
Examination
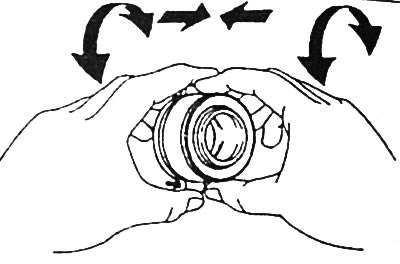
Press the clutch release bearing parts together and turn them in different directions at the same time. If the bearing has play, it must be replaced with a new one.
Caution: The bearing is lubricated for life and cannot be cleaned or re-lubricated.
Check the bearing contact surfaces for wear, corrosion and damage.
Installation
Apply a thin layer of high-temperature grease, such as MoS2, to all surfaces of the clutch release bearing and contact surfaces. Remove any remaining hardened grease if necessary.
Caution: Do not apply too much grease so that it does not get onto the working surfaces of the discs when the clutch is installed.
Models up to 8/94: Insert the clutch release bearing and attach it to the fork.
Models from 9/94: tighten the bolts securing the slave cylinder with the clutch release bearing to the gearbox to a torque of 10 Nm. Connect the quick-release coupling at the slave cylinder and insert the locking spring, see Figure F-2B32 above. Tighten the bleed valve. After installing the gearbox, bleed the air from the clutch hydraulic drive.
Install the gearbox, see p. 90.
[The original article is available on the website: fordbook.ru]