Bosch Generator
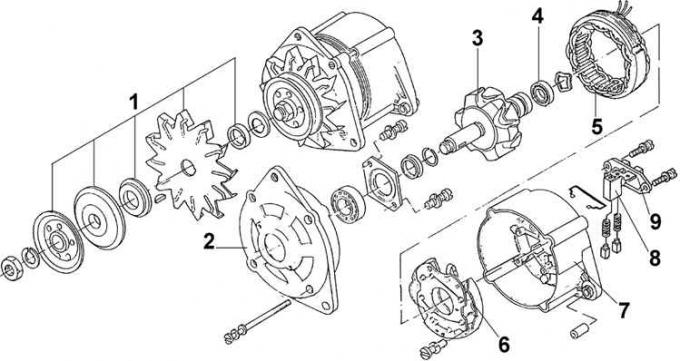
1 – fan pulley, 2 – front cover, 3 – rotor, 4 – bearing, 5 – stator, 6 – rectifier, 7 – rear cover, 8 – brush holder, 9 – electronic voltage regulator
Lucas Generator
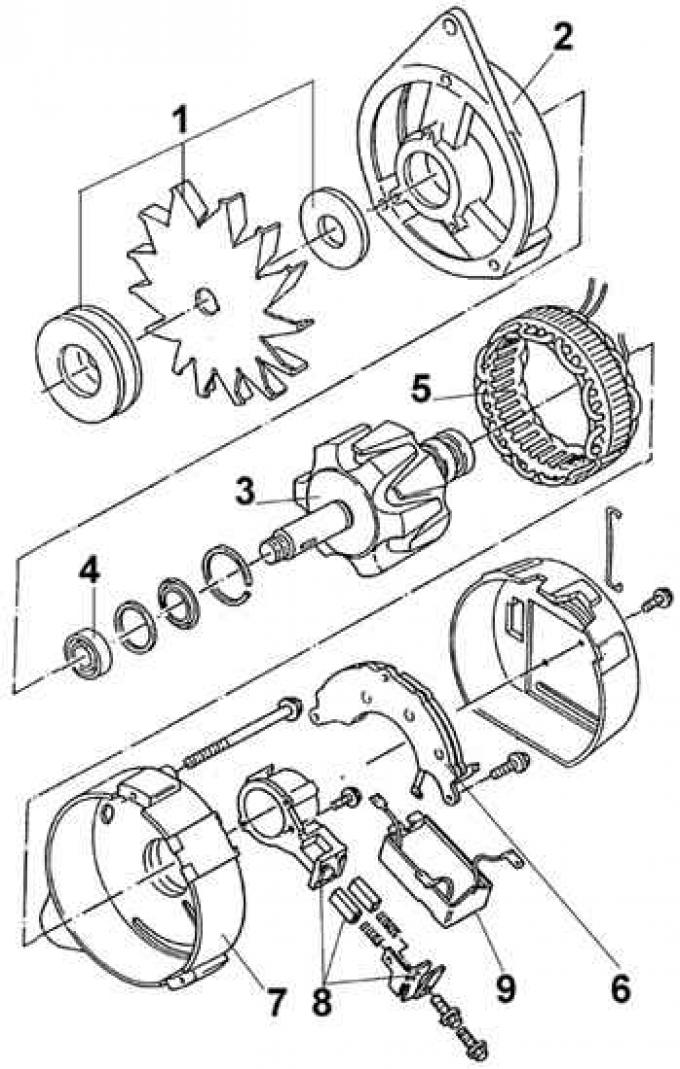
1 – fan pulley, 2 – front cover, 3 – rotor, 4 – bearing, 5 – stator, 6 – rectifier, 7 – rear cover, 8 – brush holder, 9 – electronic voltage regulator
Motorola Generator
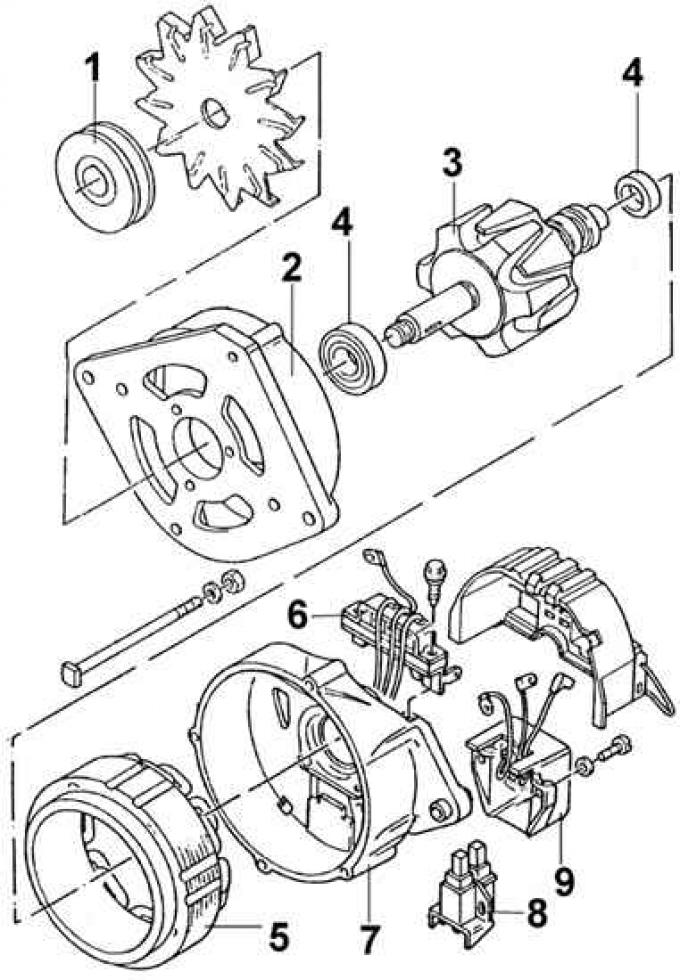
1 – fan pulley, 2 – front cover, 3 – rotor, 4 – bearing, 5 – stator, 6 – rectifier, 7 – rear cover, 8 – brush holder, 9 – electronic voltage regulator
When repairing a generator, the following instructions should be followed:
- diodes placed in the generator are sensitive to high temperature; if it is necessary to replace them during the soldering process, you should hold their leads with metal tweezers, which will remove heat from the soldering iron tip, and also limit the soldering time to the necessary minimum;
- avoid using ungrounded electric soldering irons, as if their insulation is damaged they will cause breakdown of the generator's rectifier diodes;
- during the control tests of the generator, the supply voltage should not exceed 14V;
- during the testing of rectifier diodes, it is possible to use direct current with a voltage not exceeding 24 V;
- only gasoline should be used for cleaning parts; immediately after cleaning the parts (especially the windings), they should be dried with a stream of compressed air.