To remove the generator on a 16-valve engine (produced before January 1997), proceed as follows:
- Disconnect the negative cable from the battery, taking the necessary precautions;
- remove the intake housing completely by disconnecting the large hose on one side, pressing the low pressure hose and releasing the three bolts and nuts visible in the middle;
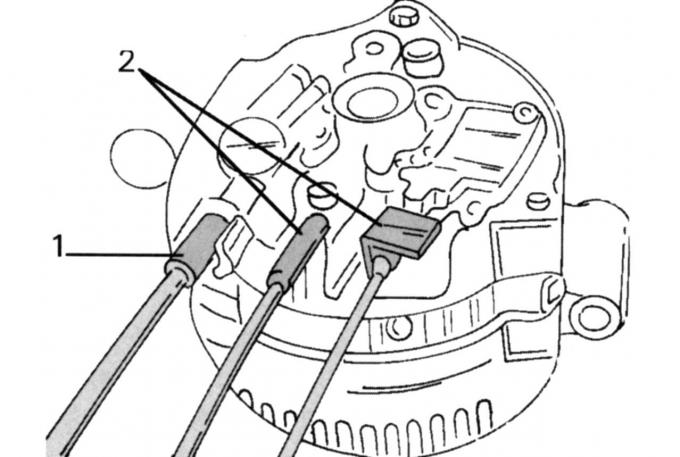
Fig. 283. Connections on the rear side of the generator: 1 - conductive cable; 2 - cable connector
- disconnect the connections shown in Fig. 283 (the generator is shown removed beforehand so that the connections are more clearly visible);
- unscrew the corresponding bolt securing the connecting wire to the body;
- release the wire mount from the front wall;
- place the front of the car on supports and remove the trim from the inside of the wheel arch on the generator side (one fastener on the left and right);
- turn the belt tensioner bolt to the right until it is possible to remove the drive belt;
- unscrew the lower generator mounting bolts, lower the car onto its wheels;
- unscrew the upper bolts; carefully turning the generator (due to limited space, achieve a position where the belt pulley is on top), only then remove the generator, then disconnect the other wire.
To remove the generator on a 16-valve engine (produced since January 1997), proceed as follows:
- jack up the front of the car and remove the protective cover from the bottom of the belt drive (in two places);
- remove the drive belt as described below;
- lower the car onto its wheels;
- find the wire on the body and disconnect the bolt on its end, unscrew the power steering wire clamp from the lever eye;
- Disconnect both fuel lines (quick-release fasteners);
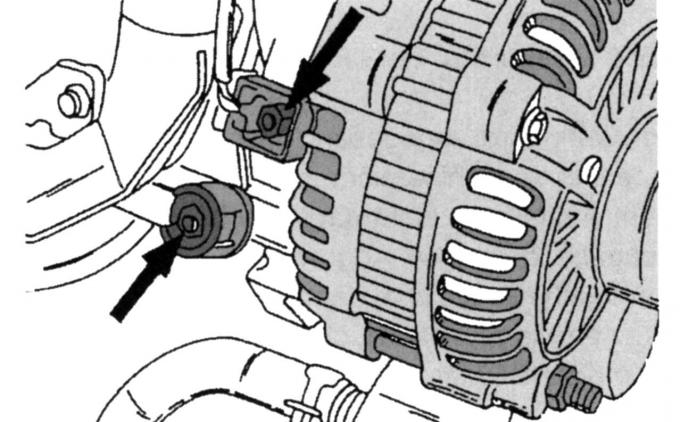
Fig. 284. Location of generator wire fastenings
- disconnect the plug connector from the back of the generator (Fig. 284);
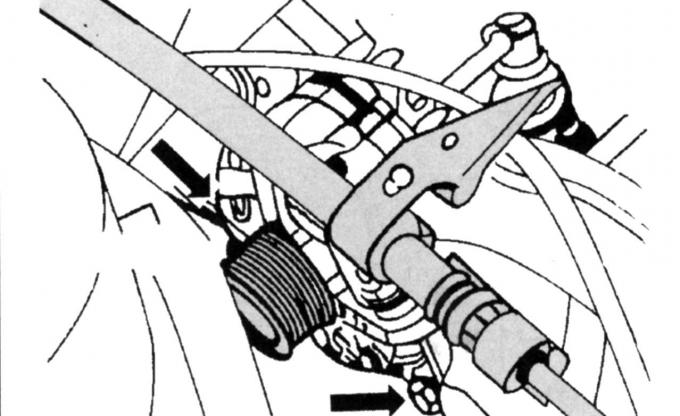
Fig. 285. Generator mounting bolts
- unscrew both generator mounting bolts shown in Fig. 285;
- pull the generator up.
Perform installation in the following order (the car is on the ground at this time, it must be raised again, so follow safety precautions):
- install the generator on the mounting bracket and tighten the bolts shown in Fig. 285 on vehicles manufactured since January 1997 to a torque of 45 N·m;
- on earlier production vehicles, temporarily install the wheel and lower the vehicle back to the ground, install the upper mounting bolts and tighten to 45 Nm, raise the front of the vehicle again and tighten the lower bolts to the same torque;
- on all vehicles, install the drive belt and tighten it using the pressure roller;
- reinstall the removable wheel arch cover;
- connect the wires to the generator and secure the clamp;
- install the wheel, lower the car to the ground and tighten the wheel nuts to a torque of 85 Nm;
- install the remaining parts.
To remove the generator on a vehicle with a 2.5-liter V6 engine, proceed as follows:
- Disconnect the negative cable from the battery, taking the necessary precautions;
- lift the front of the car and unscrew the safety shield from below, under the front part;
- remove the wheel arch trim;
- loosen the bolt in the middle of the tensioner and rotate it to the left on the back of the tensioner until the belt is loose, remove the belt;
- disconnect the wires from the generator; to remove the nut, you need a socket head with an extension and a hinge; to open the clamp, you need a screwdriver;
- disconnect the transverse steering rod on the generator side from the steering knuckle arm (see section "Steering");
- release the rear generator support using an extension, a hinge and a socket head;
- unscrew the upper generator mounting bolt;
- using the same tools, unscrew the lower generator mounting bolt. To get to this bolt, insert an extension between the oil pan and the outlet pipe;
- remove the generator through the open wheel well.
Install in the reverse order of removal. Tighten the generator mounting bolts to 45 Nm, and the tie rod joint nut to 37 Nm (always use a new nut).
This article was borrowed from the website: FordBook.ru