2. Lay out a combination of pistons with connecting rods and sets of new rings for each cylinder so that when measuring side clearances and assembling the engine, the piston rings are in a selection with the same piston and cylinder.
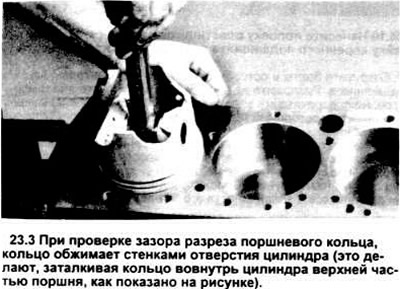
3. Insert the top (number one) ring into the first cylinder and, pushing inward with the top of the piston, make sure it is compressed by the cylinder walls (see figure). The ring should be at the bottom of the cylinder at the lower limit of the stroke.
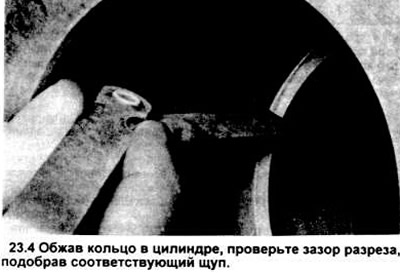
4. To check the gap, insert the feeler gauges into the ring gap until you find the one that matches the gap width (see picture). The feeler gauge should pass between the ends of the ring with some resistance. Compare the measurement result with the value specified in the specification. If the gap is greater or less than the specified value, make another check; only install correctly selected rings when final installation is complete.
5. If the gap is too small, increase it, otherwise the ends of the ring will catch on each other when the engine is running, which will lead to serious damage. The gap can be increased by carefully filing the ends of the ring with a file. Mount the file in a vice with soft jaws, connect the ends of the ring on the file and slowly move the ring along it to remove excess material. When doing this, move the ring along the file in only one direction - outward and inward.
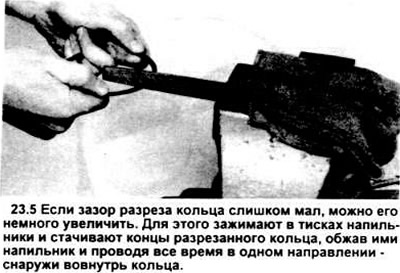
6. The critical cut clearance value - maximum - is 1.016 mm (0.040 in). Recheck to ensure that the rings are correctly matched.
7. The procedure must be repeated for each ring installed in the first cylinder, and, accordingly, for all rings of the remaining cylinders. Remember to select pistons and rings for each cylinder.
8. After checking/adjusting the gaps of the ring cuts, the latter can be installed on the pistons.
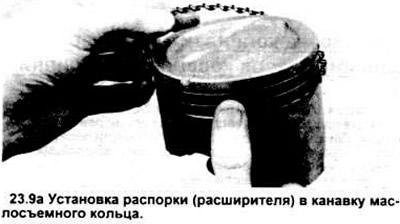
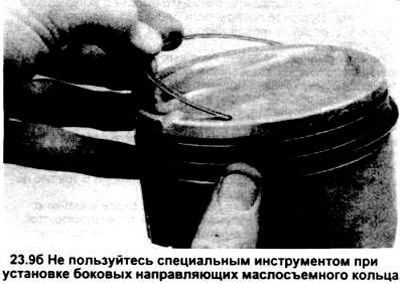
9. The lowest ring on the piston - the oil scraper ring - is installed first. It is assembled from three separate components. Place a spacer or expander in the groove (see the figure). If you use a shank to prevent rotation, make sure that it is inserted into the hole in the groove for the ring. Then install the lower guide. When installing the abrasive edges of the oil scraper ring, to avoid damaging them, do not use a special tool for installing piston rings.
Instead, place one end of the side guide in the groove between the spacer/expander and the ring face, and holding it in place, tuck the guide around the piston into the groove (see illustration). Then install the top guide in the same manner.
10. After installing all three components of the oil scraper ring, check that it is installed correctly - the upper and lower guides should move easily in the groove around the piston.
11. Next, install ring #2 (the middle one). It has a stamp on it that should be on the outside when installed and turned toward the top of the piston.
Note: Always follow the instructions printed on the ring packaging or box exactly - different manufacturers give different recommendations. Do not mix up the top and middle rings, as they have different cross-sections.
12. Use the ring installation tool, making sure that the ring is facing the top of the piston with the mark. Lower the ring into the middle groove of the piston (see picture). Do not stretch the ring more than is necessary to fit onto the piston.

13. Install ring No.1 (upper) in the same way. The mark should be on the outside. Do not confuse rings with numbers 1 and 2.
14. The procedure is repeated with the remaining rings and pistons.
(The text of the article was copied from the website: FORDBOOK)