


Note: The crankshaft can only be removed with the engine removed from the vehicle. It is assumed that the flywheel or vibration damper/crankshaft pulley hub plate, camshaft chain (for V6 engines), oil pan, oil pump and pistons and connecting rod assemblies have already been removed. On a four-cylinder engine, the housing seal must be unscrewed and separated from the block before the crankshaft removal procedure.
1. Before removing the crankshaft, check the play (axial clearance). To do this, install a dial indicator so that its leg is aligned with the crankshaft and touches one of the cranks (see figure).
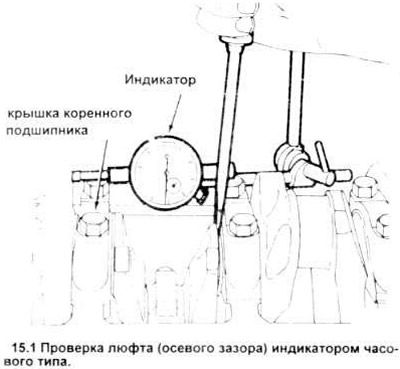
2. Push the crankshaft to the right to reset the indicator readings. Then use the lever to move the crankshaft forward as far as possible and read the indicator readings. The distance it moves is the axial clearance. If it is greater than the permissible value, check the axial surfaces of the crankshaft for wear. If wear is not noticeable, the axial clearance can be corrected by replacing the main bearings.
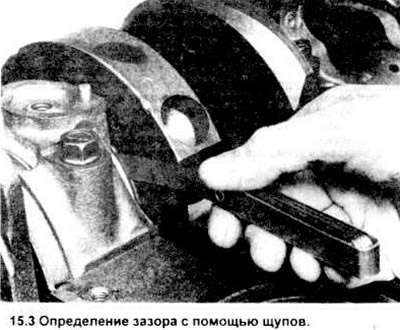
3. If it is not possible to use an indicator, you can use feeler gauges. Carefully move the lever or push the crankshaft toward the front of the engine. To determine the clearance, install feeler gauges between the crankshaft and the front surface of the main bearing (see figure).
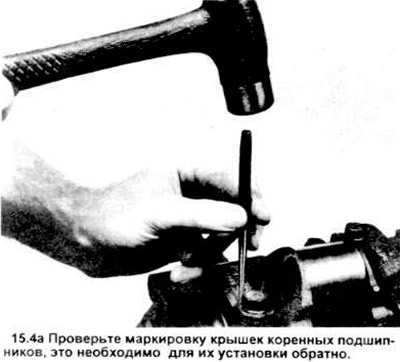
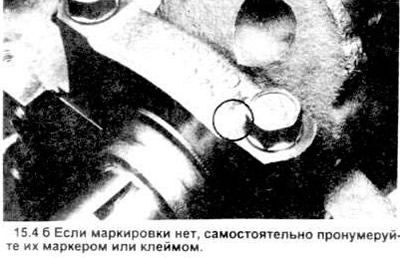
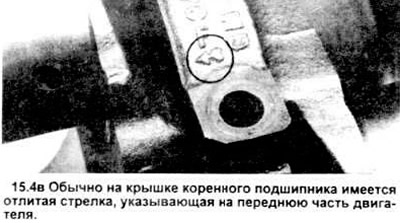
4. Check the markings on the main bearing caps, this is necessary later for reinstalling them. They should be numbered sequentially from the front to the rear of the engine. If this is not the case, number them yourself with a marker or stamp (see the picture). Usually, there is a cast arrow on the main bearing cap pointing to the front of the engine (see the picture). Loosen all the cap bolts one by one by 1/4 turn so that they can be unscrewed by hand.
5. Tap the caps gently with a soft-sided hammer, then pry them away from the block. If necessary, use the bolts as levers to remove the caps. If the insert is removed with the cap, be careful not to drop it.
6. Carefully remove the crankshaft from the engine. At this point, help is needed, as the crankshaft is very heavy. The bearing shells with caps should be in the block, install the caps in their places in the block and manually tighten the bolts.