Contents: Front oil seal for a four-cylinder… ↳ Four cylinder engine rear seal ↳ Replacing the oil seal without… ↳ Replacing the oil seal by removing… ↳ Rear crankshaft oil seal for… ↳
Front oil seal for a four-cylinder engine
Note: This procedure is performed with the engine removed. For replacing the front seals on V6 engines, see chapter 2B.
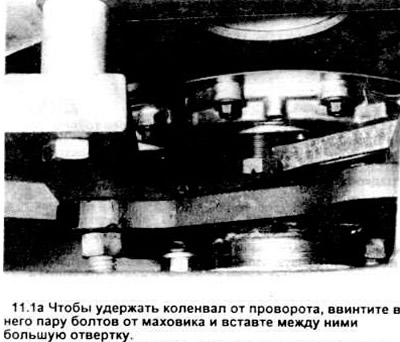
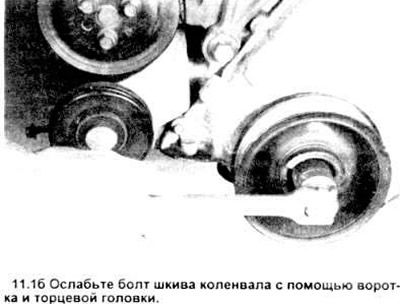
1. After removing the engine from the car and securing the crankshaft (see figure), use a ratchet to unscrew the pulley mounting bolt (see figure).
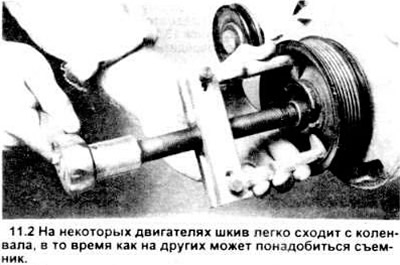
2. Remove the pulley from the crankshaft using a puller (see figure).
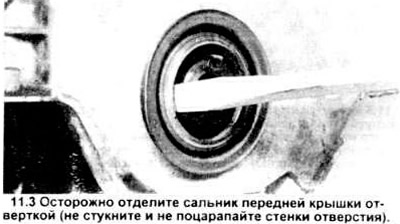
3. Using a large screwdriver, carefully separate the oil gasket from the cover (see figure).
4. Clean the hole in the cover and lubricate the outer edge of the new seal with engine oil or multipurpose grease. Using a socket with an outside diameter slightly smaller than the outside diameter of the seal, carefully tap the new seal into place with a hammer (see illustration).
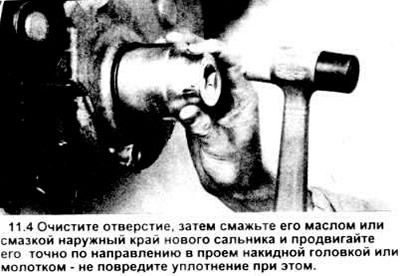
If you don't have a socket head, a short piece of large diameter pipe will do. After installation, check the seal to make sure the spring hasn't popped out of its seat.
5. Apply "moly" grease to the seal contact surface of the pulley hub, then slide the pulley onto the crankshaft. The keyway in the pulley hub must be aligned with the key on the end of the crankshaft.
6. Screw in the bolt and tighten it to the required torque value.
Four cylinder engine rear seal
7. This procedure requires the engine to be removed and the transmission and flywheel/drive plate to be disconnected.
8. It is possible to replace the oil seal without removing the oil pan and retainer. However, we do not recommend this method because the seal flange is very rigid and may break off during installation or otherwise be damaged during installation.
Replacing the oil seal without removing the oil pan and retainer
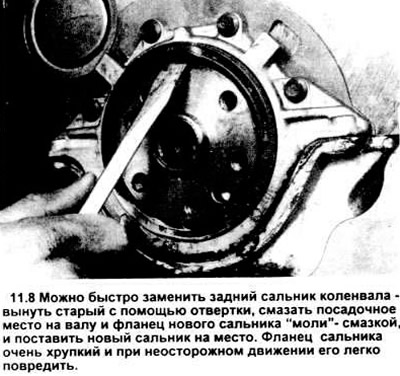
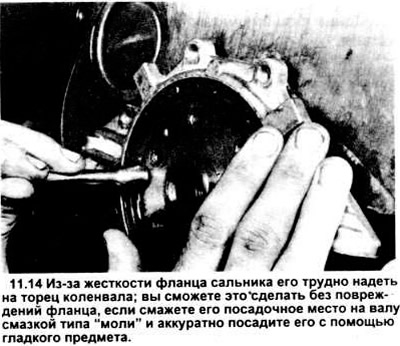
Loosen the old seal with a screwdriver (see figure). Apply "moly" grease to the crankshaft seating surface and the flange of the new seal and carefully install the new seal in place. The flange is fragile, so work carefully, using a smooth object - for example, the tip of an extension (see figure 13.14), until you have installed the seal in place. To avoid damaging it, do not make any sudden movements.
9. The method recommended below is preferred, but it requires removing the oil pan (see chapter 2A) and seal retainer.
Replacing the oil seal by removing the oil pan and retainer
10. After disconnecting the oil pan, unscrew the bolts, separate the retainer and clean off the remains of the old gasket.
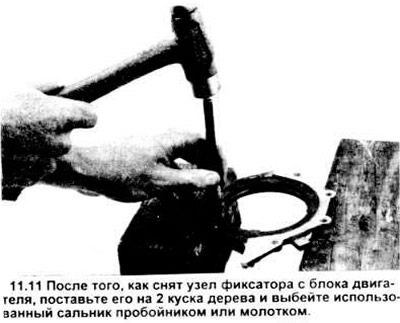
11. Place the retainer assembly on a pair of wooden blocks on the workbench and use a punch to knock out the old seal (see illustration).
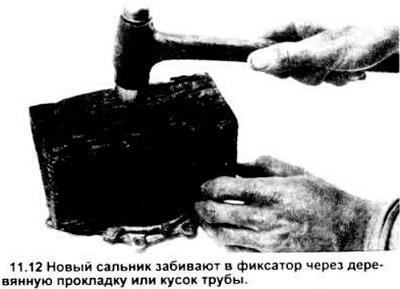
12. Hammer the new seal into the retainer through a wooden spacer (see figure) or a piece of pipe slightly smaller in diameter than the outer diameter of the seal.
13. Lubricate the seat on the crankshaft and the flange of the new oil seal with moly grease.
14. Slowly and carefully place the seal on the crankshaft. The flange is fragile and hard, so when pushing it into place, tap it with some smooth object, such as the end of an extension (see picture).
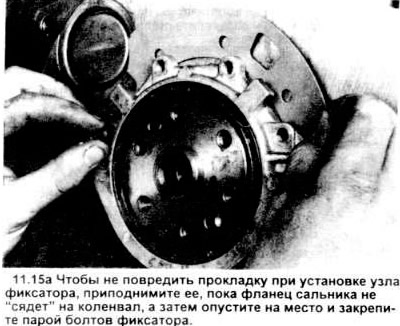
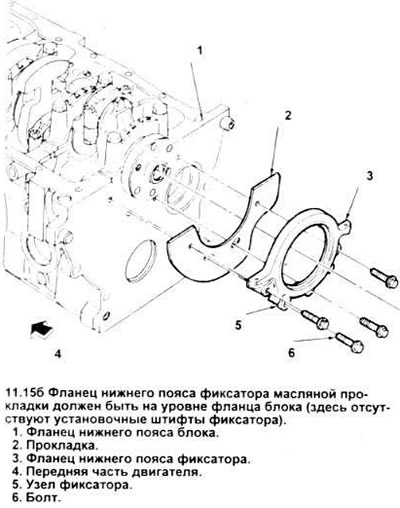
15. Place a new gasket in place between the retainer and the block (see illustration), then install and tighten the retainer bolts to the specified torque value. The lower flange of the gasket should not be lower than the lower flange of the engine block (oil pan guide) (see illustration).
16. The remaining actions are performed in the reverse order of disassembly.
Rear crankshaft oil seal for six-cylinder engines
17. Remove the drive plate (and rear cap, if any) (section 12).
Caution: Do not damage or scratch the seal surfaces, otherwise it may destroy the crankshaft or block.
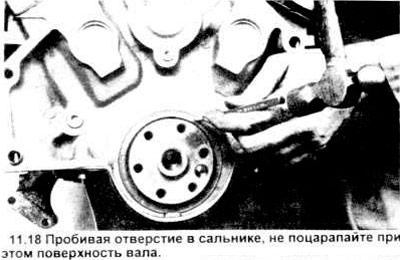
18. Using a sharp awl, punch holes in the seal between the flange and the engine block (see figure).
19. Screw in the threaded end of the T77L - 9533 - B tool or equivalent.
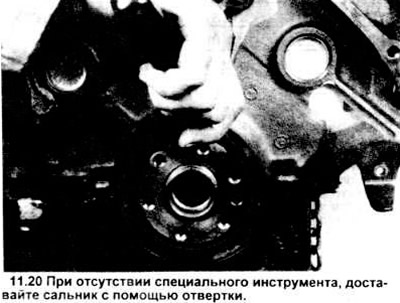
20. If there is no special tool, remove the seal using a screwdriver (see figure).
21. Thoroughly clean the inner surface of the oil seal and the crankshaft surface in contact with it, lubricate the new oil seal with engine oil.
22. Place the new oil seal on the Ford installation tool T82L - 6701 - A (see illustration) or equivalent. Place the tool and oil seal on the crankshaft. Tighten the bolts alternately to install the oil seal evenly (use the drive plate bolts if necessary).
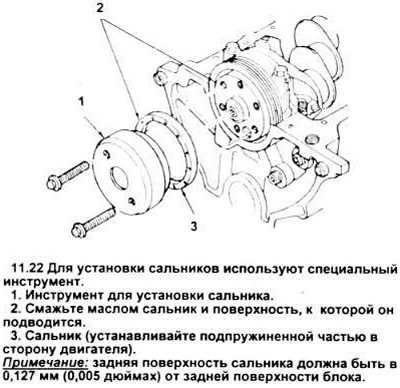
23. If it is not possible to use a special tool, carefully slide the oil seal flange onto the end of the crankshaft, and then hammer it into the hole using a hammer and blunt chisel until it is fully installed (see figure).

Note: The back surface of this seal should be 0.127 mm (0.005 in) from the back surface of the block.
24. Reinstall the drive plate (section 12).
25. Install the engine (section 4).
[The article was taken in its entirety from the specified website FordBook]