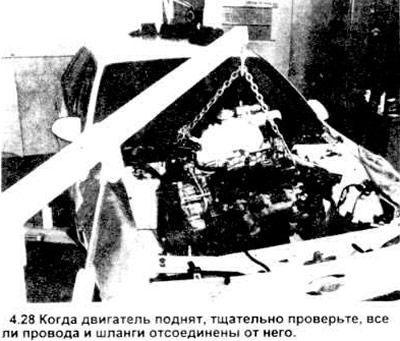
Warning: No part of your body should be under the engine when it is on a hoist or other supporting device.
Withdrawal
1. On vehicles equipped with air conditioning. check the clearance around the air cooled compressor. If, with the compressor removed and set aside, the distance between it and the engine is not enough to remove the engine, then a specialist should be contacted to discharge the air conditioning system.
2. Disconnect the negative battery cable.
3. Remove the fender covers under the fenders and hood and remove the hood cover (chapter 11).
4. Remove the air cleaner assembly and air duct (chapter 4).
5. Remove the front wheels.
6. Drain the coolant, oil, remove the oil filter (Chapter 1).
7. Mark vacuum hoses, coolant hoses, wire connectors and fuel hoses for proper installation later.
8. Disconnect all fuel hoses coming from the engine.
9. Disconnect the fan, radiator shroud and radiator itself (chapter 3).
10. Remove drive belts (Chapter 1). on four-cylinder engines, remove the water pump container. On 3.8L engines, remove the belt tensioner.
11. Relieve the pressure in the fuel system and disconnect the pipelines from the engine to the car body (chapter 4). Plug or cap all open pipe ends
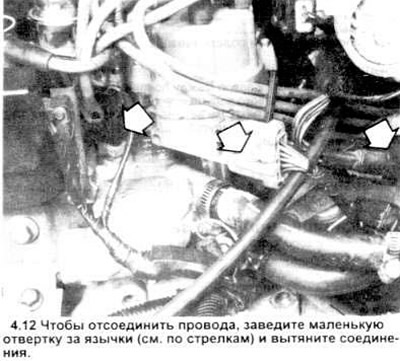
12. Carefully disconnect the vacuum pipes, exhaust pipes, fuel lines, ground straps and electrical contacts (see picture), connecting the engine to the car.
See chapters as needed 4, 5 and 6.
13. Disconnect throttle cable (as well as speed control cables, if any) from throttle body (chapter 4) and check if the speedometer cable brackets are connected at the rear of the engine.
14. On vehicles equipped with power steering, remove the power steering pump (chapter 10).
15. On vehicles with air conditioning, remove the compressor bolts (chapter 3) and place it on the side if the gaps allow (see picture). If the clearance is insufficient, disconnect the cooling hoses only after the system has been discharged (see step 1).
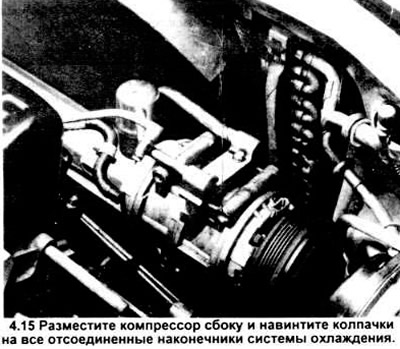
Warning: When disconnecting hoses, protect your eyes in case of an unexpected release of coolant.
16. On 3.8L engines, remove the air release pump to the exhaust manifold according to the recommendations given in chapter 6. Remove the water pump (chapter 3) and crankshaft pulley.
17. Remove the starter motor (chapter 5).
18. Turn off bolts of fastening of system of an exhaust from the engine (chapter 4).
19. Remove engine shock absorbers (see chapter 2 part A or IN).
20. On models with automatic transmission, remove the inspection cover from the housing. On a four-cylinder engine with an automatic transmission, remove the adjusting window cover on the gearbox and turn the crankshaft until the adjuster on the drive bar is aligned with the appropriate pointer. Mark the crankshaft pulley in position "12 hours" (TDC) (see chapter 2 part A). Rotate the crankshaft until the mark is in position "6 hours" ("lower").
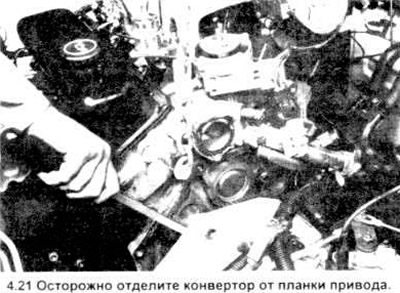
21. According to the instructions in chapter 7, unscrew the torque nuts securing the converter to the drive rail.
Note: in models with an automatic transmission, there must be a mark on the drive bar for installation in "lower" position specifically for cases of removal and installation of the engine. Slightly slide the converter towards the box (see picture).
22. Disconnect transmission cooling lines (chapter 7).
23. Turn off bolts of fastening of a transmission to the block of the engine.
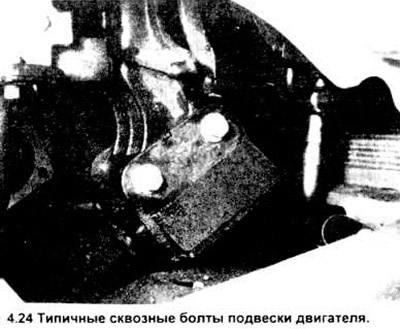
24. Unscrew the through bolts of the engine mount (see picture).
25. Check everything again to make sure the engine is no longer connected to the car. On models with a four-cylinder engine and a manual transmission, remove the binding from the engine shock absorbers.
26. Lower the vehicle, then place a floor jack under the transmission. Use a block of wood to avoid damaging the box.
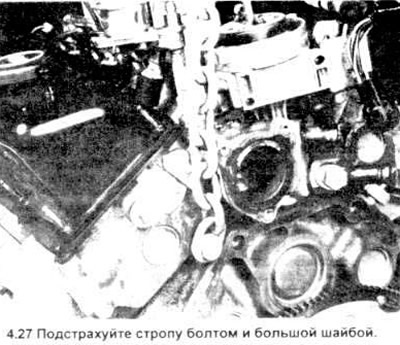
27. Connect the engine lifting straps to the corresponding brackets on the engine. If you can’t get close to some bracket, take a chain with a longer bolt and washer (see picture). Bring the lift and attach a sling to it. Choose a gap until you feel friction against the lift hook. If the chain presses on the distributor cap, remove the cap.
28. Slightly raise the engine above the suspension. Remove all remaining bolts connecting the gearbox and the rear of the engine mount and carefully disconnect the engine from the gearbox. Slowly remove the engine from the compartment (see picture).
Installation
30. On manual transmission models, use a clutch alignment tool to install the driven plate (chapter 7).
31. Carefully lower the engine into the compartment, observing the position of the suspension.
32. On automatic transmission models, direct the transformer accessory into the crankshaft as described in chapter 7 procedure.
33. On models with a manual transmission, guide its input shaft into the crankshaft bearing and driven disk until it sits tightly along the entire length (body dome flush with engine block).
34. Tighten bolts of fastening of a box to the engine and tighten them reliably.
Caution: do not try to align the engine and gearbox with bolts. This can damage important parts.
35. Install fasteners and remaining parts in the reverse order of disassembly.
36. If necessary, add coolant, oil, fluids to the hydraulic booster and gearbox.
37. Start the engine, check its operation and possible leaks.
Visitor comments