Contents: Removal ↳ Installation ↳
Please note: The following describes how to remove the engine without the gearbox.
Removal
On engines with fuel injection, depressurize the fuel system.
Remove the ground cable from the battery Drain the coolant and engine oil Reinstall the oil drain plug Remove the hood.
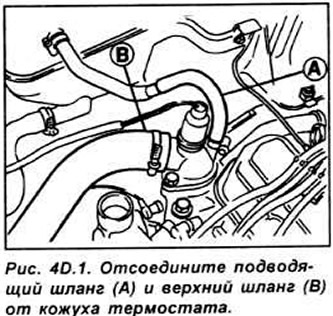
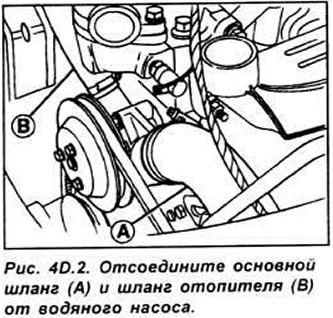
Remove the air filter housing and engine air supply system components. Loosen the clamps and disconnect the following coolant hoses (see Fig. 4D.1, 4D.2):
- all hoses in thermostat housing
- hose from the base of the radiator going to the water pump
- heater hoses
- intake manifold hose
Disconnect the fuel canister vacuum hose from the intake manifold.
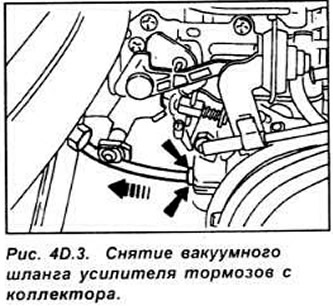
Disconnect the brake booster vacuum hose from the intake manifold by pressing the hose retainer against the manifold and simultaneously pulling the hose towards you (see Fig. 4D.3).
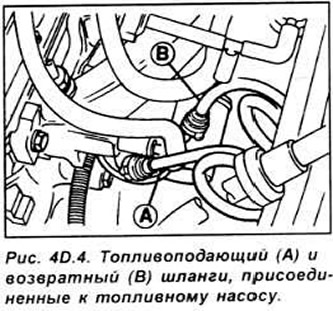
Remove the accelerator cable. Disconnect the quick-release couplings and remove the fuel supply and return hoses to the fuel pump. Plug the ends of the removed hoses with plugs (see Fig. 4D.4).
Label and disconnect the electrical connectors from the following components (see Fig. 4D.5, 4D.6):
- coolant temperature sensor
- oil pressure sensor
- ground bus from the radio receiver
- thermal fan switch
- ignition coils
- crankshaft speed and position sensor
- engine temperature sensor
- cut-off valve
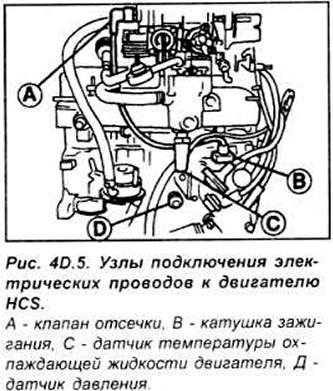
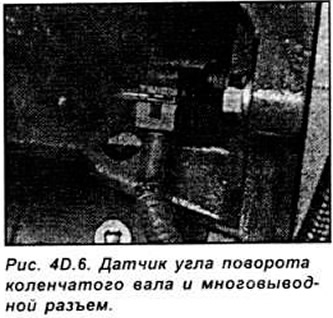
Disconnect the remaining multi-pin connectors from the engine sensors in the intake manifold and from the oxygen sensor in the exhaust manifold or in the exhaust pipe. On Endura-E engines, release both wiring harnesses and disconnect the 4 fuel injector multi-pin connectors.
Raise the front of the car and secure it on stands. Unscrew the nuts and disconnect the exhaust pipe from the exhaust manifold. Remove the gasket. Remove the starter.
Unscrew the two mounting bolts and remove the lower clutch plate. Unscrew the mounting bolt and separate the stabilizer from the gearbox. Unscrew the gearbox mounting bolts and the ground bus mounting bolt.
Remove one bolt securing the rig's suspension to the beam. Check that all connections are disconnected and lower the vehicle to the ground.
Remove the bolt and heat shield from the exhaust manifold. Place a lifting device over the engine and hook the engine with slings diagonally. Raise the engine so that the engine weight is fully supported by the lifting device, then remove the nuts and bolts securing the engine mount. Place a jack under the gearbox and raise it so that the weight of the gearbox is supported by the jack.
Remove the upper gearbox-to-engine mounting bolts.
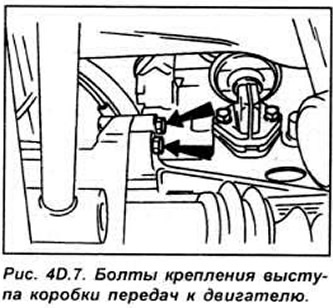
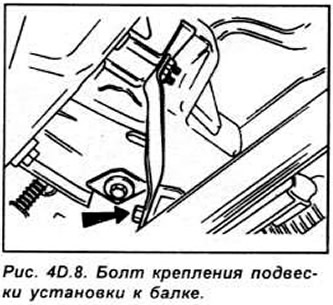
Make sure all engine connections are disconnected. Move the engine away from the transmission and lift it out of the engine bay. Do not allow the engine to hang on the transmission input shaft while the engine is being removed. After removing the engine, inspect its mounts. If they are worn, they must be replaced. Inspect the condition of the coolant hoses, vacuum hoses and pipes. Also inspect the condition of the clutch and replace the clutch disc if the clutch disc linings are worn.
Installation
Installation is carried out in the reverse order of removal.
Before installing the clutch on the gearbox input shaft, lubricate the input shaft with high melting point grease. If the clutch drive part was removed, the clutch disc must be centered.
Tighten all mounting bolts and nuts to the specified torque.
Check that the mating surfaces of the exhaust manifold and downpipe are clean, install a new gasket and bolt the downpipe.
Check that all electrical connectors are connected according to the previously applied markings. Remove the plugs from the fuel lines and connect the fuel lines. Connect the accelerator cable and reinstall the air cleaner housing.
Replace coolant hoses if necessary Install clutch cable Check all hoses are connected to the engine, fill with coolant and engine oil.
(The material was copied from an information website: FORDBOOK.RU)