Contents: Removal ↳ Installation ↳
Caution: This chapter describes the removal of the engine together with the gearbox
Removal
On engines with fuel injection, depressurize the fuel system.
Remove the ground cable from the battery. Drain the coolant and engine oil. Install the drain plug on the oil pan. Remove the hood.
Remove the air cleaner housing and engine air intake components. Loosen the clamps and remove the upper hose, heater hose, and radiator hose from the thermostat housing. Remove the coolant hose from the intake manifold and water pump base.
On 1.4 dm³ engines with CFI injection system, disconnect the coolant hose from the pump. On EFI and SEFI injection system engines, disconnect the heater hose from the Y-shaped connector (see Fig. 4D.9, 4D.10).
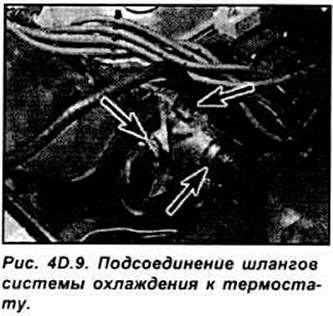
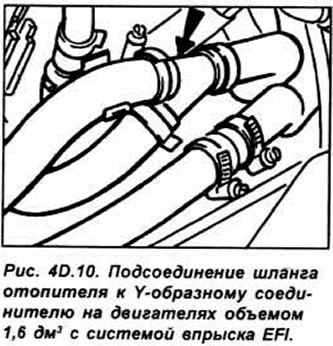
Disconnect the accelerator cable from the throttle. On carburetor engines, remove the fuel feed hose from the fuel pump and the return hose from the carburetor.
On engines with CFI injection system, remove the fuel supply hose from the injector and the return fuel hose by pressing the coupling and releasing the hose from the connection. On engines with EFI and SEFI injection system, unscrew the nut and separate the fuel supply hose from the fuel line and disconnect the return pipe from the pressure regulator. Seal the removed lines with plugs.
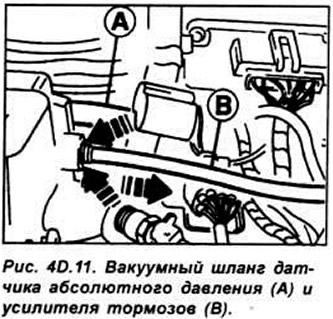
Remove the brake booster hose from the intake manifold by pressing the clamping ring and simultaneously pulling the hose out.
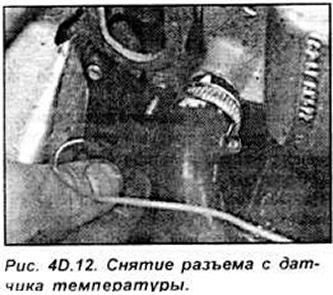
On engines with CFI and EFI injection systems, disconnect the vacuum hose from the absolute pressure sensor and the hose connecting the carbon canister and the fuel injection system. Disconnect the following electrical connectors (see Fig. 4D.12-4D.14):
- coolant temperature sensor;
- oil pressure sensor;
- ignition coils;
- engine temperature sensor;
- radiator fan thermal switch;
- carburetor;
- grounding the radio receiver;
- reverse light switch from gearbox;
- crankshaft angle sensor;
- ground busbar connecting the gearbox and the engine;
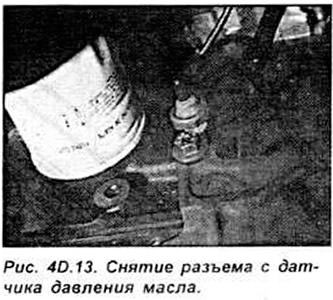
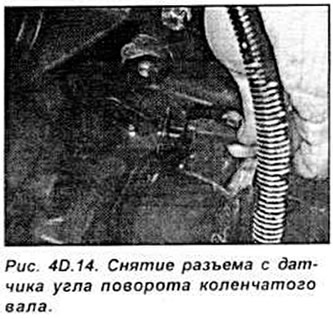
On engines with a fuel injection system, additionally remove the connectors:
- incoming air temperature sensor;
- vehicle speed sensor;
- throttle control motor (CFI models);
- throttle position sensor;
- injector harness;
- idle speed control valve;
Remove the bolts and separate the electrical wiring and coolant hoses from above the transmission.
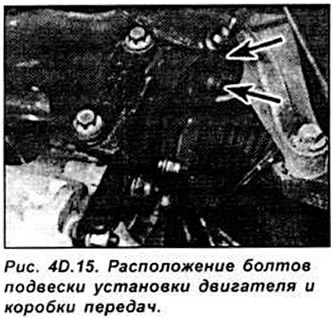
Disconnect the speedometer drive cable from the transmission. On models with a manual transmission, remove the clutch cable from the release lever on the transmission. Unscrew the two bolts and separate the engine and transmission mount (see Fig. 4D.15).
Raise the front of the vehicle and support it on stands or lift the vehicle to ensure there is enough space underneath the vehicle to remove the engine and transmission. Remove the connector from the oxygen sensor.
Remove the three mounting bolts and disconnect the exhaust manifold header. Remove the gasket. Disconnect the exhaust manifold header from the rest of the exhaust system and remove it from underneath the vehicle.
Remove the 4 nuts and two bolts securing the front of the heat shield to the bottom and remove the heat shield.
Remove the wires from the starter and generator. Unscrew and remove the starter.
Models with manual transmission
On 4-speed gearboxes, engage 2nd gear; on 5-speed gearboxes, engage 4th gear. Apply alignment marks to the gear shift rod and gear shift shaft. Unscrew the clamp bolt and remove the gear shift rod from the shaft (see Fig. 4D.16).
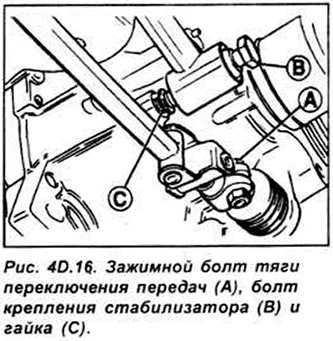
Unscrew the bolt and disconnect the stabilizer from the gearbox.
Models with automatic transmission
Disconnect the connector from the starter lock sensor (on the gearbox housing).
Disconnect the accelerator cable from the carburetor or injector. Unscrew the two nuts from the gear selector cable hanger that connect it to the lever on the shaft.
Unscrew the union nuts and disconnect the oil supply from the oil cooler and the return pipes from the gearbox.
All models
Loosen the lock nut and remove the TORX bolt securing the lower control arm.
Remove the right steering rod joint. Insert a suitable lever between the gearbox housing and the drive shaft joint and, pressing the lever, remove the drive shaft from the gearbox. At the same time, pull the wheel away from the car. After removing the drive shaft from the gearbox, hang the drive shaft from the steering gear using a wire.
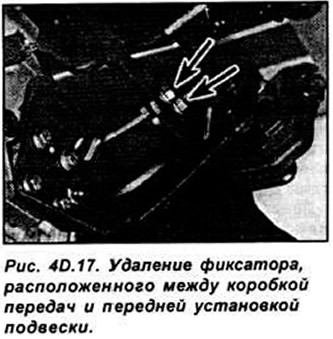
Insert a suitable plug into the differential in place of the removed drive shaft to hold the half-axle gear in place. Remove the left drive shaft from the gearbox in the same manner. Unscrew the bolts and remove the retainer located between the gearbox and the front suspension mount (see Fig. 40.17).
Attach the engine with lifting cables. Remove the two bolts securing the front of the gearbox. Remove the three bolts and the additional drive belt cover from under the crankshaft pulley. Remove the two nuts and the right engine mount. On EFI engines, remove the MAP sensor (see Fig. 40.18). Check that the engine and gearbox are completely separated.

Lower the engine together with the gearbox down the engine compartment. Place a trolley under the engine, on which you can then remove the engine from under the car. When lowering and moving the engine, be careful not to damage the engine components. Disconnect the gearbox from the engine.
Check the engine mount suspension and replace if necessary.
Installation
Installation is carried out in the reverse order of removal, taking into account the following points:
- install new snap rings into the grooves of the right and left ends of the drive shafts. Lubricate the shaft splines with engine oil;
- when connecting the exhaust pipe to the exhaust manifold, install a new gasket;
- make sure that the heat shields are installed correctly and securely;
- check that all ground rails are clean and securely fastened.
- tighten all nuts and bolts to the specified torque;
- install a new oil filter and fill the engine and gearbox with engine oil;
- fill the cooling system with coolant;
For more information, please visit the website FORDBOOK.ru