Contents: Removal ↳ Installation ↳
Removal
1. Disconnect the wire from the negative terminal of the battery.
2. Remove the hood and the inner liner of the left front fender (chapter 11).
3. Remove the air cleaner assembly.
4. On ATX transmissions (four-cylinder models): Remove the inspection window plug and rotate the crankshaft until the mark on the flywheel aligns with the adjustment pointer. Mark the crankshaft at the TDC mark position of the first cylinder and then turn the crankshaft pulley mark to the BDC position of the first cylinder.
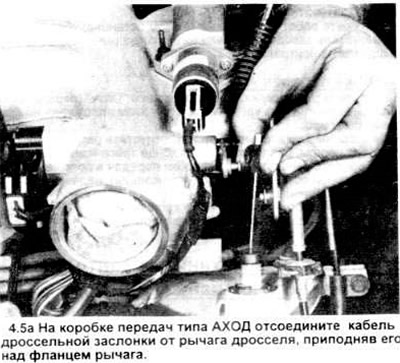
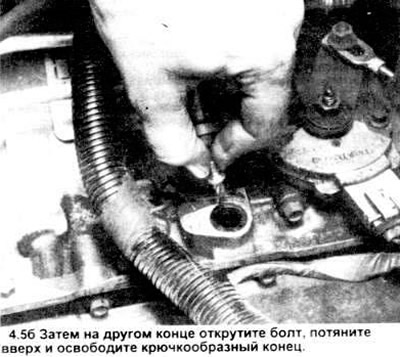
5. Disconnect the throttle valve cable (see pictures).
6. Drain the fluid from the gearbox (chapter 1).
7. Remove the starter motor (chapter 5).
8. Remove the transformer boot.
9. Mark one of the transformer studs and the transformer itself with white paint to ensure accurate installation later (see picture).

10. Block the engine with a large socket head and a handle on the front crankshaft bolt so that it does not turn, then unscrew the four fastening nuts of the transformer. As you remove each nut, turn the engine further with the head and handle.
11. Remove the engine (chapter 2).
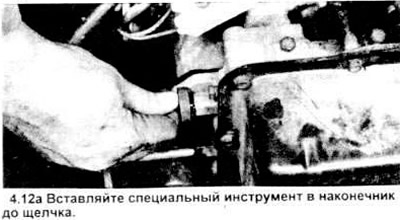
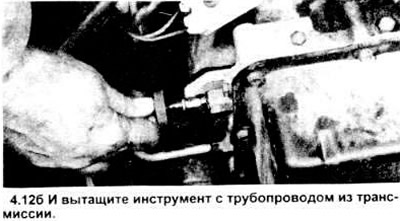
12. Disconnect the transmission coolant lines. On these models, a special tool is required to disconnect the lines, do not try to unscrew the ends. Insert the tool into the end until you hear a click (indicating that the internal retainer has engaged), then pull the tool and end out (see pictures).
13. Disconnect the speedometer cable.
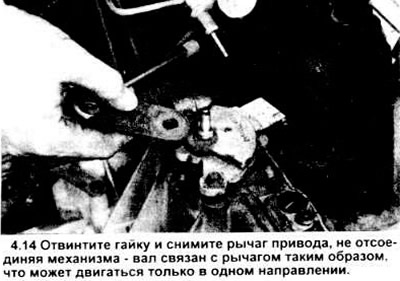
14. Disconnect the drive mechanism (see figure).
15. Remove the gearbox electrical connectors.
16. Disconnect the axial drives.
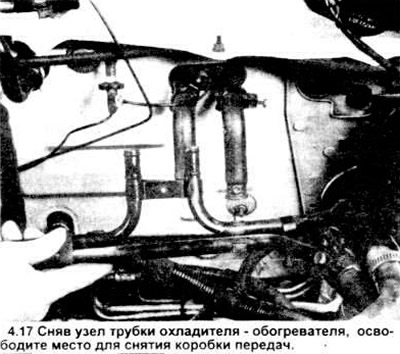
17. Remove the cooler-heater tube assembly (see figure).
18. Secure the lift chain to the box.
19. Unscrew the gearbox mounting nuts.
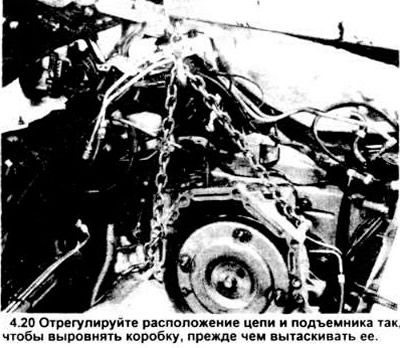
20. Connect a hoist to the chain and remove the box from the engine compartment (see figure).
Installation
21. Lower the box into place onto the support pins.
22. Install the transmission support nuts. Tighten the nuts to the specified torque.
23. Connect the axial drives.
24. Install the cooler-heater tube assembly.
25. Insert the electrical connector of the box.
26. Connect the speedometer cable.
28. Using the special tool, insert the cooling tubes into the connectors (tips) until they snap into place.
29. Install the engine (chapter 2C). When installing an engine with an ATX gearbox, the mark you made in paragraph 4 on the crankshaft pulley should be as close to the 6 o'clock position as possible.
30. On all models, the white paint marks on the transformer and stud (paragraph 9) must match. Tighten the transformer nuts. Tighten the nuts to the required tightening torque.
31. Install the transformer boot.
32. Install the starter motor.
33. Connect the throttle valve mechanism.
34. Install the air cleaner assembly.
35. Install the front wing liner.
36. Hang the hood.
37. Fill the gearbox with specialized fluid (chapter 1).
38. Adjust the throttle valve mechanism.