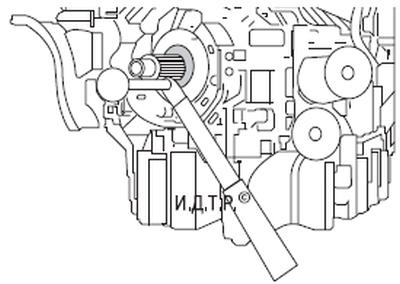
Pic. 5.44. Removing the front crankshaft seal.
You will need: all the tools needed to remove the timing belt, as well as tools for removing and installing crankshaft oil seals.
Replace a forward epiploon of a cranked shaft as follows.
1. Disconnect a wire from the minus plug of the storage battery.
2. Remove the timing belt (see Duratec-v15 2.5L Timing Belt Replacement).
3. Remove the crankshaft sprocket.
4. Remove the oil seal from the body using a special puller (pic. 5.44) crankshaft seals or a flat blade screwdriver.
5. Lubricate the working lip of the new oil seal with engine oil, install the oil seal in the body, orienting its working edge inside the engine, and press it in until it stops with a mandrel. As a mandrel, you can use a suitable size head from the tool kit or an old oil seal.
6. Establish all removed details and knots in an order, the return to removal.
NOTE: The crankshaft pulley can only be splined in one position.
7. Adjust the tension of the timing belt (see Duratec-v15 2.5L Timing Belt Replacement).
Replace a back epiploon of a cranked shaft as follows.
1. Remove the gearbox (see Removing and installing transmission).
2. Remove the clutch (see Clutch removal and installation).
3. Remove the flywheel by unscrewing the ten bolts of its fastening (see Removal, troubleshooting and installation of the flywheel).
4. Inspect the gland. If the tightness of the stuffing box is broken, an oil leak will be visible in its lower part.
5. Remove the oil seal from the body using a special puller (see figure 5.44) crankshaft seals or by prying it with a screwdriver.
6. Lubricate the working lip of the new oil seal with engine oil and install it with a mandrel. As a mandrel, you can use a suitable size head from the tool kit.
7. Establish all removed details and knots in an order, the return to removal.
Visitor comments