Replace the front crankshaft oil seal as follows.
1. Disconnect the wire from the negative terminal of the battery.
2. Remove the timing belt (see Replacing the timing belt of the 2.2L duratorq-tdci engine).
3. Remove the crankshaft timing pulley.
4. Using a screwdriver, remove the seal.
5. Lubricate the working edge of the new seal with engine oil, install the seal into the oil pump housing, orienting its working edge inside the engine, and press it in until it stops using a mandrel. You can use a suitable-sized head from the tool kit or an old seal as a mandrel.
6. Install all removed parts and assemblies of the timing mechanism in the reverse order of removal.
7. Adjust the timing belt tension (see Replacing the timing belt of the 2.2L duratorq-tdci engine).
Replace the rear crankshaft oil seal as follows.
1. Remove the gearbox (see Removing and installing the gearbox).
2. Remove the clutch (see Clutch Removal and Installation0).
3. Remove the flywheel (see Removal, defect detection and installation of the flywheel).
4. Inspect the seal. If the seal is not sealed, oil will be visible at the bottom.
5. Remove the oil seal from the housing using a special crankshaft seal remover or a flat-blade screwdriver.
6. Lubricate the working lip of the new oil seal with engine oil and install it using the crankshaft rear seal installation tool (Fig. 5.53).
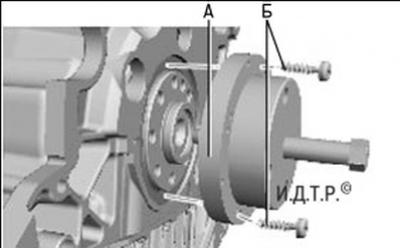
Fig. 5.53. Installing the rear crankshaft oil seal: A – device for installing the rear crankshaft seal; B – screws for fastening the device.
NOTE: If you do not have a special tool, press the seal in with a hammer through a suitable mandrel (an old seal can be used as a mandrel).
7. Install all removed parts in the reverse order of removal.