Checking and replacing spark plugs
1. Correct functioning of the spark plugs is vital to the engine performance. The spark plugs installed must be suitable for the engine type (see Technical Data).
2. The type of spark plugs recommended for use in your vehicle's engine are listed in the Owner's Manual supplied with your vehicle when you purchased it.
3. If the correct type of spark plugs are used and the engine is in good condition, spark plug maintenance between scheduled replacements is not necessary. Cleaning of spark plugs is rarely necessary. It should be done with a special tool to avoid damaging the ends of the electrodes.
4. To remove and install spark plugs, you need a special socket wrench with an extension. This wrench has a rubber sleeve inside that separates the porcelain insulator of the spark plug from the inner surface of the wrench and protects the spark plug from damage, and also keeps the spark plug from falling out when installing and removing it. To check and adjust the gaps in the spark plugs, you will also need a set of feeler gauges, and (ideally) a torque wrench to tighten the spark plug to the required torque.
5. Open the hood. Access to the spark plugs from above is easy. Pay attention to the placement of the spark plug high-voltage wires and their fixation with clamps along the groove located in the cylinder head cover. To avoid mixing up the wires, work with the spark plugs one by one.
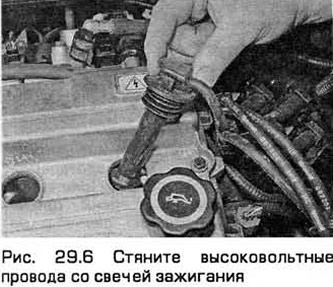
6. If the spark plug high-voltage wires are not marked, mark them with numbers from 1 to 4 in accordance with the cylinder number (the cylinder numbering starts from the camshaft drive belt). Pull the wires off the spark plugs by the rubber caps sealing the holes in the cylinder head (see Fig. 29.6). Pull by the rubber cap, not by the wire, so as not to tear it off the spark plug.
7. Before removing the spark plugs, it is recommended to remove water and dirt from their sockets using a cloth, clean brush, compressed air or vacuum cleaner.
Caution! Wear safety glasses when working with compressed air!
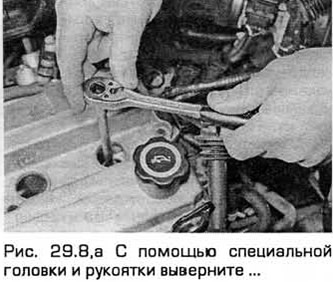
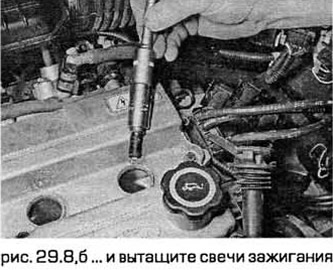
8. Unscrew the spark plugs with a special key (see Fig. 29.8. a, b). Keep the head aligned with the spark plug - if it is skewed, the porcelain insulator may be damaged. Remove the spark plug from the socket.
9. If the spark plug is difficult to remove, inspect the cylinder head threads and conical sealing surface for wear, corrosion, and damage. If such signs are found, consult with your dealer about repair options.
10. After removing the spark plugs, inspect them according to the recommendations below. Inspecting the spark plugs provides information about the condition of the engine.
- a) If the tip of the spark plug insulator is clean and white, this indicates that the engine is running on a lean mixture.
- b) If the tip of the electrode and the toe of the insulator are covered with a black coating, this indicates an excessively rich mixture.
- c) A black and oily spark plug indicates that the mixture is too rich or that the engine is excessively worn.
- d) If the insulator toe is coated with a yellowish-brown or greyish-brown coating, this indicates a normal mixture and, most likely, a good engine condition.
12. The spark gap size is very important. If it deviates from the nominal value, the efficiency of the spark decreases. The adjustment must be carried out in accordance with the "Technical data". Keep in mind that new spark plugs do not necessarily have the correct gap, so they also need to be checked.
13. A special device for adjusting the spark gap can be purchased at auto parts stores (see Fig. 29.13).
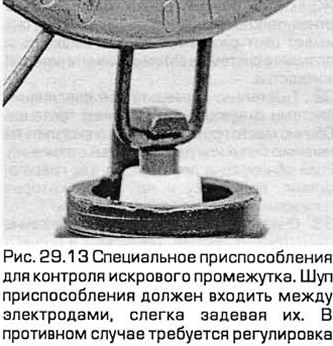
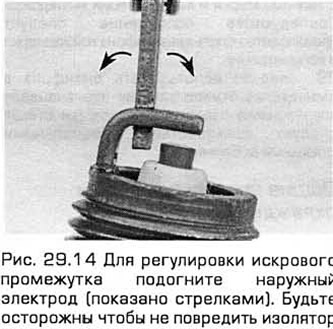
14. To adjust the spark gap size, measure it with a feeler gauge, and then bend the outer electrode until the specified value is reached. The inner electrode must not be bent due to possible damage to the insulator and failure of the spark plug. The spark gap is normal when a feeler gauge of the specified size fits tightly into it. If the outer electrode is offset from the axis of the inner electrode, it must be carefully bent until it aligns with this axis (see Fig. 29.14).
15. Before installing the spark plugs, check that their outer and threaded surfaces are clean, and that the threaded tips on the outer end of each spark plug are tight. Brown spots on the insulator just above the metal body of the spark plug are completely acceptable. They do not indicate a leak between the body and the insulator.
16. Before installing the spark plug, make sure that the threads and sealing surface in the cylinder head are perfectly clean. Wrap a brush in a clean rag and wipe the sealing surface. Apply copper-based grease or anti-seize compound to the threads of each spark plug. Screw the spark plugs in by hand, if possible. Screw the spark plugs in straight so as not to damage the threads in the cylinder head - remember that the cylinder head is made of aluminum alloy and it is very easy to damage the threads in it.
17. Tighten the spark plugs to the specified torque. If you do not have a torque wrench, tighten the spark plugs 1/16 of a turn, but no more. Do not overtighten the spark plugs, otherwise the spark plugs or cylinder head may be damaged when loosening them.
18. Attach the high-voltage wires into place, rocking the sealing caps so that they sit on the ends of the spark plugs and enter the cylinder head.
Checking the spark plug high voltage wires
19. When replacing spark plugs, always check the high-voltage wires. First, inspect the wires when the engine is running. In a dark room (but always with good ventilation), observe the wires. Do not touch moving parts. If the wire is faulty, sparking will be visible on it.
20. Check the wires one by one so as not to disturb the order of the flashes in the cylinders. The original wires are marked according to the cylinder numbers. If there is no such marking or it is worn out and difficult to see, apply it to the wires yourself. To do this, take a piece of adhesive tape, write the number on it and wrap it around the wire. The numbers on the wires should correspond to the cylinder numbers (the cylinder numbering starts from the camshaft drive belt). Pull the wires off the spark plugs.
21. Inspect the inside of the rubber boot and the tip of the wire for corrosion, which usually looks like a white, loose coating. If there is corrosion, clean it with a brush. If the corrosion cannot be removed or if the tip makes poor contact with the spark plug, replace the wire together with the tip. Then place the tip on the spark plug and check the reliability of their contact. If the contact is loose, remove the tip again and carefully bend the metal petals inside the boot until the contact becomes tight.
22. Wipe the entire wire with a clean cloth to remove grease and dirt. While the wire is clean, inspect it for burns, cracks, and other damage. Do not bend or stretch the wire excessively - this may cause the internal conductor to break.
23. Disconnect the wire from the ignition coil by squeezing the clamps of its tip and pulling it off the coil terminal. Check the connection for corrosion and for tight contact in the same way as for the spark plug tip.
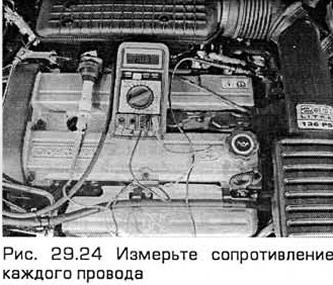
24 If you have an ohmmeter, measure the resistance of the wire by connecting the device to its ends (see Fig. 29.24). If the resistance of any wire exceeds 30,000 ohms per meter of length, replace the entire set of wires.
25. Connect the wire to the ignition coil according to the number marked on the terminal.
26. Check the remaining high-voltage wires in the same way. After checking, connect the wire to the coil and to the spark plug, paying special attention to the reliability of the connections. If significant corrosion of the contacts, burns, cracks or other defects are found in at least one wire, replace the entire harness of high-voltage wires together with the tips and covers. When replacing the harness, disconnect the old wires and connect the new ones one by one.