Every 4 years (regardless of mileage).
Checking and replacing spark plugs
1. Correct functioning of the spark plugs is vital to the engine performance. The spark plugs installed must be suitable for the engine type (see Technical Data).
2. The type of spark plugs recommended for use in your vehicle's engine are listed in the Owner's Manual supplied with your vehicle when you purchased it.
3. If the correct type of spark plugs are used and the engine is in good condition, spark plug maintenance between scheduled replacements is not necessary. Cleaning of spark plugs is rarely necessary. It should be done with a special tool to avoid damaging the ends of the electrodes.
4. To remove and install spark plugs, you need a special socket wrench with an extension. This wrench has a rubber sleeve inside that separates the porcelain insulator of the spark plug from the inner surface of the wrench and protects the spark plug from damage, and also keeps the spark plug from falling out when installing and removing it. To check and adjust the gaps on the 8 spark plugs, you will also need a set of feeler gauges, as well as (ideally) a torque wrench to tighten the spark plug to the required torque.
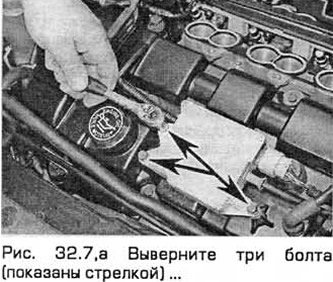
5. Remove the water pump belt cover from the top and front of the engine. The cover is secured with three bolts.
6. Remove the upper section of the intake manifold (Chapter 2B).
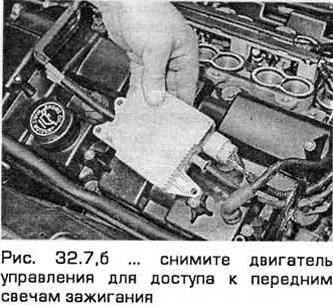
7. To access the spark plugs on the front cylinder block, unscrew the bolts from the intake manifold control motor. Move this motor to the side. Its wiring does not need to be disconnected (see Fig. 32.7, a, b).
8. The spark plugs are numbered: 1 to 3 on the rear block and 4 to 6 on the front block. The numbering starts from the camshaft drive chain.
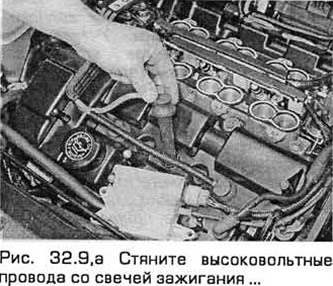
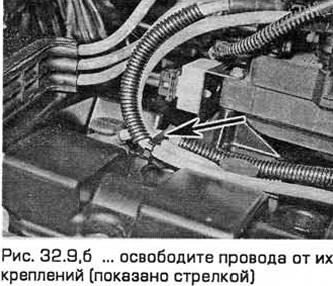
9. If the high-voltage wires are not marked, mark them according to the cylinder numbers. Pull the wires off the spark plugs (pull only by the rubber boot, not by the wire). If necessary, release the wires from the fasteners (see Fig. 32.9, a, b).
10. Before removing the spark plugs, it is recommended to remove water and dirt from their sockets using a cloth, clean brush, compressed air or vacuum cleaner.
Caution! Wear safety glasses when working with compressed air!
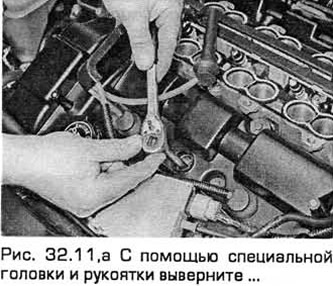
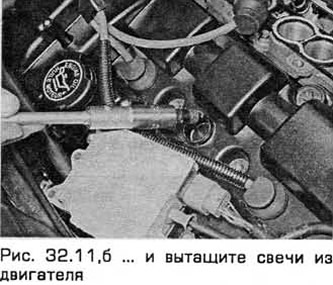
11. Unscrew the spark plugs with a special key (see Fig. 32.11, a, b). Keep the head aligned with the spark plug - if it is skewed, the porcelain insulator may be damaged. Remove the spark plug from the socket.
12. The remaining operations are carried out in the same way as for the 4-cylinder engine (paragraph 29). Finally, install the removed components.
Checking the spark plug high voltage wires
13. See item 19 of paragraph 29. Note that the wires are numbered as indicated above in item 8.
Content was created using data from this website: www.fordbook.ru