Every 96,000 km.
Warning: Gasoline is highly flammable. Use extreme caution when working around the fuel system. Work in a well-ventilated area - open all windows and doors to create an exhaust hood. Do not smoke or allow naked flames or unshielded incandescent lamps near the work area. Please note that fuel used in household appliances (heaters, boilers, dehumidifiers) is also dangerous. Keep this in mind when working near such equipment. Always have a fire extinguisher suitable for extinguishing burning petroleum products near the work area, and read the instructions for its use before starting work. Protect your eyes (goggles, shield, etc.) when working around the fuel system, and if fuel gets on your skin, wash it off immediately with soap and water. Please note that fuel vapors are just as dangerous as liquid fuel.
1. The fuel filter is located in the front right corner of the fuel tank just before the jack hole on the right rear. The filter is a very important component as it prevents foreign particles and dirt from entering the fuel system. Therefore, it should be replaced according to the maintenance schedule or if you suspect that it is clogged.
2. Before servicing the filter, it is recommended to wash the area around it to make your work easier and to prevent dirt from entering the fuel system.
3. The fuel system remains under excess pressure for a long time after the engine has stopped, so before disconnecting any pipeline, it is necessary to reduce the pressure in the system to atmospheric pressure as follows.
4. With the ignition off, find fuse #14 (fuel pump) in the fuse box located in the engine compartment and remove it.
5. Start the engine. If it does not start, crank it with the starter for a few seconds.
6. If the engine starts, let it idle until it stalls. Try starting the engine again to make sure all pressure is released from the fuel system. Turn off the ignition.
Caution! Remember that the above procedure only relieves the pressure in the fuel system, while fuel remains in it. Therefore, take appropriate precautions when disconnecting fuel lines.
7. Disconnect the negative battery cable (refer to the information given in paragraph 1 of Chapter 5B).
8. Raise the right rear edge of the vehicle and support it.
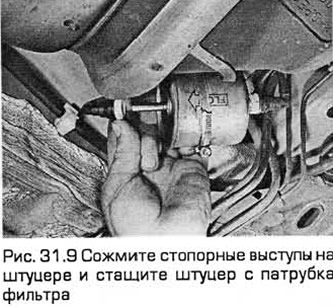
9. Prepare rags to absorb spilled fuel and disconnect the inlet and outlet pipes from the filter. To do this, press the tabs on the sides of the connection and carefully pull the pipe off the filter pipe (see Fig. 31.9). If the connections are color-coded, then it is impossible to mix up the inlet and outlet pipes. If both connections are the same color, you will have to remember their location for subsequent correct installation.
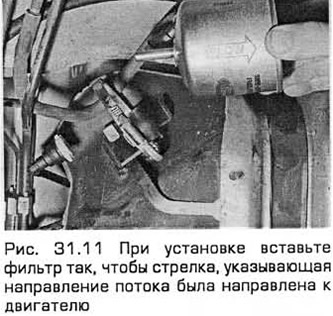
10. Note the direction of the arrow and/or other marking on the filter indicating the direction of fuel flow, loosen the filter clamp screw and pull out the filter. Note that the filter contains fuel. Be careful not to spill it and cause a fire hazard.
11. When installing, insert the filter into the clamp, observing the correct direction of the arrow (see Fig. 31.11).
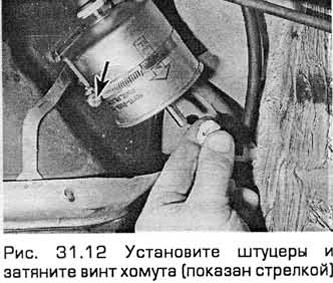
12. Place each fitting on the corresponding pipe, pressing it so that the clamps click into the groove (see Fig. 31.12). Carefully tighten the clamp screw so that the filter cannot move. But do not overtighten it so as not to damage the filter housing.
13. Install the fuel pump fuse and connect the negative battery cable. Then cycle the ignition on and off five times to pressurize the system. Check for leaks around the filter fittings, then lower the vehicle to the ground and start the engine.
For more information, please visit the website fordbook