- hot air hot air gun
- Straight glass blade for cutting glued glass
- Adhesive kit for direct glazing
- Direct Glazing Furnace
- Glass suction cups
Withdrawal
All cars
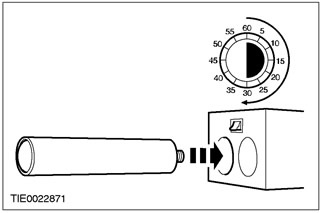
1. Remove the cap from the polyurethane tube (PU) glue and heat the PU glue for at least 30 minutes.
2. Raise the hood.
3. Disconnect a wire of weight from the accumulator. See Section 414-01 for more information.
4.
NOTE: Make sure the windshield wiper motor is in the off position.
Remove the windshield wiper arms.
Vehicles manufactured before 01/1999
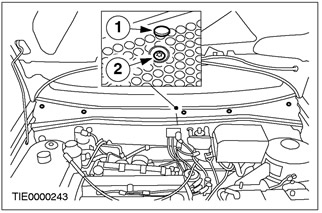
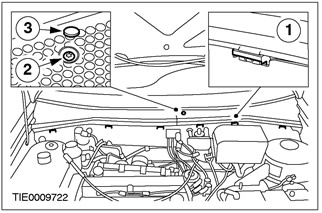
5. Remove the hood grille panels.
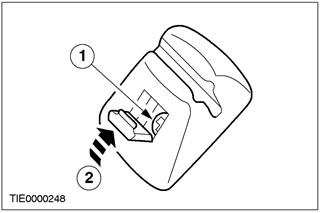
- 1. Remove the screw covers.
- 2. Turn out screws of fastening.
Vehicles manufactured since 01/1999
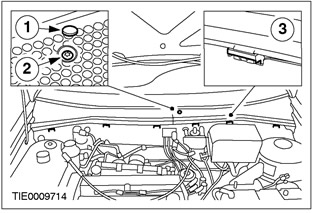
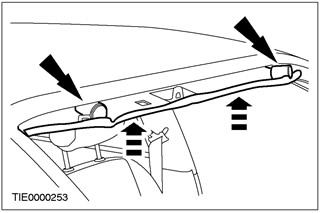
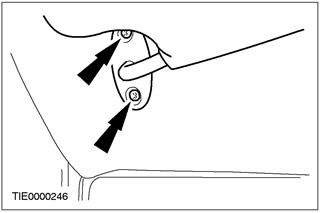
6. Remove the grille panel.
- 1. Remove the screw cover.
- 2. Remove the fastening screw.
- 3. Release the clamps.
Vehicles equipped with a heated windshield
7. Disconnect electric sockets of heating of a windshield.
All cars
8. Lower the hood.
Cars with a cell phone
9. Remove the cell phone antenna. See Section 419-08 for more information.
All cars
10. Remove rack trim panels "A". See Section 501-05 for more information.
Vehicles with a mechanical sunroof.
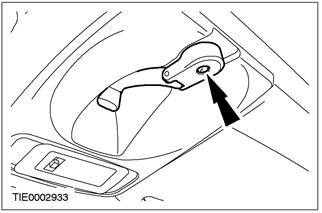
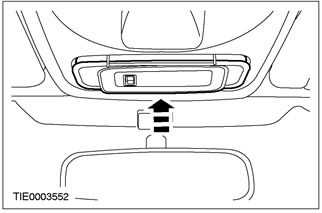
11. Remove the sunroof drive handle.
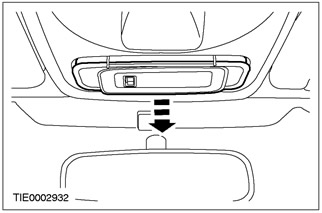
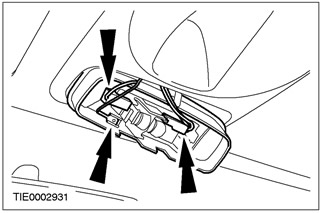
12. Disconnect a lamp of illumination of salon from the overhead console.
13. Disconnect electric sockets and remove a lamp of illumination of salon.
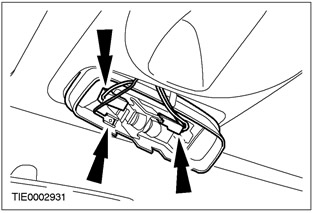
14. Remove the overhead console.

Vehicles with electric sliding sunroof
15. Remove the overhead console. See Section 501-12 for more information.
Vehicles without a sliding sunroof
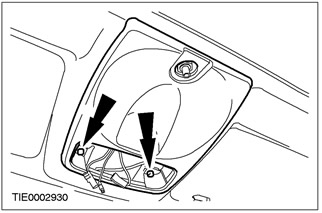
16. Disconnect a lamp of illumination of salon from a covering of a ceiling.
17. Disconnect electric sockets and remove a lamp of illumination of salon.

All cars
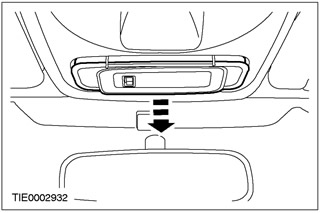
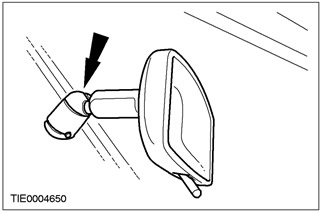
18. Remove a rear-view mirror of salon.

19. Remove sun visors.

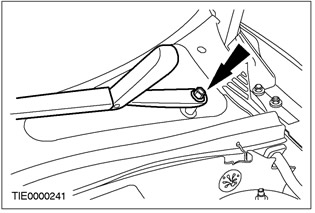
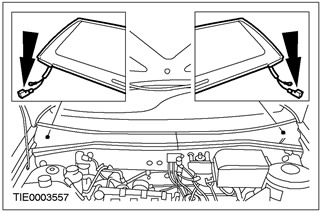
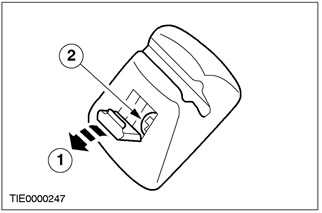
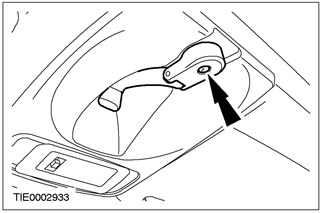
20. Remove clips of fastening of antisolar peaks.
- 1. Open the lid.
- 2. Remove the screw.
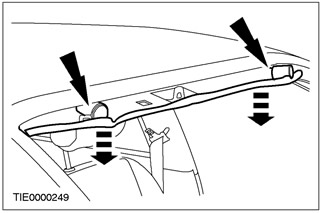
21. Detach the leading edge of the headlining and place two blocks of suitable material between the headlining and roof panel as spacers.
22.
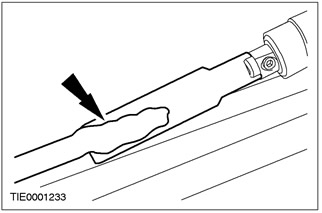
WARNING: Be sure to wear gloves and goggles when working with glass cutting tools, as cutting may cause splinters. Wear earmuffs while cutting. Failure to follow these instructions may result in personal injury.
CAUTION: Be sure to change blade when changing depth of cut to avoid damage to body and trim panels.
NOTE: Some resistance may be felt when cutting through the glass guide studs at the bottom corners of the windshield.
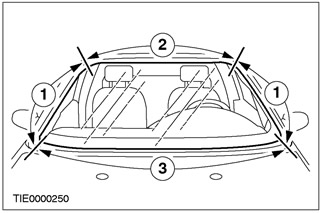
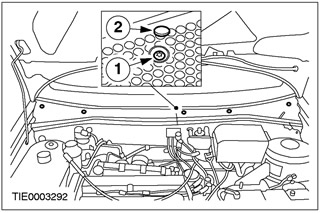
Cut through the PU adhesive with a suitable straight glazing knife and, with the help of another mechanic, use glass suction cups to remove the windshield.
- Cut the PU adhesive from inside the car to the given maximum depth.
- 1. 23 mm.
- 2. 75 mm.
- 3. 160 mm.
23. Remove the windshield seal.
Installation
All cars
1. Carefully remove the rest of the guide pins from the windshield flange.
2.
CAUTION: Do not touch the surface of the adhesive as this will prevent re-adhesion.
Carefully trim the remaining PU adhesive from the windshield flange so that approximately 1 mm of trimmed PU adhesive remains on the flange.
3. Check the windshield flange for sheet metal damage, rust, or foreign objects that may or may not have caused glass damage.
4.
CAUTION: To ensure that the PU adhesive cures, it is essential that all surfaces to be bonded be free of moisture.
Using a hot air blower, direct the warm air (25°C) on the windshield flange and on the glass bonding line to remove all traces of moisture.
5. Prepare the glass, windshield flange and trimmed PU adhesive according to the instructions included with the PU adhesive kit.
6.
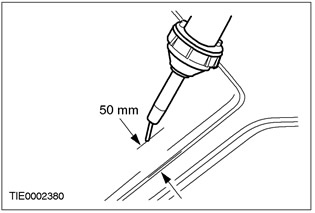
NOTE: Discard the first 100mm of PU adhesive as this adhesive may have a shorter working time.
NOTE: An overlap of 20 mm must be made at any point where the continuous strip is interrupted to prevent water leakage.
Apply PU adhesive in a continuous strip 8 to 10 mm high on the windshield flange along the bonding line.
7. Install the windshield seal.
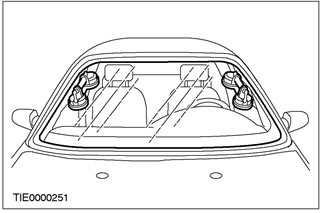
8. With the help of another mechanic, use the glass suction cups to install the windshield.
9.
CAUTION: While the PU adhesive is curing, the door windows must be left open to prevent pressure from building up when opening and closing the doors.
Using a suitable film, fix the windshield in the desired position until the PU adhesive has cured.
10. If the ambient temperature drops below 10°C, use a hot air blower to blow hot air continuously (25°C) within 15 minutes (inside or outside the car).
11. Attach headlining to roof panel. Remove spacers.
12. Establish clips of fastening of antisolar peaks.
- 1. Tighten the screws.
- 2. Close the covers.
13. Install sun visors.
14. Establish a rear-view mirror of salon.
Vehicles without a sliding sunroof
15. Dock electrical sockets of a lamp of illumination of salon.
16. Establish a lamp of illumination of salon.
Vehicles with electric sliding sunroof
17. Install the overhead console. See Section 501-12 for more information.
Vehicles with a mechanical sunroof.
18. Install the overhead console.
19. Dock electrical sockets of a lamp of illumination of salon.

20. Install the interior lamp.

21. Install the sunroof handle.
All cars
22. Install the A-pillar trim panels. Refer to Section 501-05 for more information.
Cars with a cell phone
23. Install the cell phone antenna. See Section 419-08 for more information.
All cars
24. Raise the hood.
Vehicles equipped with a heated windshield
25. Dock electrical connectors for heated windshield.

Vehicles manufactured before 01/1999
26. Install the hood grille panels.
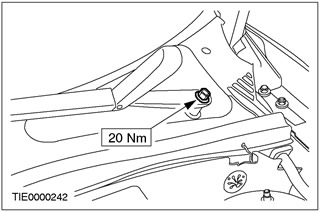
- 1. Install the fixing screws.
- 2. Install the screw covers.
Vehicles manufactured since 01/1999
27. Install the grille panel.
- 1. Install clamps.
- 2. Install the fixing screw.
- 3. Install the screw cover.
All cars
28. Establish levers of cleaners of a windshield.
29. Connect a wire of weight of the accumulator. See Section 414-01 for more information.
30. Lower the hood.
Visitor comments