Contents: Removal ↳ Installation ↳
Removal
1. Remove the rear door trim panel. Refer to Section 501-05 for additional information.
2. Remove the side impact energy absorption panel.
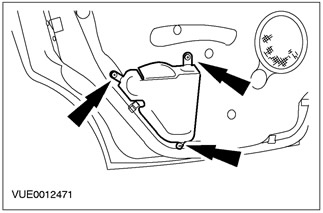
3. Remove the screw (if present).
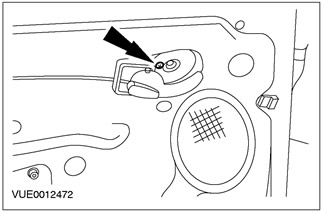
4. Disconnect the door latch remote control cable.
- 1. Disconnect the handle from the door panel.
- 2. Disconnect the door latch remote control cable.
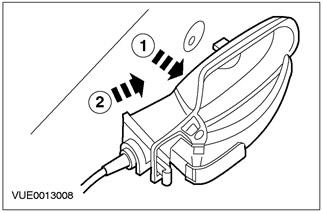
5.
CAUTION: Do not touch the adhesive surface as this will disrupt the re-bonding.
Bend the seal back.
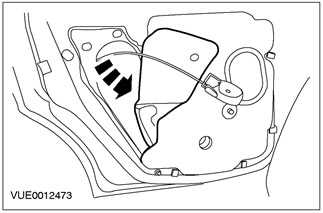
6. Disconnect the electrical connector of the door latch actuator.
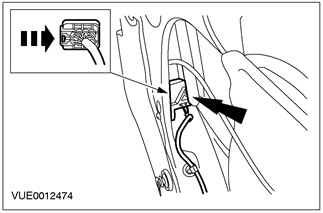
7. Remove the outer door handle hole gasket and remove the window guide groove.
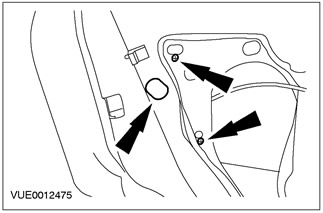
8.
NOTE: The screw must be completely removed from the outside door handle cover, but does not have to be completely removed.
Loosen the screw.
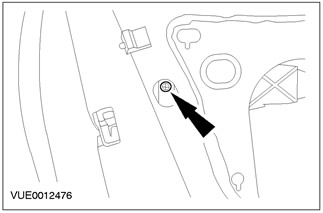
9. Remove the outer door handle cover.
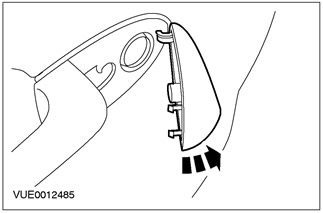
10. Remove the outside door handle.
- 1. Slide and unfasten the outside door handle.
- 2. Remove the outer door handle and gaskets.
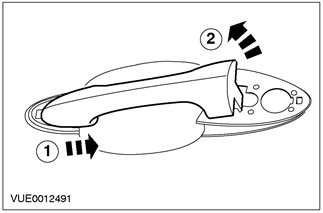
11. Remove the screws.
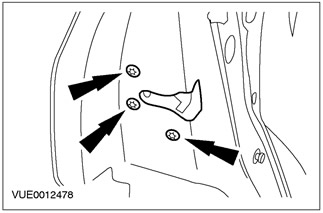
12.
NOTE: The screw needs to be completely removed from the outside door handle, but does not have to be completely removed.
Loosen the screw.
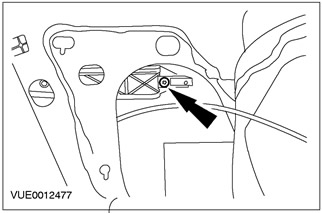
13. Disconnect the door latch.
- 1. Press and release the door latch.
- 2. Remove the door latch.
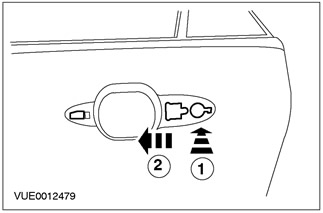
14. Disconnect the door latch from the outer door handle reinforcement plate.
- 1. Press and release the clamp.
- 2. Disconnect the door latch from the outer door handle reinforcement plate.
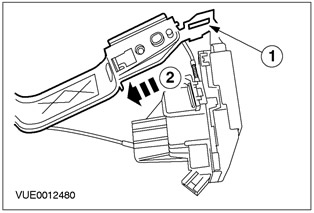
15. Remove the outer door handle reinforcement plate.
- Turn the outer door handle reinforcement plate 90 degrees counterclockwise.
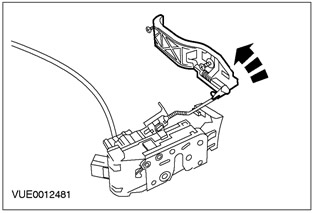
16. Remove the door latch rod.
- Turn the door latch rod 90 degrees counterclockwise.
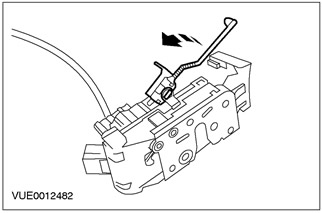
17. Release the door latch rod adjusting clamp.
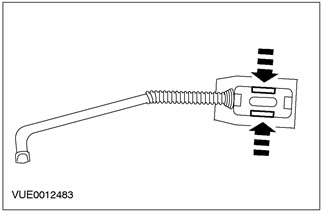
18. Remove the door latch.
- 1. Disconnect the outer door latch remote control cable.
- 2. Turn the door latch remote control cable clockwise.
- 3. Remove the door latch.
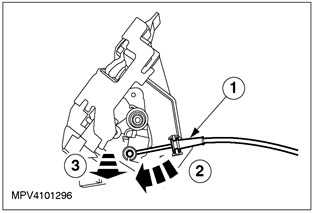
Installation
1. Install the door latch remote control cable to the door latch.
2. Install the door latch rod.
- Rotate the door latch rod 90 degrees clockwise.
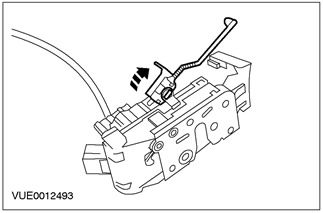
3. Install the outer door handle mounting plate onto the rod.
- Rotate the outside door handle mounting plate 90 degrees clockwise.
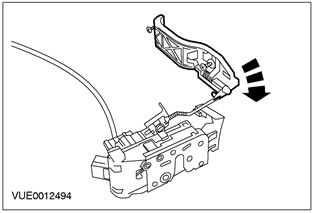
4. Install the outside door handle mounting plate onto the door latch.
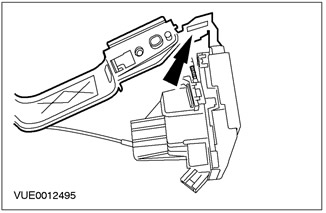
5. Install the door latch.
- 1. Slide the door latch to the installation position.
- 2. Press down on the door latch to engage the retaining tabs.
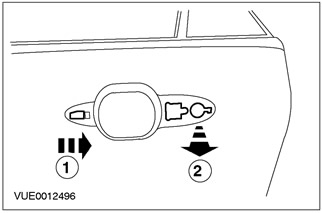
6.
NOTE: Do not tighten the rear door latch screw at this stage.
Install the screws.
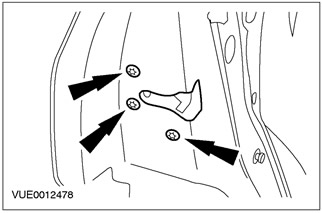
7.
NOTE: Install shims before positioning the outside door handle in the installation position.
Install the outside door handle.
- 1. Position the outside door handle in the installation position.
- 2. Slide the outside door handle until it locks into the installed position.
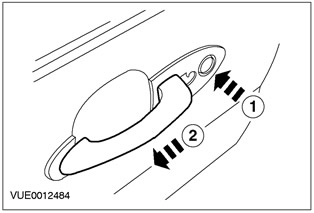
8. Tighten the outside door handle screw.
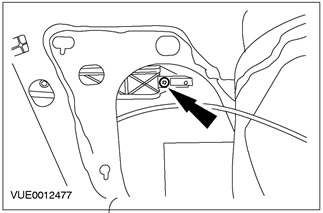
9. Install the outer door handle cover.
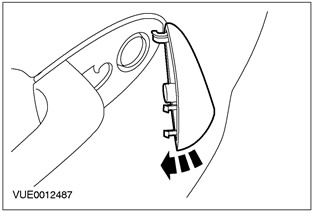
10. Tighten the outside door handle cover screw.
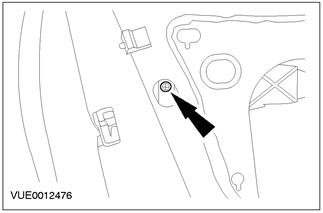
11. Press the door latch rod adjustment clamp to secure the latch position.
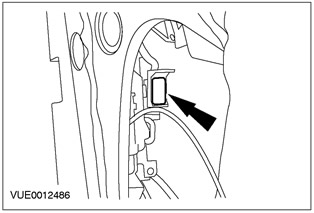
12. Connect the electrical connector of the door latch actuator.
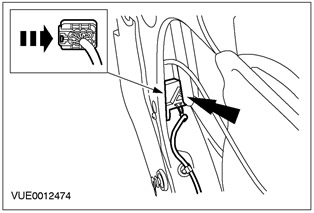
13. Install the window guide groove, install the outer door handle hole gasket.
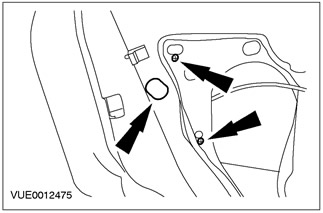
14. Tighten the door latch screws.
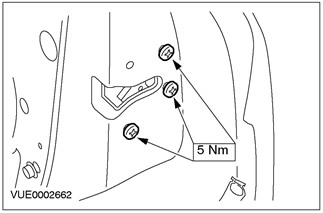
15. Glue the seal.
16. Secure the remote control cable to the door latch.
- 1. Insert the handle into the clamp.
- 2. Secure the remote control cable to the door latch.
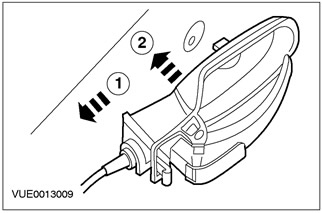
17. Install the screw (if any).
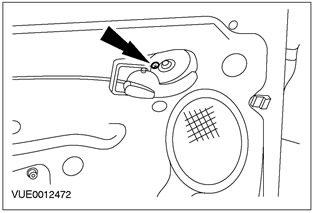
18. Install the side impact energy absorption panel.
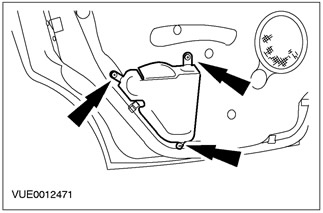
19.
NOTE: When the door latch lever is fully engaged, you should hear two distinct clicks.
Secure the door latch lever into the catches on the door latch.
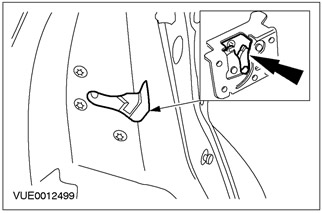
20. Lock and unlock the door latch using the sliding lever on the door latch remote control handle.
21. Open the door latch using the outside door handle. The door latch should open at approximately 75% of the handle's full travel. The outside door handle should have 5-6 mm of travel after the door latch is released.
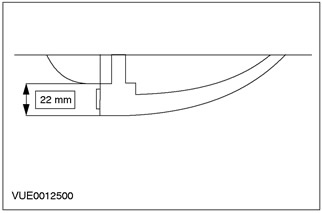
22. If the door latch does not open correctly, remove the door latch and reinstall the door latch rod adjusting clamp.
23. Install the rear door trim panel. Refer to Section 501-05 for additional information.