Contents: Removal ↳ Installation ↳
Fastenings in the front part of the engine compartment
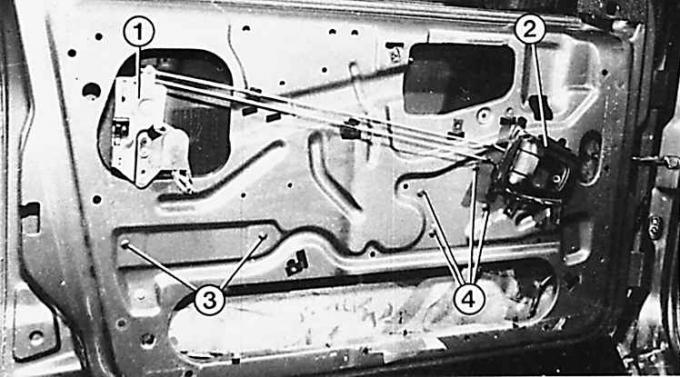
1 – lock, 2 – inner handle, 3 – glass guide fastening rivets, 4 – window lift mechanism fastening
Removal
1. Remove the inner decorative trim of the outside rearview mirror.
2. Remove the glass lifting handle by lifting the plug located on the handle axis and, after unscrewing the screw, pulling the handle towards you.
3. Remove the plastic pocket by unscrewing the fastening screws, detaching the pocket from the back, lifting it up and removing it from the lower fastening elements.
4. Unscrew the two screws of the plastic niche of the door lock handle and remove the niche.
5. Unscrew the screw securing the inner door handle cover, set the handle to the "open" position and remove the cover.
6. Pull the inner trim away from the door frame around the perimeter (for vehicles manufactured before December 1996).
7. Unscrew the mounting screws around the perimeter and remove the trim (for cars manufactured since January 1997).
Installation
1. Before installation, replace damaged clamps and check that the clamps are installed correctly in the holders.
2. Place the upholstery on the door frame so that the clamps are positioned opposite the holes and secure the upholstery with light blows of the palm of the hand.
3. Install the glass lifting handle so that when the glass is fully raised, it is directed at an angle of 45° forward and upward. Perform the remaining actions in the reverse order of removal.