Every 16,000 km or 12 months.
Caution: Air conditioning hose replacement must be performed by professionals who have the proper equipment to safely depressurize the system. Never remove air conditioning components or hoses while the system is under pressure.
General information
1. When exposed to high temperatures in the engine compartment, rubber or plastic hoses of the engine, auxiliary units and the emission control system may deteriorate. Therefore, it is necessary to periodically inspect them for cracks, leaks, hardening of the material, and loosening of clamps.
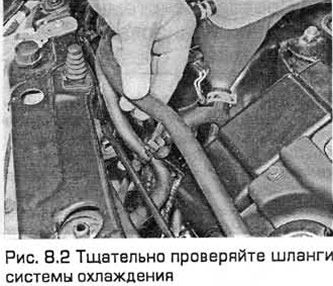
2. Carefully inspect the large radiator hoses at the top and bottom, as well as the small diameter cooling system hoses and metal pipes. Don't forget to check the heater hoses/lines from the engine to the bulkhead, as well as to the engine oil cooler (if equipped). Inspect the entire length of the hoses, and if you find cracks, damage, or decomposition in a hose, replace it. Cracks can be more easily detected by squeezing the hose (see Fig. 8.2). If the system uses antifreeze that is not specified by Ford and therefore requires replacement every two years, it makes sense to replace the hoses at this time, regardless of their condition.
3. Make sure all hose connections are securely tightened. If the large diameter air hoses of the air cleaner are leaking, this will impair engine idling performance (see Fig. 8.3). If the spring clamps used to secure the hoses of this system have become loose, they should be replaced with worm-type clamps to prevent leaks.
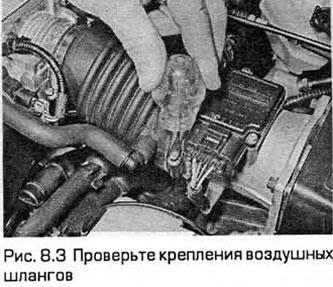
4. Check the clamps securing the hoses and make sure they remain tight and therefore do not leak. Check the hose connections where clamps are not used and make sure the hoses are tight and not hardened in place.
5. Check all fluid reservoirs, filler caps, drain plugs and fittings for leaks of oil, transmission or brake fluid, coolant or power steering fluid.
6. If you park your car in the same place, any leaks will leave traces on the ground. However, you should not pay attention to the damp spots that remain under the car when using the air conditioning system. Place a sheet of thick paper under the car overnight. In case of leaks, stains will remain on it, which will help you determine where and what is leaking. However, do not place flammable material under the catalytic converter.
7. Some leaks only appear when the engine is running. Apply the parking brake, start the engine from a cold state and while the engine is warming up, inspect it from all sides and, most importantly, from below.
8. If you feel any specific smell in the car or around it, this may indicate the presence of a leak.
9. Once a leak has been detected, its source must be immediately determined and the cause eliminated. When an oil leak occurs, the engine usually becomes dirty due to dust sticking to the oil. In this case, the engine must be washed to detect the leak.
Vacuum hoses
10. Usually vacuum hoses, especially in the extraction system, are color-coded (i.e. have different colors or colored engravings on the outer surface). Different systems use vacuum hoses of different thicknesses, having different compression resistance and different heat resistance. When replacing hoses, make sure that the new hoses are made of the same material as the ones being replaced.
11. Often, in order to perform a reliable test of a hose, it must be removed from the vehicle. If you remove more than one hose, make sure that the hoses are marked and where they are installed so that they can be reconnected correctly.
12. When checking vacuum hoses, check all plastic tee fittings. Check these fittings for cracks, and also check the hose installed on the fitting for any deformation that could cause leaks.
13. To locate leaks in vacuum hoses, you can use a small piece of vacuum hose (1/4" ID) as a "stethoscope." Place one end of the hose to your ear and press the other end against the vacuum hoses and connections, listening for the whistling sound that is typical of vacuum hose leaks.
Caution! When listening to vacuum connections with a stethoscope, do not get too carried away and do not get caught under any rotating parts: belts, fan, etc.
Fuel hoses
Warning: When checking or servicing fuel system components, take the following precautions. Work in a well-ventilated area and keep open flames (cigarettes or unshielded light bulbs) away from fuel system components. Wipe up spills immediately and do not leave fuel-soaked rags where they may catch fire.
14. Check all fuel hoses for damage and wear. Pay particular attention to cracks where the hoses bend and near connections, such as where the hoses connect to the fuel filter.
15. When replacing fuel hoses, install high-quality hoses with the designation - "Fluroelastomer" on their surface. Under no circumstances should vacuum hoses, plastic tubes or water hoses be used as fuel lines.
16. Spring clamps are usually used to secure fuel hoses. They often lose their elastic properties over time, and therefore when replacing hoses, such clamps should be replaced with screw clamps.
Metal pipelines
17. Metal pipes are often used as fuel lines between the fuel filter and the engine. Make sure that the pipes are not bent, pinched, or cracked.
18. If you need to replace a metal fuel line, choose only seamless steel pipes. Copper and aluminum pipes are not strong enough to withstand engine vibration.
19. Check the metal brake pipes where they connect to the master cylinder and the ABS hydraulic modulator (if any) for cracks in the pipes and loose connections. If a brake fluid leak is detected, the brake system must be carefully checked.