Contents: Removal ↳ Installation ↳
Removal
1. Remove the steering column flexible coupling (paragraph 29).
2. Apply the handbrake, lift the front end and place it on supports. Remove both front wheels.
3. Working underneath the vehicle, remove the bolts and the front and rear engine mounts from the subframe, marking their positions.
4. To improve access, you can remove the exhaust pipe (chapter 4A).
5. Remove the cotter pins from the ball joint nuts on the tie rod ends. Then unscrew the nuts. Disconnect the rods from the steering knuckles using a ball joint puller. Do not damage the ball joint seals.
6. Remove the fasteners and screws and remove the accessory drive belt cover from the right wheel arch.
7. Place a container under the steering gear. Then unscrew the nuts securing the pressure, drain, and radiator pipes to the steering gear. Mark the pipes. Then unscrew the clamp bolts and disconnect the pipes so that the fluid drains into the container. Plug the holes in the steering gear and pipes to prevent dust or dirt from getting in.
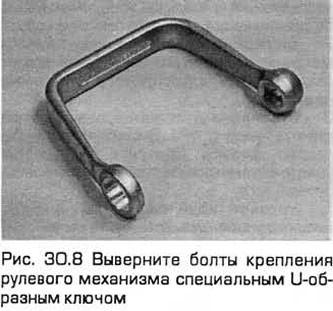
8. Remove the steering gear cover where necessary. Unscrew the steering gear mounting bolts. They are located at the top and access to them is limited. It is best to use a special U-shaped key. But the bolts can also be unscrewed with a regular key (see Fig. 30.8).
9. Pull the steering gear out through the wheel well.
Installation
10. If you are replacing the steering gear, please note that the new unit is supplied with the pipe connection nuts. The new nuts are installed only on the pressure and drain pipes.
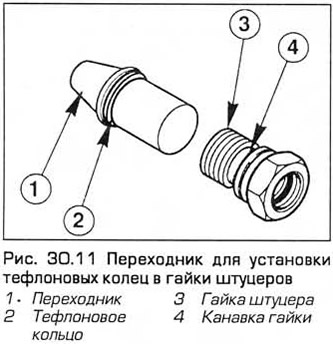
11. If you are reconnecting the same pipes and nuts, you will need to replace the Teflon rings. To do this, place the ring on the adapter (see Fig. 30.11) and then install it in the groove of the nut.
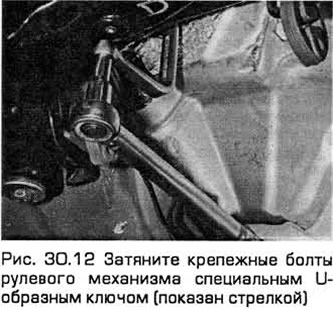
12. Install the steering gear on the subframe and insert the two mounting bolts. Tighten them to the required torque (see Fig. 30.12).
13. Install the pipes and tighten the nuts to the specified torque. Install the clamps and tighten the bolts. Where necessary, install the steering gear cover and tighten the five bolts to the specified torque.
14. Install the front and rear engine mounts on the subframe according to the marks and tighten the bolts to the required torque.
15. Install the exhaust pipe.
16. Install the accessory drive belt cover.
17. Install the ball joints of the tie rod ends onto the steering knuckles. Tighten the nuts to the specified torque. The holes for the cotter pins must be aligned. If necessary, turn the nut slightly, observing the specified tightening torque. Insert new cotter pins and straighten them.
18. Install the front wheels and lower the vehicle to the ground.
19. Install the steering column flexible coupling (paragraph 29).
20. Bleed the hydraulic steering system (paragraph 33).
21. Check and adjust the front wheel alignment angles as soon as possible (paragraph 36).
The text is available on the specified website info portal www.fordbook.ru