


Contents: Removal ↳ Installation ↳
Removal
1. Set the vehicle wheels to the forward driving position.
2. Remove the upper and lower steering column covers, as well as the trim under the front panel at the height of the steering column.
3. Disconnect the electrical wire connectors from the universal switch.
4. Remove the universal switch and the hood release lever.
5. Unscrew the steering column clamp mounting bolt.
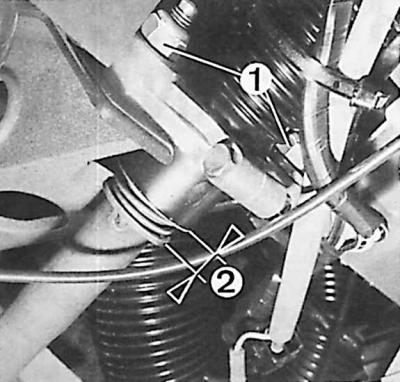
6. Unscrew the nuts (1) securing the steering column clamp to the holder under the front panel.
7. Unscrew the bolt of the clamping collar of the elastic joint flange from the steering gear drive pinion.
8. Remove the steering column assembly.
Installation
1. Check that the wheels are correctly positioned for forward movement.
2. Install the steering column in the appropriate place without tightening its mounting nuts.
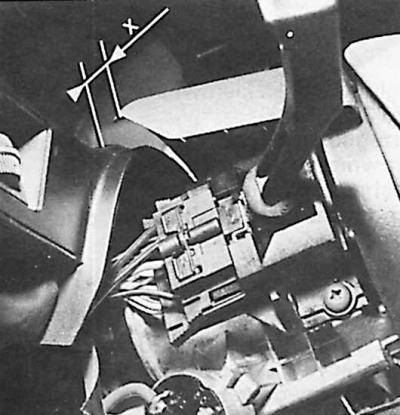
3. Adjust the position of the steering column relative to the front panel, maintaining a distance of X = 5 mm between the front panel and the upper casing of the steering column.
4. Remove the upper steering column cover.
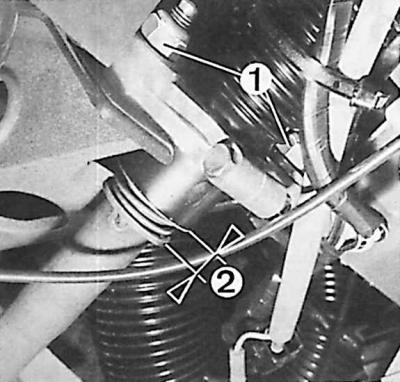
5. Check that the control distance (2) = 12±1 mm is observed and tighten the nuts securing the column clamp to the holder under the front panel, the bolt securing the steering column clamp, and the nut of the lower bolt securing the steering wheel shaft.
6. Install the universal switch and connect the electrical wire connectors.
7. Install the hood release lever.
8. Install the upper and lower steering column covers.
9. Check the symmetry of the steering wheel position when setting the wheels for forward movement.
Information for this article was taken from the website www.fordbook.ru