Withdrawal
Remove the gearbox see point 10.1.
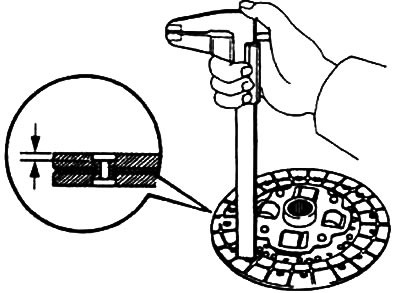
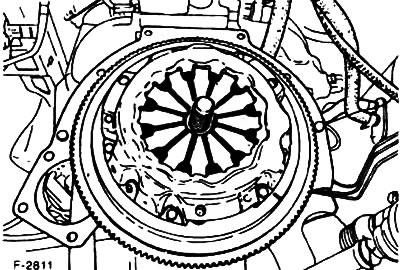
In order to prevent the flywheel from turning while unscrewing the bolts, the flywheel ring gear must be blocked with a screwdriver and a mandrel.
Loosen the fixing bolts of the clutch pressure plate crosswise by 1-1.5 turns, as a result, the pressure plate should become free.
Attention! If you immediately completely loosen the bolts, you can damage the diaphragm spring.
Finally, completely unscrew the bolts.
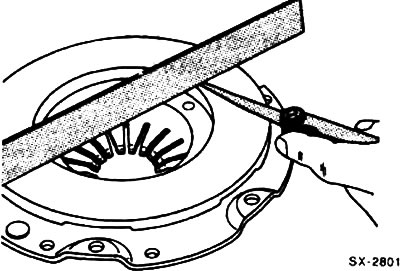
Remove pressure and driven clutch discs.
Attention! Try not to drop the clutch pressure and clutch discs during their dismantling, otherwise various problems may arise during installation.
Wipe the flywheel with a cloth soaked in gasoline.
Examination
If you are using used pressure or driven discs, they must be checked before installation.
Clutch discs coated with grease or with mechanical defects must not be installed.
Use a vernier caliper to measure the thickness of the friction linings on the clutch discs. The thickness of the pads to the top of the rivet heads must be at least 0.3 mm, otherwise replace the driven disk. If the friction linings are cracked, then the driven discs must also be replaced.
Check pressure plate. Traces of running-in at the ends of the membrane spring up to 0.3 mm deep do not matter.
Check the spring connections between the clutch pressure plate and cover for cracks and firm seating. Replace pressure plates with damaged or loose rivets.
Check the pressure plate bearing surface for cracks, burn marks and wear. Pressure plates with an inward deflection of up to 0.3 mm can be installed. Verification is performed using a template and a ruler. Small cracks and grooves on the flywheel and pressure plate are removed with fine sandpaper.
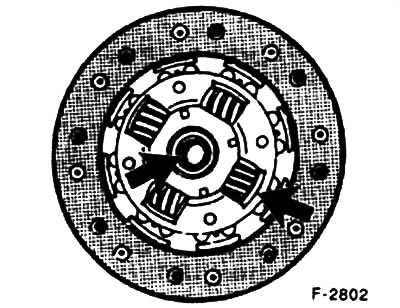
Check for wear and signs of running-in windows in the springs, torsion springs, mounting rivets and hubs.
Installation
Check the free running of the clutch release bearing. The bearing must run silently.
Before installing a new clutch, it is necessary to completely remove the anti-corrosion grease from the pressure plate.
Thoroughly clean the inner splines of the driven disc and the splines of the gearbox input shaft, as well as the guide sleeve of the clutch release bearing.
Lubricate the splines of the drive shaft and the guide bushing with a thin layer of special grease (Microlube GL-261). In this case, it is necessary to lubricate the entire surface of the splines.
Attention! Do not apply too much grease, as during the operation of the car, excess grease will be thrown onto the rubbing surfaces, resulting in a decrease in adhesion efficiency. Switching problems may occur if other grades of grease are used.
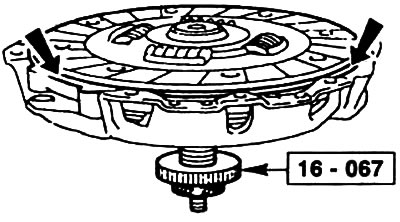
Position the clutch disc by eye in the center of the pressure plate. It is still better to center the disc with a suitable mandrel, such as HAZET 2174, or with an old gearbox input shaft. Ford workshops have a special tool 16-067 for this purpose. If the clutch disc is not centered, then at a later stage it will not be possible to install the transmission drive shaft.
Install the pressure plate with the driven plate centered in the corresponding adjusting pins on the flywheel.
Install the mounting bolts for the clutch pressure plate, first tighten them by hand, then crosswise tighten the bolts 1-1.5 turns in stages, do this until the pressure plate is firmly seated on the flywheel.
Attention! Make sure that the pressure plate is pulled evenly and without burrs into the flywheel when the bolts are tightened. The tightening torque of the pressure plate fixing bolts is 30 Nm.
Remove the center mandrel.
Install the gearbox see point 10.1.
Check clutch adjustment, see point 9.3.
Visitor comments