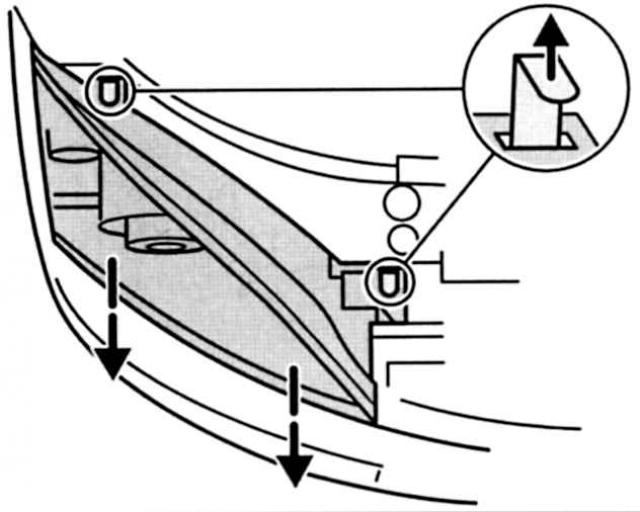
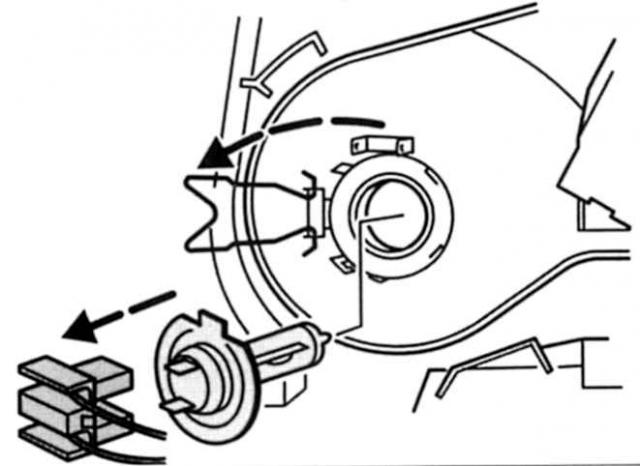
Bulbs of lanterns of passing, driving, parking light and direction indicators are located all together in the headlight housing. To replace the bulb, the headlight must be removed: there is no reason to use unauthorized hands - you open the engine hood, release both clips on the sides on top of the radiator grille and pull out the grille. If you now pull out both mounting pins (indicated by arrows) on top of the headlight housing and then unplug the bulb plug, you have a complete headlight ready for bulb replacement. Attention: not to «darken» your relationship with a halogen lamp, never take it by the glass bulb, but only by the cartridge. Use only spare lamps with a UV filter.
Fully pull out both mounting pins. |

 (depending on light source)
Front direction indicators
|
PROCEDURE |
- Rotate the lamp holder to the left and completely unscrew it, together with the lamp, from the housing.
- Lightly squeeze the old light bulb in the socket and unscrew it with a left-hand rotation.
- Reinstall the new lamp in reverse order, making sure both guides are correctly positioned during installation.
Left-hand unscrewing: first cartridge, then lamp. |
|
|
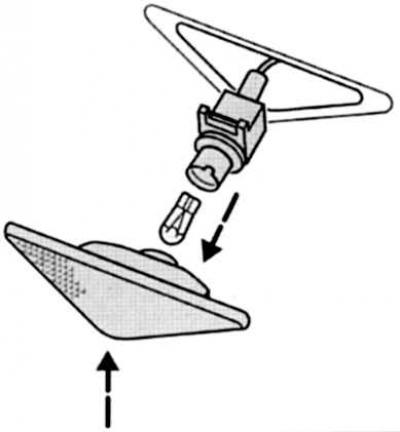
Side direction indicators
|
PROCEDURE |
- Carefully slide the turn signal glass out of the wing until the spring under the tip can be pressed out with a screwdriver and the glass completely pulled out of the wing.
Pay attention to the rear spring when mounting the side turn signal. |
- Hold the lamp socket firmly, rotate the glass to the left and remove.
- Remove the bulb from the socket and replace with a new one.
- Carry out installation in reverse order.
|
|
Dipped beam
|
PROCEDURE |
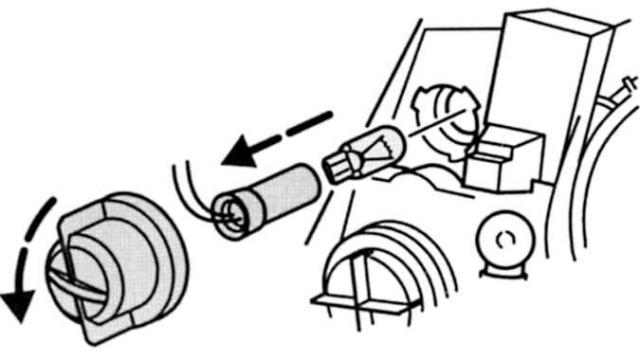
- Open the headlight housing. To do this, first unplug the lamp plug, release the clamps and put the caps aside.
Follow the procedure: Disconnect the lamp plug and then release the clamping latches. |
- Disconnect the lamp plug (indicated by an arrow), fold aside the wire staples (indicated by arrows) and pull the lamp base out of the reflector.
- Insert a new bulb, plug it in and then close the headlight. Make sure the wire locks are in place.
Halogen lamp: always take only the holder. |
|
|
High beam
|
PROCEDURE |
- Disconnect the lamp plug from the main beam lamp, fold the wire clips to the sides and pull the lamp by the base from the reflector
- Insert a new bulb, plug it in and then close the headlight.
|
|
Parking light
|
PROCEDURE |
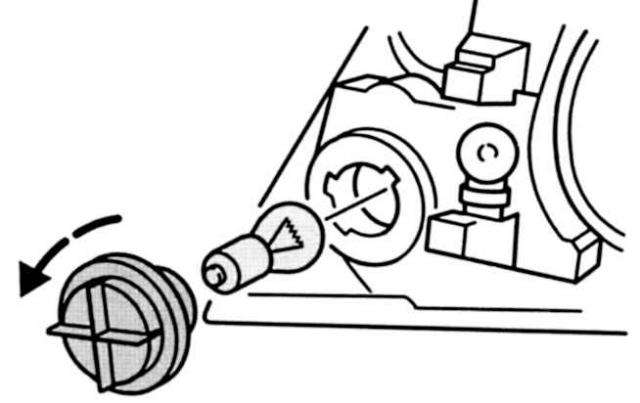
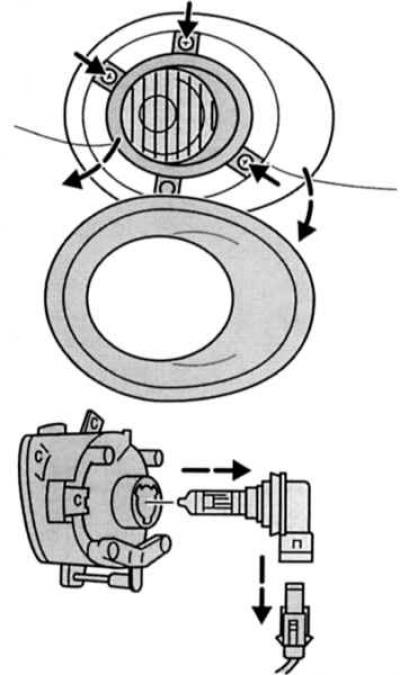
- Rotate the cap to the left and pull it out of the housing.
- Then lift the socket out of the housing with a flat screwdriver and pull the bulb out of the socket.
- Insert a new lamp. Make sure both guides fit correctly and close the housing.
Must sit correctly: guides. |
|
|
|
PRACTICAL ADVICE |
Headlight position check - after every bulb change
Since the reflector must be adjusted when changing the headlight bulb, before changing the bulb, place your Mondeo in front of a dark wall, if possible, and mark with a piece of chalk on the wall the beams of light of working lamps. After replacing the lamp, compare the light hole of the new lamp with the old one. If your Mondeo is clearly «mows to the side», it is better to carry out the necessary adjustment of the light in a special workshop using an optical device for installing headlights. |
|
Fog lights
|
PROCEDURE |
- Carefully lift the headlight reflector out of the front deflector and...
- ...then unscrew the fixing screws of the lamp using a Phillips screwdriver.
- Now pull the housing out of the mounting hole and disconnect the lamp plug.
- Remove the bulb from the socket and insert a new bulb.
Mounting in models with standard bumper. |
|
|
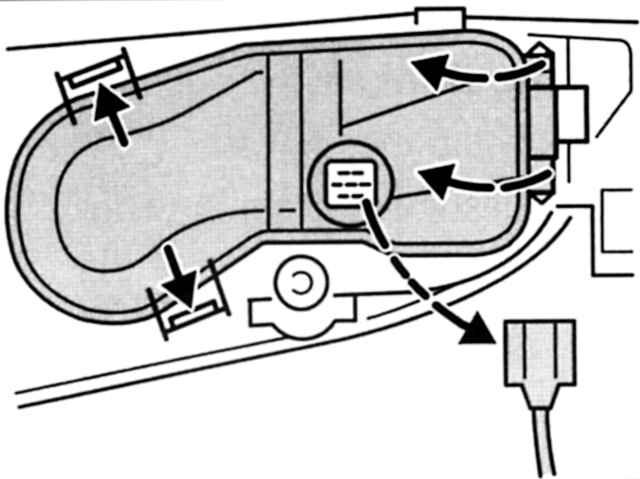
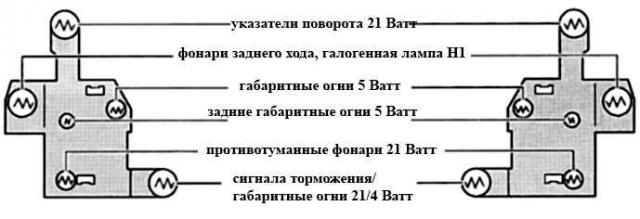
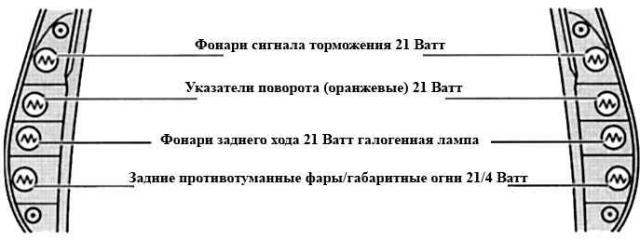
Taillights for sedan and station wagon models (brake signal, position and direction indicators)
|
PROCEDURE |
- Open the trunk lid and release the swivel clip of the corresponding lamp housing.
- Remove the trim and...
- ...separate the lamp holder from the housing. To do this, press both red plug-in tabs (indicated by an arrow).
Squeeze both red insert tabs. |
- Disconnect the lamp plug now and remove the defective lamp from the socket.
- After replacement, install in reverse order. Don't forget to check the functionality.
Uniform: Taillights for sloped and angled tailgate models. |
|
|
Wagon rear lighting
|
PROCEDURE |
- Open the rear door and release the upper trim of the lamp housing in the passenger compartment (the bottom is fixed with adhesive tape).
- Now remove the cover and...
- ...unscrew both wing nuts of the lamp housing. Take care that the nuts are not «failed» into holes.
- Pull the housing out, slightly squeeze the lamp in the socket and remove by turning to the left.
- After replacement, install in reverse order. Don't forget to check the functionality.
Mounted on top of each other: taillights in the Mondeo Turnier |
|
|
Additional brake lights
|
PROCEDURE |
- On sedan models, simply slide the lamp holder cover. For coupe and station wagon models, open the tailgate first.
- Then unscrew the two Phillips head screws and remove the cap.
- Then disconnect the plug and pull out the lamp holder. To do this, click on both tabs.
- Replace the defective lamp and install in reverse order. Don't forget to check the functionality.
Additional brake lights: a set of five lamps. |
|
|
License plate lighting
|
PROCEDURE |
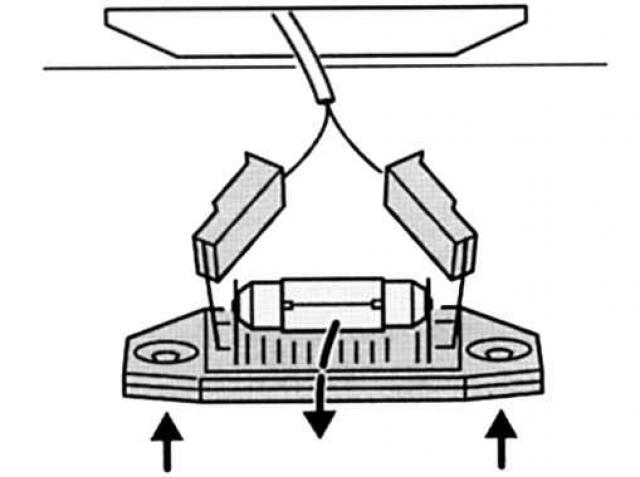
- Unscrew both Phillips screws and pull the lamp housing out of the buffer.
- Insert a new soffit lamp and install in reverse order.
License plate light: secured with two Phillips screws. |
|
|
|
PRACTICAL ADVICE |
Replacing incandescent bulbs
Any ordinary incandescent lamp is subject to wear: the particles of the filament evaporate and its light output decreases. Therefore, in the outdoor lighting sector (except for halogen lamps) Replace incandescent bulbs generally at least every two years. «Aging» lamps are usually recognized visually by a slightly blackened glass bulb. |
|


Visitor comments