USEFUL TIP: When removing the rear suspension crossmember, you must have assistants to hold it and lower it.
You will need a 15 mm socket head.
1. Remove the rear wheels.
2. Remove the rear suspension spring (see Replacing the rear suspension spring).
3. Remove both rear brake hoses (see Replacing brake hoses).
4. Disconnect the parking brake cables from the trailing arms (see Replacing the rear parking brake cables).
5. Disconnect the wheel speed sensor wiring harness from the holders on the lever (see Removing and installing rear wheel speed sensors).
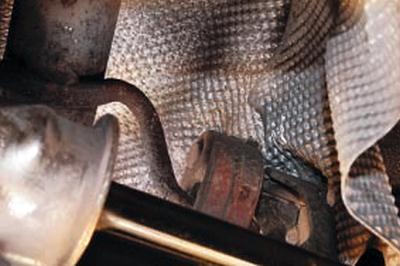
6. Use a screwdriver to pry up and remove the exhaust system suspension cushion from the rear suspension crossmember bracket.
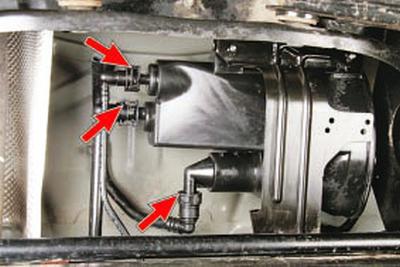
7. Squeeze the clamps and disconnect the lines from the fuel vapor recovery system canister.
8. Install hydraulic struts under the crossbar.
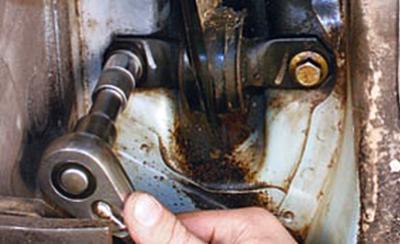
9. Remove two bolts securing the rear suspension trailing arm brackets to the body.
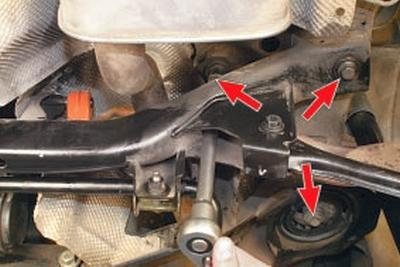
10. Unscrew the three bolts securing the crossmember to the body on both sides of the car and remove the rear suspension crossmember, lowering it on the struts.
11. Install the rear suspension crossmember in the reverse order of removal. Finally tighten the crossmember mounting bolt nuts with the vehicle on the ground.
12. After installing the crossmember, bleed the brake system (see Bleeding the hydraulic brake system) and, if necessary, adjust the parking brake drive (see Adjusting the Parking Brake Drive).