1. Disconnect the wire from the negative terminal of the battery.
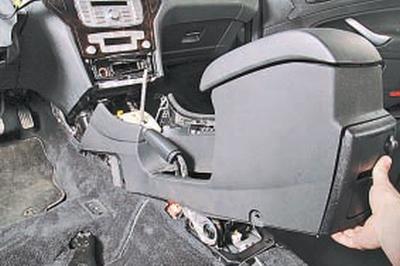
2. Remove the floor tunnel lining (see Removing and installing floor tunnel lining).
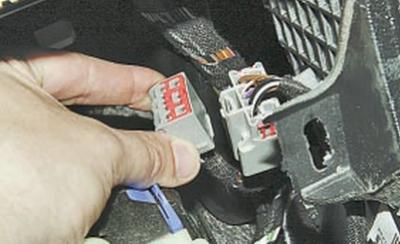
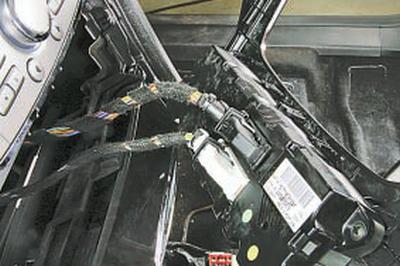
3. Press the release button to disconnect the wiring harness connector located under the floor tunnel trim.
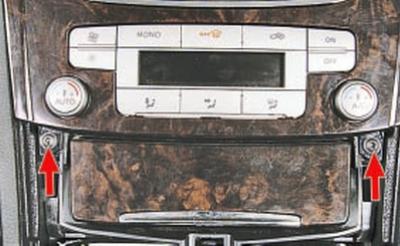
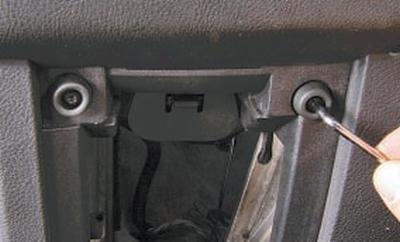
4. Remove the two screws securing the lower trim panel of the radio and the climate control panel.
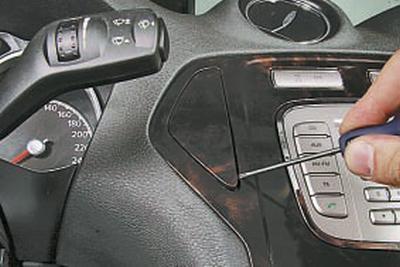
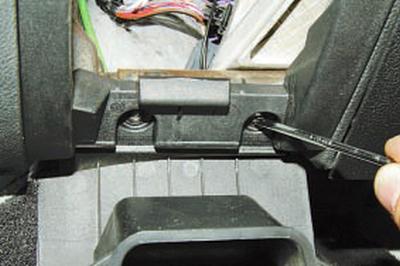
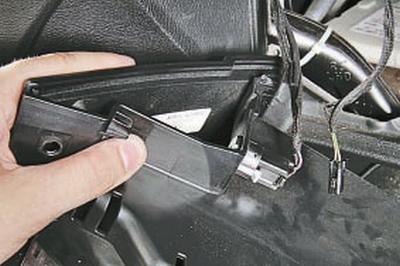
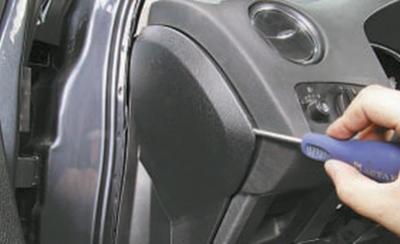
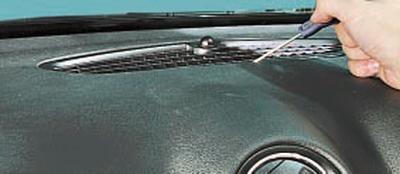
5. Carefully pry up the left trim plug with a screwdriver…
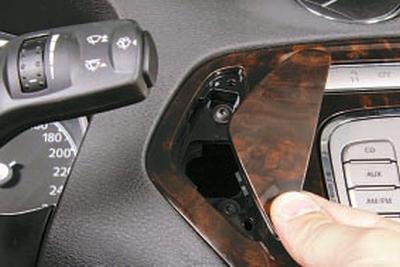
6….and take it off.
7. Remove the right plug in the same way.
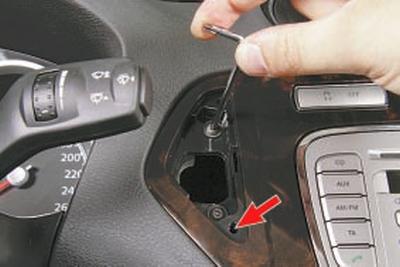
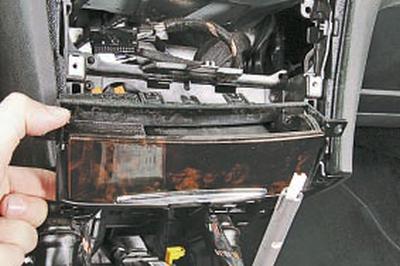
8. Unscrew two screws on the left and right sides of the upper trim mounting…
9….and move it away from the dashboard.
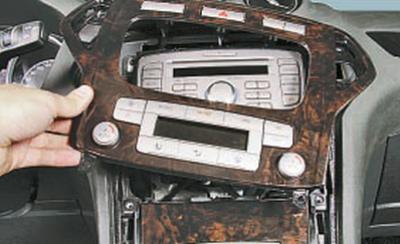
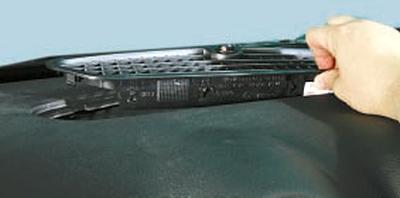
10. Press the latches to disconnect the three wiring harness connectors from the switches…
11….two pads – from the climate control system control panel and remove the trim.
12. Remove the ashtray from the instrument panel console.

13. Disconnect the wiring harness connectors from the cigarette lighter…

14….and the backlight lamps and remove the ashtray.
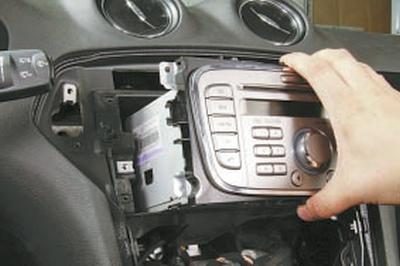
15. Remove the radio (see Removing and installing a car radio).
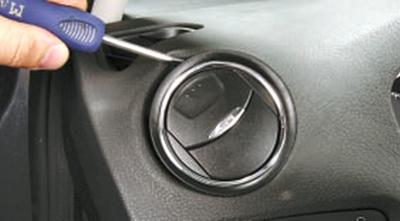
16. Using a screwdriver, pry up the left air duct nozzle…

17….take it off.
18. Similarly, remove the right and central nozzles of the HVAC ducts.
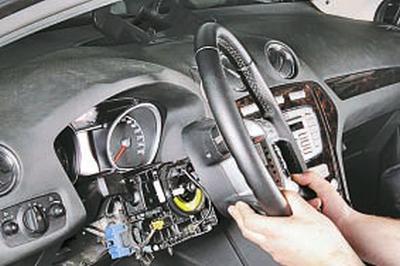
19. Remove the steering wheel (see Removing and installing the steering wheel) and steering column cover (see Removing and installing the steering column cover).
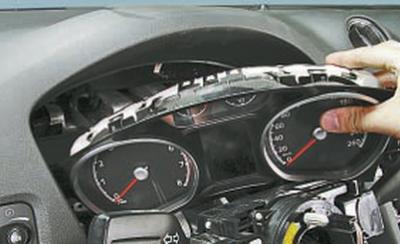
20. Remove the instrument cluster (see Removing and installing the instrument cluster).
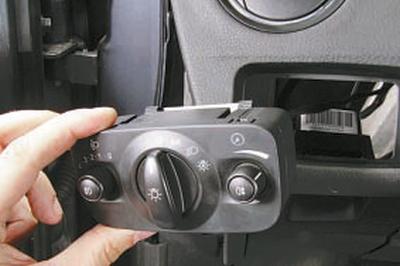
21. Remove the central light switch (see Replacing the control unit for external lighting and instrument cluster illumination).
22. Remove the steering column (see Removing and installing the steering column).
NOTE: If the instrument panel frame does not require replacement and does not need to be removed, then it is not necessary to remove the steering column.
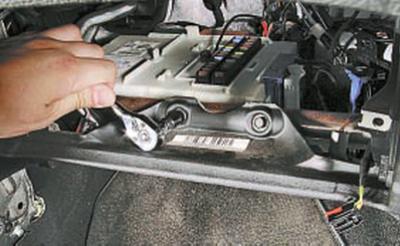
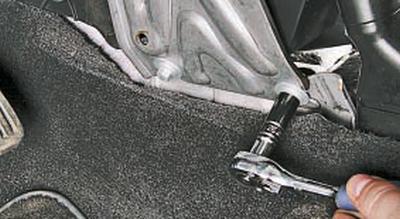
23. Remove the two screws securing the instrument panel to the frame.
24. Open the lid of the small items drawer and unscrew the two screws of the lower fastening of the lid base.
25. Remove the two screws securing the top cover base.
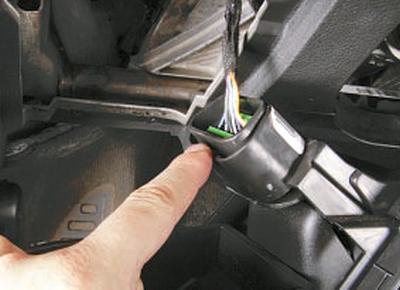
26. Disconnect the wiring harness connector from the diagnostic connector…
27….and remove the box together with the lid.
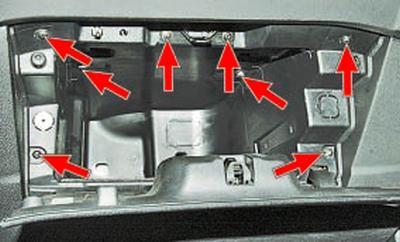
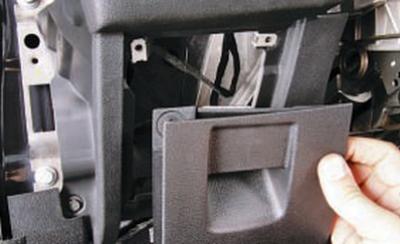
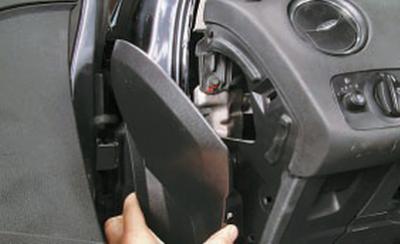
28. Open the glove box cover, remove the six screws and two bolts securing the glove box.
29. Remove the storage compartment from the instrument panel.
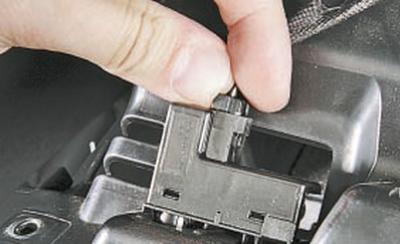
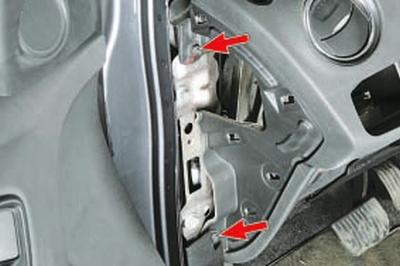
30. Press the lock and disconnect the wiring harness connector of the glove compartment light switch.
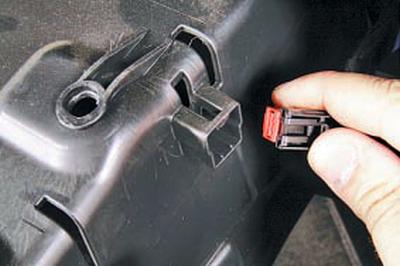
31. Press the release button to disconnect the front passenger airbag switch wiring harness connector.
32. Press the lock, disconnect the wiring harness connector and remove the glove box.
33. Through the window that opened after removing the glove compartment, unscrew the two bolts securing the instrument panel to the frame.
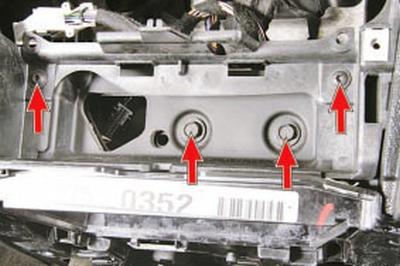
34. Remove the two bolts and two screws securing the instrument panel to the frame in its central part.

35. Disconnect the wiring harness connector from the anti-theft alarm shock sensor (if installed).
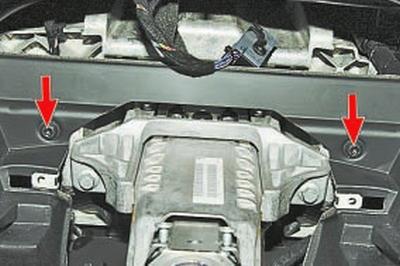
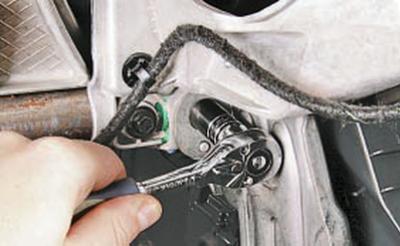
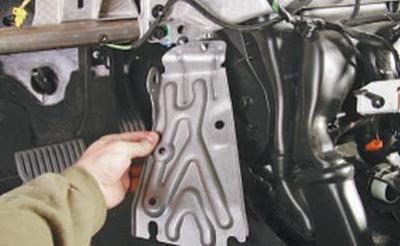
36. Remove the two bolts securing the airbag bracket to the instrument panel frame.
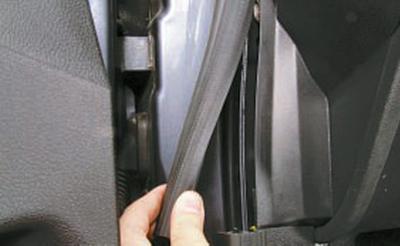
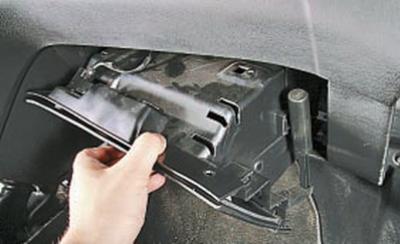
37. Remove part of the seal from the door frame flange.
38. Pry it off with a screwdriver..
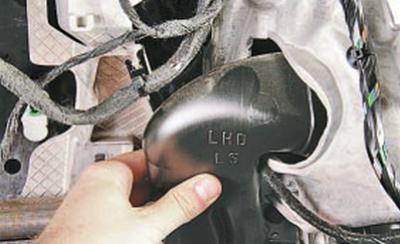
39….remove the left side trim of the instrument panel.
40. Remove the right side panel in the same way.
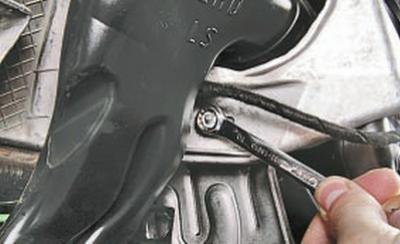
41. Unscrew the two bolts securing the left and right instrument panel to the frame.
42. Using a screwdriver, pry off the central windshield deflector…
43….and having overcome the resistance of the clamps, move it away from the instrument panel.

44. Press the lock and disconnect the wiring harness connector from the light sensor.
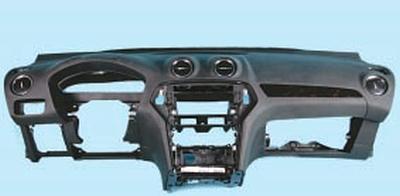
45. Remove the decorative instrument panel.
46. Install the instrument panel in the reverse order of removal.
If the instrument panel frame needs to be replaced, follow these steps.
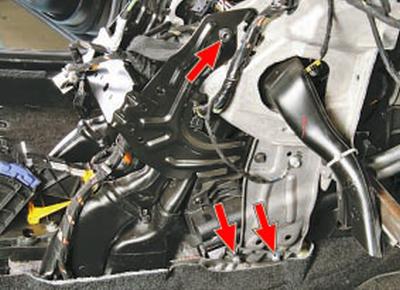
47. Remove the lower bolts securing the right frame support bracket.

48. Remove the screw securing the frame support bracket, as well as the bolt and nut securing the upper instrument panel bracket.
49. Remove the upper screw securing the center console bracket.
50. Similarly, unscrew the screws securing the center console bracket on the left side.
51. Using a screwdriver, remove the wire harness holder from the hole in the bracket on the left and right sides.
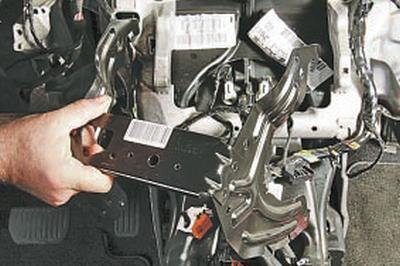
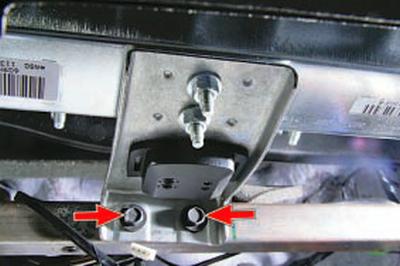
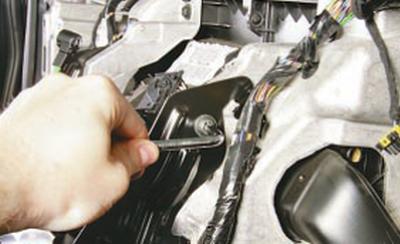
52. Remove the center console bracket.

53. Unscrew the ground wire mounting bolt and remove the right support bracket.
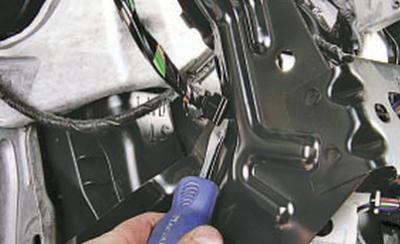
54. Remove the two bolts securing the lower left instrument panel frame support bracket.
55. Unscrew the nut securing the left support bracket to the instrument panel.
56. Remove the left and right air ducts.
57. Loosen the upper mounting bolt of the left instrument panel support bracket…
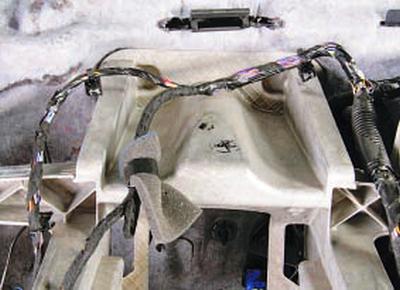
58….and take it off.

59. Remove the four frame mounting bolts.

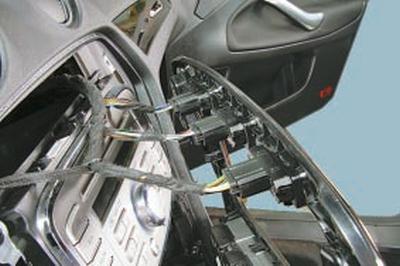
60. Remove two bolts securing the frame to the front pillars on the left and right sides.
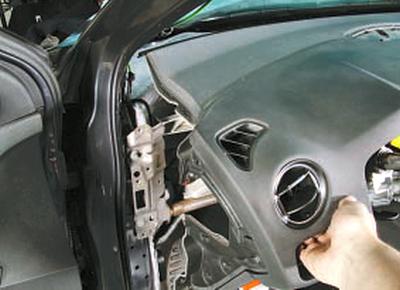
61. Remove the wire harness holders from the frame openings and pull the wire harness out of the frame.
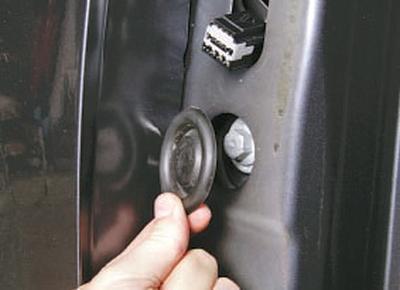
62. Remove both front doors (see Removing and installing the front door).
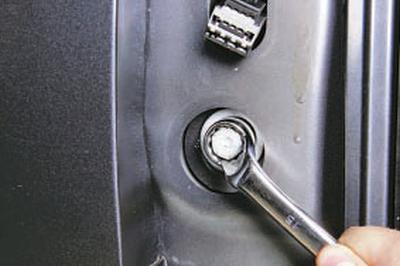
NOTE: It is necessary to remove the front doors because they block access to the two bolts that secure the upper instrument panel frame tube to the body pillars.
63. Remove the hole plugs in the left and right pillars.
64. Remove one bolt each from the side mounting of the instrument panel frame to the left and right front body pillars…
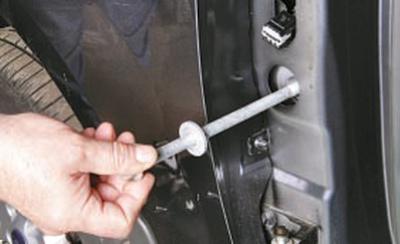
65….and remove the bolts
66. Make sure all wires are disconnected from the instrument panel frame and remove the frame.
67. Install the parts in the reverse order of removal.
For more information, please visit the website [FORDBOOK]