NOTE: Shown are the removal and installation of trims on the left side of the cabin. The trims on the right side are removed in the same way.
Removal of the interior trims is shown in the reverse order of their installation on the car. Trying to remove the trims in a different order will not lead to the desired result, since each previous trim holds the next ones with its edges or covers the fastening.
1. Remove the rear seat cushion and backrest (see Removing and installing the rear seat).

2. Remove the lower part of the seal from the door frame.
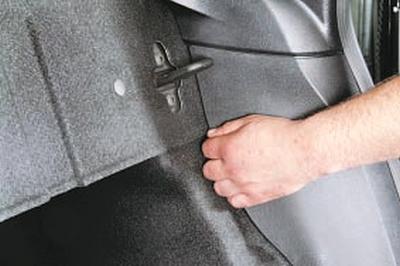
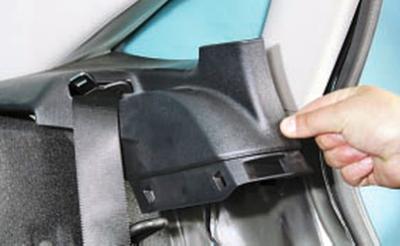
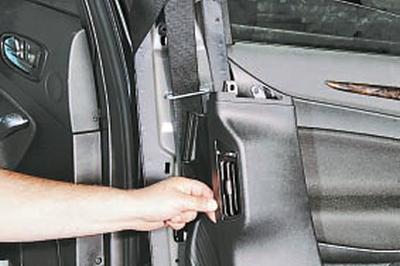
3. Press the inner edge of the lower trim of the rear pillar, overcoming the resistance of the clamps..
4….and take it off.
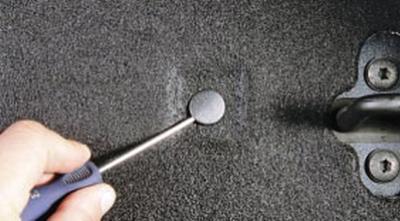
5. Using a screwdriver, remove the rear mounting pin of the rear sill trim.
6. Remove the rear threshold trim.
7. Remove the seal from the back of the door opening.
8. Remove the lower seat belt mounting bolt on the left side (see Removing and installing the rear seat belt).
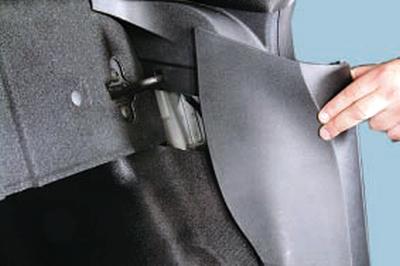
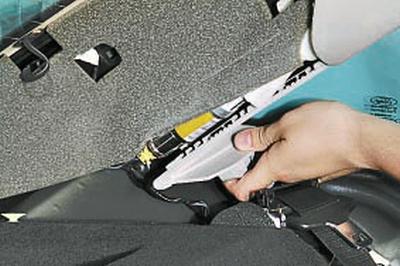
9. Separate the front part of the left luggage compartment shelf trim…
10….and, having overcome the resistance of the clamps, remove it by moving the trim towards the central axis of the car and passing the buckle of the lower seat belt mount into the hole in the trim.
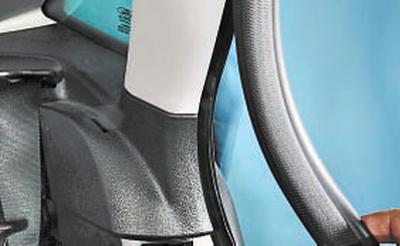
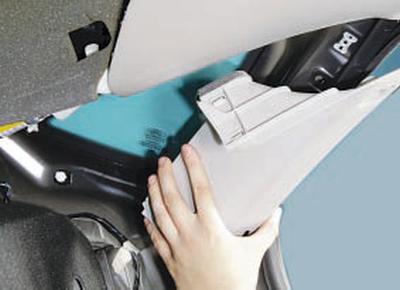
11. Press the side trim of the rear window pillar, overcoming the resistance of the clips, and remove it.
12. Press the lower trim of the rear window pillar, overcoming the resistance of the clips..
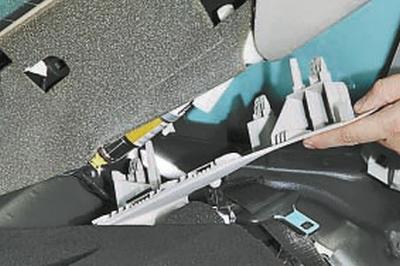
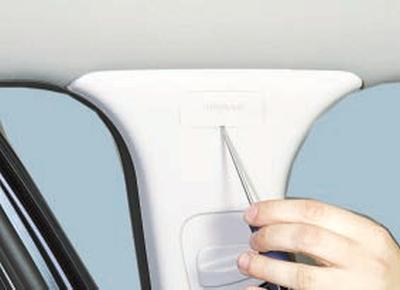
13….and take it off.
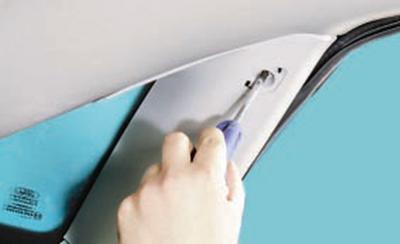
14. Pry it off with a screwdriver..
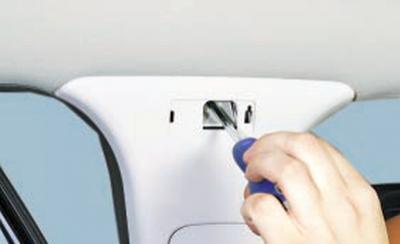
15….remove the decorative plug from the upper part of the rear pillar trim, overcoming the elastic resistance of its clips.
16. Remove the fastening screw…
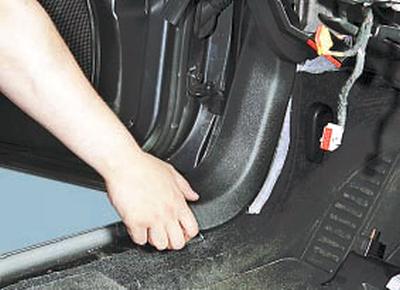
17….and remove the upper part of the rear pillar trim, overcoming the elastic resistance of its holders.
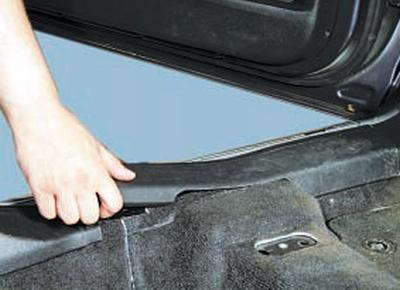
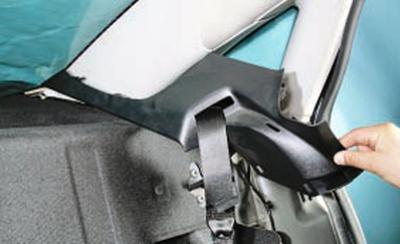
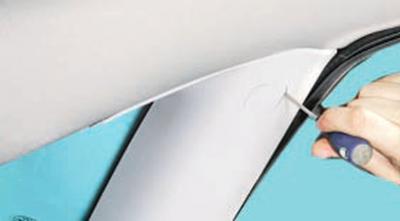
18. Using your hand, pry the rear part of the threshold trim and remove it, overcoming the resistance of the clips.
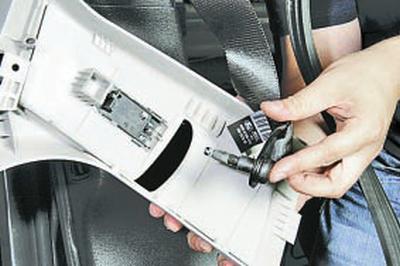
19. Using your hand, pry the lower part of the front pillar trim and remove it, overcoming the resistance of the clips.
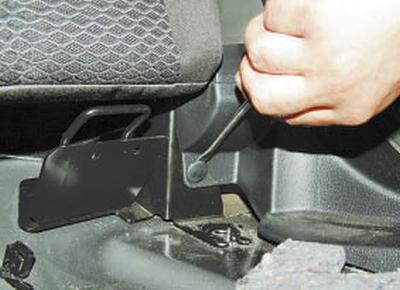
20. Remove the front seat belt bracket mounting bolt (see Removing and installing the front seat belt).
21. Using a screwdriver, remove the decorative plug of the upper trim of the middle pillar, overcoming the elastic resistance of its fasteners.
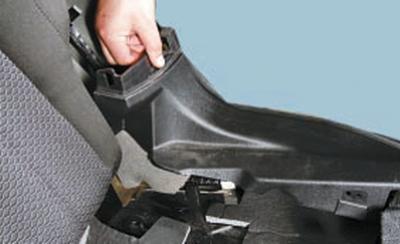
22. Remove the fastening screw…

23….and, lifting the cladding…
24….remove it by passing the buckle of the lower seat belt mount through the gap in the trim.
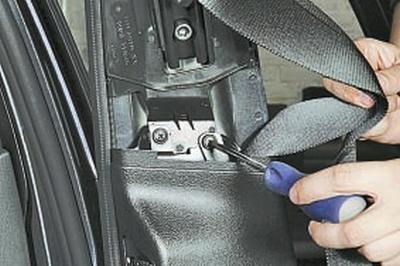
25. Remove the two screws securing the lower trim of the middle pillar…
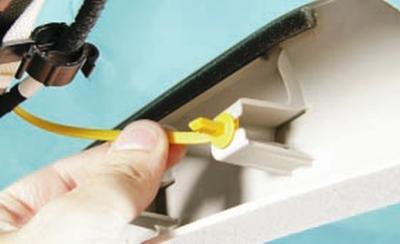
26….and remove it, overcoming the resistance of the clamps.
27. Using a screwdriver, pry the mounting pin of the luggage compartment shelf trim and remove it from the hole.
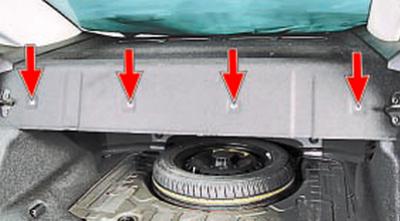
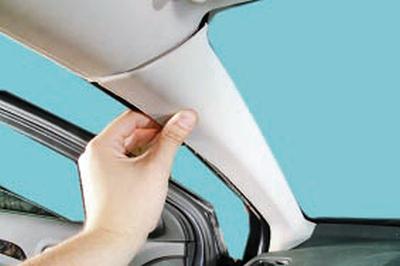
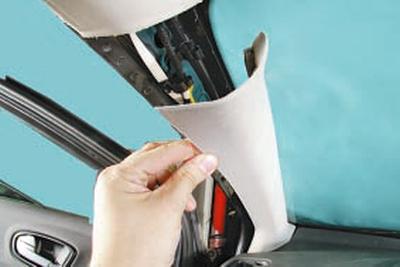
NOTE: This is how the four mounting pins for the luggage compartment parcel shelf trim are located.
28. Remove the remaining three pins and remove the luggage compartment shelf trim.
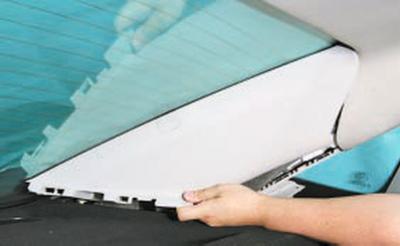
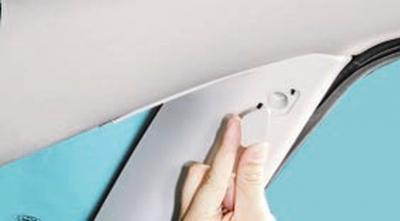
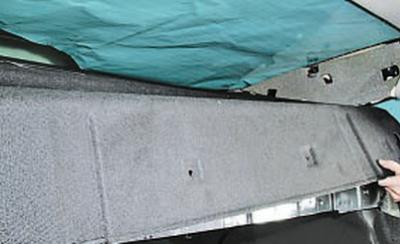
29. Pry up the top edge of the front pillar trim…
30….and, overcoming the elastic resistance of the clamps, disconnect the upper and lower trim holders from the rack.
31. Slide the holder along the groove of the trim and remove it.
32. Install the parts in the reverse order of removal.
(The full article is on the online resource: «FORDBOOK.RU»)