To remove the master cylinder, follow these steps:
- disconnect the wire from the negative terminal of the battery;
- remove the panel on the left bottom of the cabin under the steering column. To do this, unscrew the screws and remove the two clip clamps;
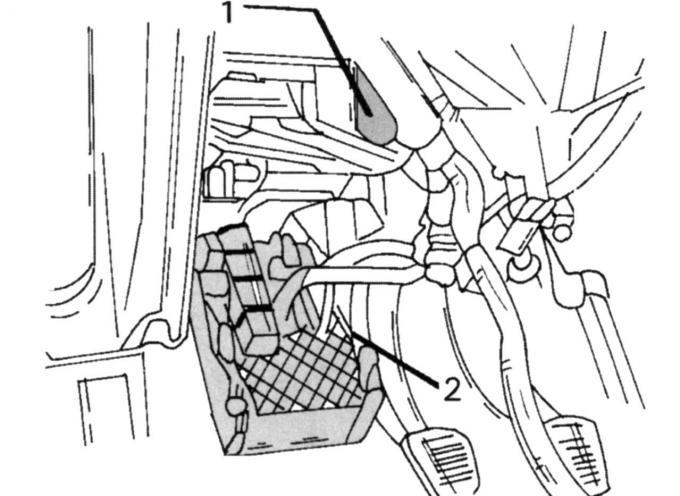
Fig. 150. Location of plugs: 1 — upper plug; 2 - side plug
- remove the engine control unit (Fig. 150);
- remove the plug from the bottom of the unit;
- open the engine control unit;
- remove the wire tip 1 (see Fig. 150) at the top;
- remove plug 2;
- unscrew the four nuts and remove the box mount;
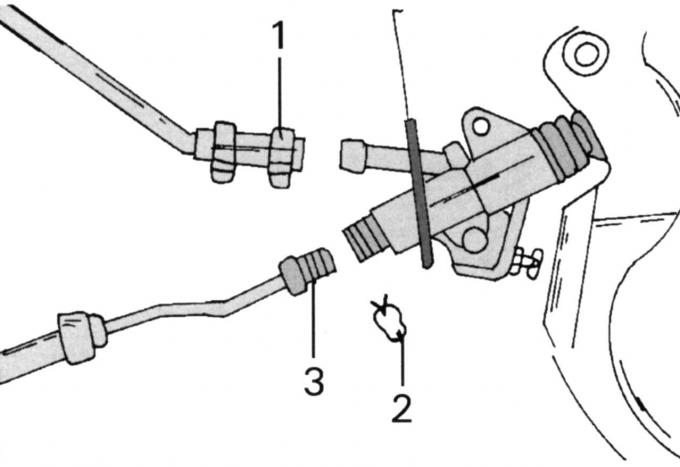
Fig. 151. Removing the clutch master cylinder: 1 — hose clamp; 2 - safety clamp; 3 - high pressure pipeline
- loosen clamp 1 (Fig. 151) of the hose and remove the hose;
- remove the safety clamp 2 and remove the high pressure line 3 from the master cylinder;
- press the safety clamp of the push rod mounting on the clutch pedal;
- unscrew both cylinder mounting nuts;
- remove the cylinder.
Installation is carried out in reverse order, taking into account the following:
- tighten the cylinder mounting nuts to a torque of 10 Nm;
- remove air from the clutch hydraulic drive;
- test drive the vehicle to update the data in the electronic control unit.
A copy of the article is available on the website (fordbook.ru)