To remove the slave cylinder, perform the following operations:
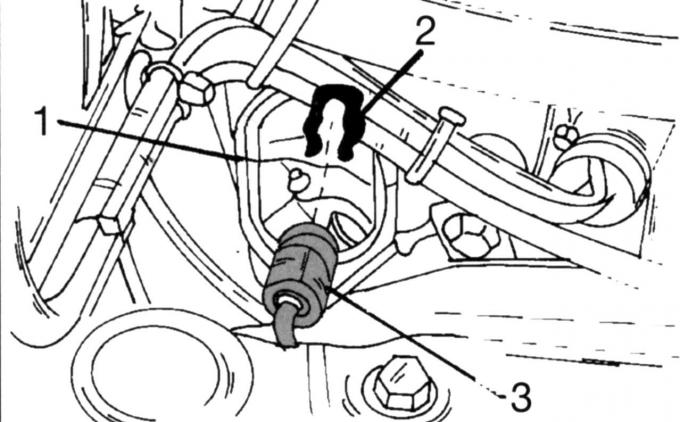
Fig. 152. Disconnecting the liquid pipeline: 1 - dust cap; 2 - safety clamp; 3 - fast acting constipation
- disconnect the high-pressure line of the working cylinder (Fig. 152). To do this, put on the dust cap, pull the spring clamp upward, squeeze the quick-release lock of the wiring and remove the line;
- remove the gearbox as described in section 9.1;
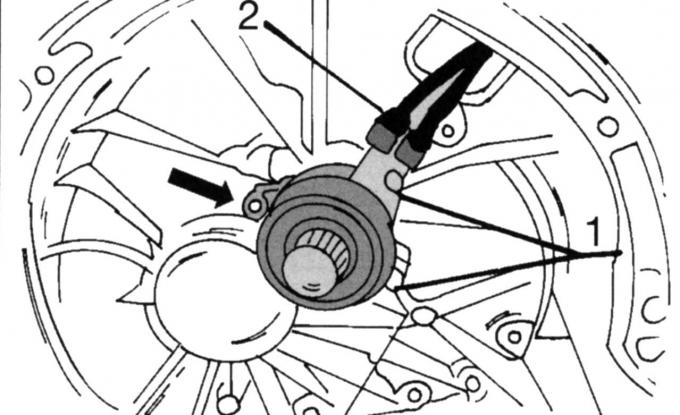
Fig. 153. Clutch release bearing mounting location: 1 — cylinder screws, 10 Nm; 2 - union nuts, 15 Nm
- unscrew the pipeline 2 (Fig. 153) for liquid;
- unscrew the adjacent threaded plug to remove air;
- unscrew screws 1;
- remove the cylinder with the bearing.
Installation is carried out in reverse order, taking into account the following:
- lubricate the cylinder with sealant;
- put on a new sealing ring;
- install the cylinder together with the clutch release bearing;
- insert the screws and tighten to 10 Nm;
- tighten pipe 2 to 15 Nm;
- screw in the air release valve with a torque of 15 Nm;
- install the gearbox;
- connect the wiring (see Fig. 152). Make sure that the spring clamp is fixed;
- remove air from the clutch hydraulic drive.
(For more information, please visit the website Fordbook.ru)