Contents: Engine compartment illumination lamp ↳ Interior lighting lamps ↳ Reading lamp ↳ Instrument cluster lights and… ↳ Fog Light Indicator - Pre-1996 Models ↳ Hazard warning light indicator ↳ Glove box light ↳ Interior Light Switch Illumination… ↳ Heater Blower Switch Illumination… ↳ Automatic transmission selector… ↳ Interior door handle illumination… ↳ Clock Lighting Lamp ↳ Heater control unit illumination lamp ↳ Trunk light lamp ↳ Footwell Lighting Lamp ↳
1. Before disconnecting the bulb electrical connector, turn off all external lighting devices. Do not touch the glass bulb of the halogen bulb (headlights, front fog lights) with your fingers. If you accidentally touch the bulb with your fingers, wipe it with methyl alcohol.
Engine compartment illumination lamp
2. Open the hood and remove the bulb from the wedge socket.
3. Install the bulb in the reverse order of removal.
Interior lighting lamps
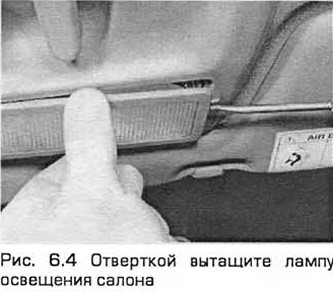
4. Turn off the interior lighting. To do this, set the switch to the middle position. Using a small screwdriver, carefully remove the lamp or bulb cover (depending on the version) (see Fig. 6.4).
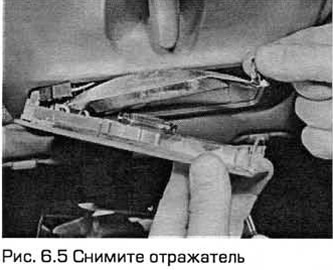
5. Remove the reflector. Then pull the bulb out of the elastic contacts (see Fig. 6.5).
6. Install the bulb in the reverse order of removal. Make sure that the elastic contacts securely fix the bulb.
Reading lamp
7. When the switch of this lamp is turned off, pull out the lamp with a screwdriver.
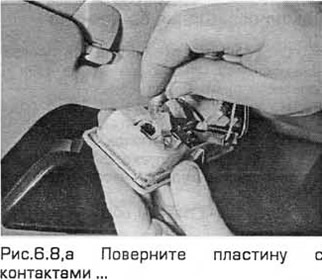
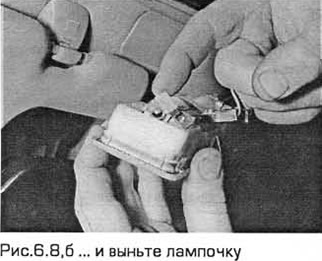
8. Turn the plate with contacts and release the bulb from the elastic contacts (see Fig. 6.8, a, b).
9. Install the bulb in the reverse order of removal. Make sure that the elastic contacts securely fix the bulb.
Instrument cluster lights and indicators
10. Remove the instrument panel (paragraph 10).
11. Turn the bulb holder counterclockwise (see Fig. 6.11).
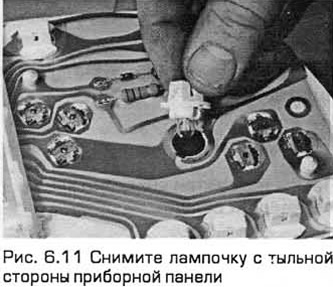
12. Install the bulb in the reverse order of removal.
Fog Light Indicator - Pre-1996 Models
13. Use a screwdriver to remove the indicator from the front panel and disconnect the electrical connector.
14. Use a screwdriver to turn the bulb socket counterclockwise (see Fig. 6.14).
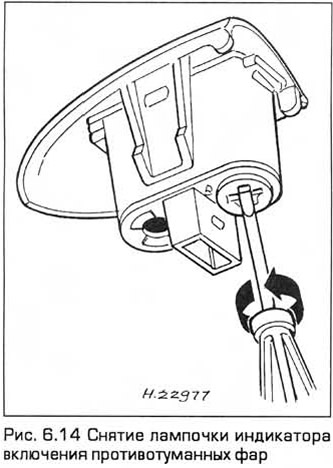
15. Install the bulb in the reverse order of removal.
Hazard warning light indicator
16. Remove the cover from the switch. Then remove the light bulb (see Fig. 6.16,a,b).
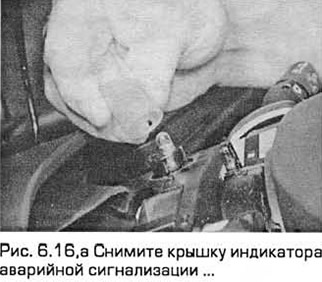
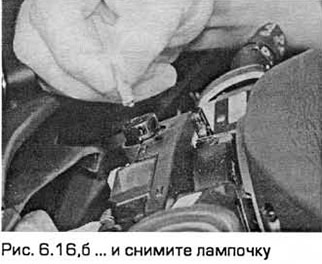
17. Install the bulb in the reverse order of removal.
Glove box light
18. Open the drawer. Then take out the light bulb installed under the top edge.
Interior Light Switch Illumination Lamp
19. Carefully remove the switch panel from the faceplate using a screwdriver, placing a rag underneath it to avoid damaging the faceplate.
20. Disconnect the electrical wiring connector.
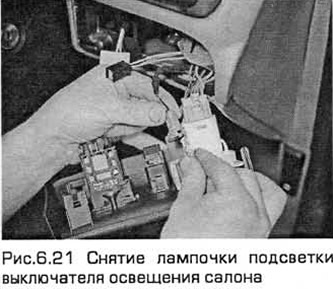
21. Unscrew the bulb holder and remove the bulb from the wedge holder (see Fig. 6.21).
22. Installation - in the reverse order of removal.
Heater Blower Switch Illumination Lamp
23. Remove the switch handle. Then, while pressing on the bulb, turn it and pull it out.
Automatic transmission selector panel illumination lamp
24. Disconnect the negative battery cable.
25. Remove the ashtray.
26. Set the neutral and then remove the panel from the central console.
27. Disconnect the high gear switch electrical connector.
28. Disconnect the bulb holder and remove the bulb from the holder.
29. Install the bulb in the reverse order of removal.
Interior door handle illumination lamp
30. Disconnect the negative battery cable.
31. Remove the door interior trim panel (chapter 11).
32. Use a knife to cut out the foam seal to access the back of the inside door handle.
33. Pull out the socket and remove the light bulb.
34. Installation - in the reverse order of removal.
Clock Lighting Lamp
Note: This lamp is not easy to replace on later models. Please contact your dealer.
35. Disconnect the negative battery cable.
36. Remove the watch (paragraph 13).
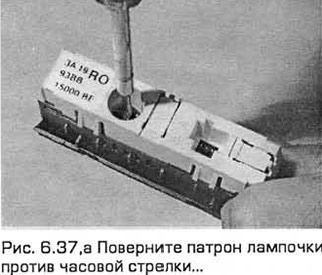
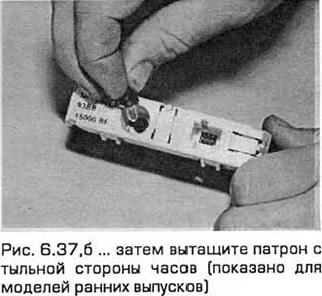
37. Use a screwdriver to turn the bulb holder counterclockwise. Then pull the holder out from the back of the clock (see Fig. 6.37,a,b).
38. Installation - in the reverse order of removal.
Heater control unit illumination lamp
39. Remove the heater control panel (chapter 3). Turn the socket counterclockwise and remove the bulb from the back of the panel (see Fig. 6.39).

Trunk light lamp
40. Disconnect the negative battery cable (chapter 5A). Pull out the knot with a screwdriver.
41. On models produced before 1996, turn the contact plate and remove the bulb from the elastic contacts.
42. On 1997 and later models, turn the bulb counterclockwise and remove it.
43. Installation - in the reverse order of removal.
Footwell Lighting Lamp
44. Disconnect the negative battery cable (chapter 5A).
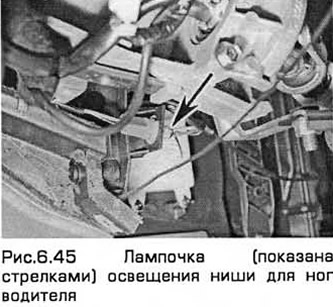
45. To access the light bulb, unscrew the screws of the lower trim of the front panel on the driver's side (see Fig. 6.45).
46. Remove the light bulb from the socket.
47. Installation - in the reverse order of removal.