Withdrawal
1. Disconnect the negative battery cable. Please note that immediately after turning off the light, the bulbs remain hot.
Headlight unit - pre-1996 models
2. Lock the hood in the open position. Let go (without turning completely) screw located on top of the front turn signal.
3. Pull the front turn signal assembly forward and disconnect the electrical connector. Set the knot aside.
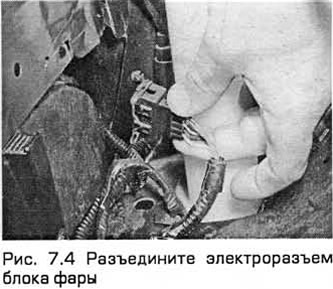
4. Disconnect the electrical connector of the headlight unit (see fig. 7.4).
5. Remove the grille (chapter 11).
6. Remove the front bumper (chapter 11).
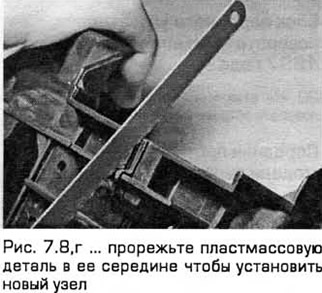
7. Headlights installed during the manufacture of the car are a single unit connected by a plastic part. If you only need to replace one headlight assembly, then you must first remove the plastic part and then split the assembly apart.
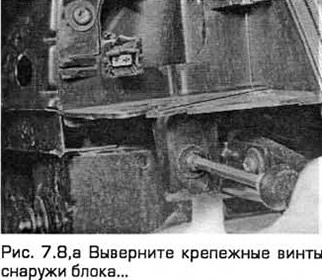
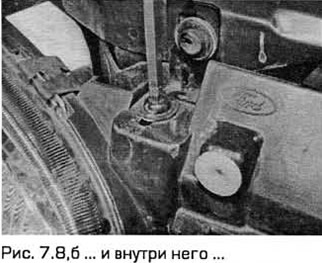
8. Remove the mounting screws on each side of the headlight unit and remove the assembly from the front of the car (see fig. 7.8,a-d). Then cut the headlight block with a hacksaw (in the middle between two headlights). Obtain a connector kit from dealers to install a new assembly.

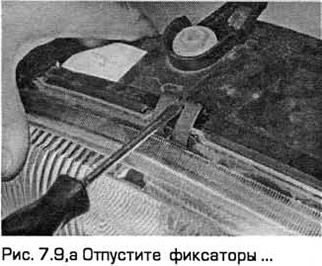
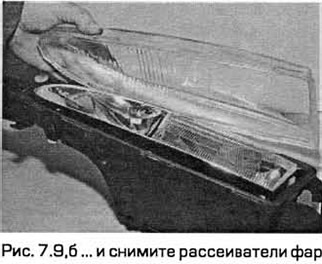
9. If necessary, the diffusers can be removed individually. To do this, you need to release the latches (see fig. 7.9.a,b). To remove the reflector, release the tabs and then remove the rubber seal.
10. Installation - in the reverse order of removal. Please note that the rubber seal is installed in the conical socket of the headlight unit. Adjust headlight beam direction (paragraph 8).
Headlight unit - production models since 1997
11. Remove the grille (chapter 11).
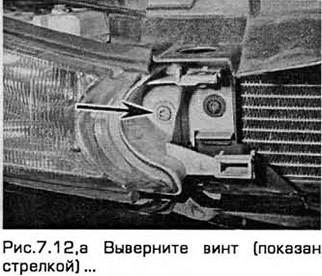
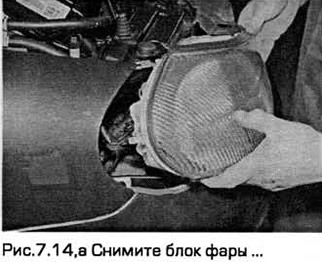
12. While supporting the headlight assembly, remove the screws (see Fig. 7.12, a, b).

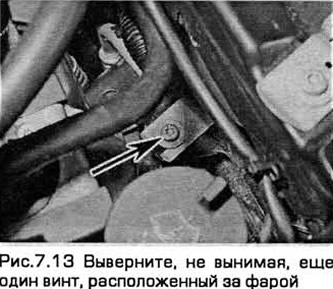
13. Turn out, without taking out, one more screw located behind a headlight (see fig.7.13).
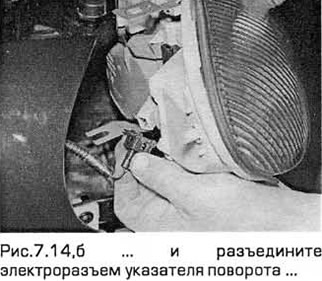
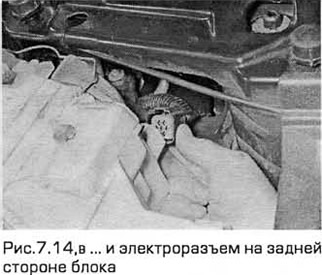
14. Remove the headlight unit and disconnect the wiring connector on the back of the unit and the turn signal connector (see Fig. 7.14, a-c).
15. Installation - in the reverse order of removal. Adjust headlight beam direction (paragraph 8).
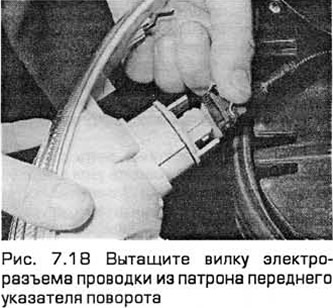
Front turn signal unit - pre-1996 models
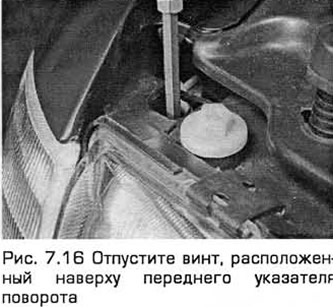
16. Lock the hood in the open position. Let go (without turning completely) screw located at the top of the front turn signal (see fig. 7.16).
17. Pull out the front turn signal assembly.
18. Turn the cartridge counterclockwise and pull it out of the block. Another way is also possible. Pull the wiring plug out of the socket without removing the bulb (see fig. 7.18). Remove the block.
19. Installation - in the reverse order of removal.
Front turn signal unit - pre-1997 models
20. On these models, the front turn signal is built into the headlight assembly.
Front fog lamp - pre-1996 models
21. Remove the Phillips screws securing the front fog light assembly to the front sidewall. Remove the block from the side.
22. Release the plastic clips and remove the back cover from the unit.
23. Pull out the light bulb, releasing the elastic clamps. Then disconnect the wiring connector. Remove the block.
24. Installation - in the reverse order of removal. Adjust headlight beam direction (paragraph 8).
Front fog lamp - production models from 1997
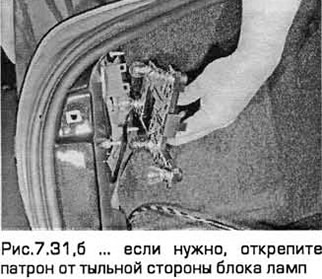
25. To improve access to the rear of the assembly, remove the screws and retainers and remove the bottom heatsink cover.
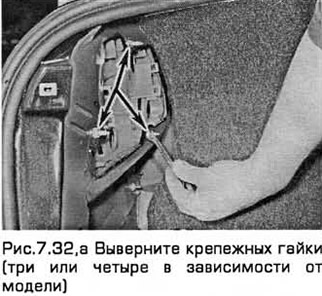
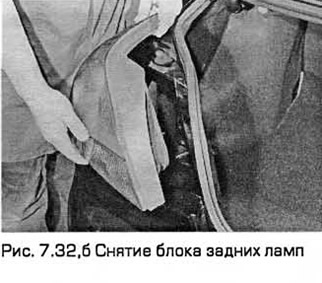
26. Removing the node is described in paragraph 5, paragraphs 36, 37.
27. Installation - in the reverse order of removal. Adjust headlight beam direction (paragraph 8).
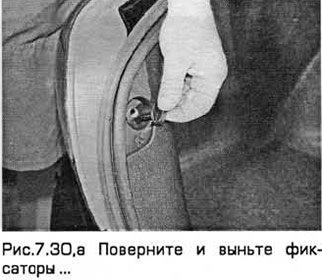
Rear lamp block
28. Raise the trunk lid or tailgate. Unhook the mesh (in the presence of), installed at the rear of the luggage compartment.
29. On Sedan and Hatchback models before 1996, remove the screws, release the clips and remove the trim panel from the rear cross panel.
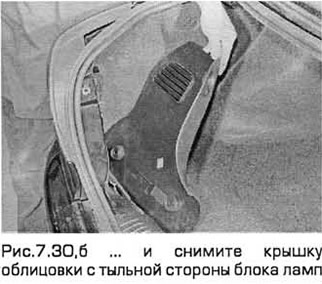
30. Turn and remove the latches and remove the cover of the lining from the back of the lamp unit (see Fig. 7.30, a, b).
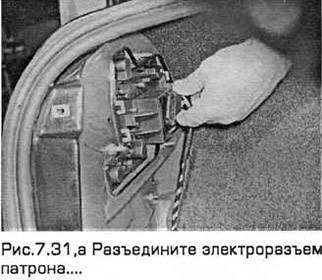
31. Disconnect the chuck electrical connector. If you are installing a new assembly, unfasten the socket from the back of the lamp unit (see Fig. 7.31, a, b).
32. Supporting the assembly, unscrew the fixing nuts and remove it from the outside of the car (see fig. 7.32, a, b).
33. Installation - in the reverse order of removal. On release models from 1997, check the condition of the seal on the body panel and. if necessary, replace it.
Rear license plate illumination unit
34. Remove both license plate lights (paragraph 5).
35. Lifting the trunk lid or tailgate, remove the screws and remove the interior trim panel.
36. Remove the nuts and remove the outer cover and license plate base from the tailgate.
37. Disconnect the electrical connector and remove the block.
38. Installation - in the reverse order of removal.
Visitor comments