Contents: Removal ↳ Installation ↳
Removal
Disconnect the negative (-) cable from the battery.
Warning! This will erase data in electronic memory devices, such as the engine fault memory device or the radio code. Please read the section carefully "Removing and installing the battery", before disconnecting it.
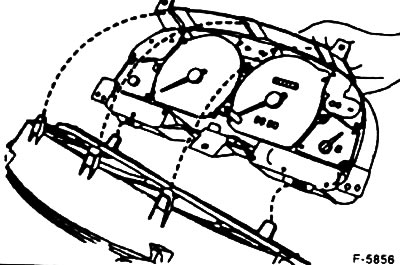
Remove the instrument panel.
Caution: To avoid damage or contamination of the instruments, indicators and their indications, place the instrument panel on clean paper or a soft, lint-free cloth.
Remove all bulbs from the instrument panel. To do this, turn the bulb sockets counterclockwise from the back of the housing.
Remove the protective washers, marking the position of the five locking tabs with a felt-tip pen.

Tighten the positions of the holder's fixing clamps to facilitate installation. Remove the holder.
Unscrew the three speedometer mounting screws at the front and remove the instrument.
Unscrew the tachometer. To do this, unscrew one screw on the left side of the device.
Remove one coolant temperature gauge screw and remove the gauge.
Unscrew one screw of the fuel gauge and remove the gauge.
Push or pull the pin connectors.
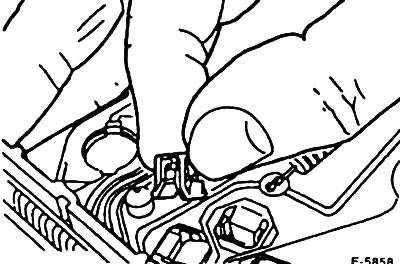
Remove the two protective elements of the multi-pin connector from the contact board. To do this, press out the spacer pins with a flat screwdriver, see the figure.
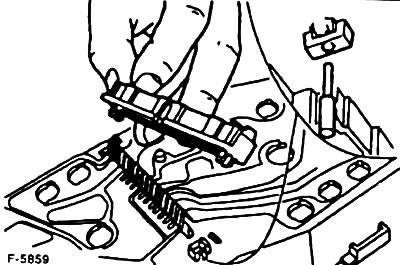
Carefully lift the contact board. Try not to damage the contact board or its components.
Installation
Carefully place the contact board.
Install the multi-pin connector protective shells and secure with spacer pins, see the "Removal" section.
Install and secure the devices in the reverse order of their removal.
Install the terminal holder according to the positions recorded during disassembly.
Carefully install the protective washers.
Insert the bulbs into the instrument panel and secure by turning them to the right.
Mount the instrument panel.
Connect the battery ground wire.
Set the clock to the current time.
Set the anti-theft code for the radio.
The text of the article was copied from the website: fordbook