Withdrawal
Remove shock absorber see point 12.2.
Attention! To remove the shock absorber, you must first compress the spring with a compression tool.
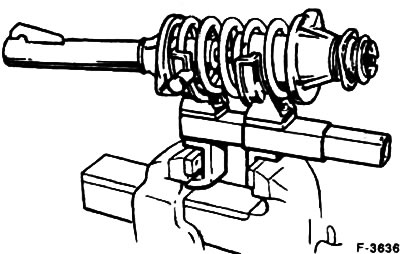
Secure the spring compressor in a vise.
Install the shock absorber strut into the fixture and slowly compress the spring until the top spring seat is unloaded.
Attention! If a standard fixture is used that catches the coils of the spring, make sure that the coils of the spring are well covered so that the spring cannot come off the fixture. Compress the spring from three opposite sides. The spring is compressed with great force, so use only a serviceable fixture. Never compress the spring with wire. Risk of injury!
Attention! Loosen the spring stop nut only when the spring is pre-compressed.
Loosen the spring stop nut.
Remove the stop cover.
Remove the stop and the upper spring plate.
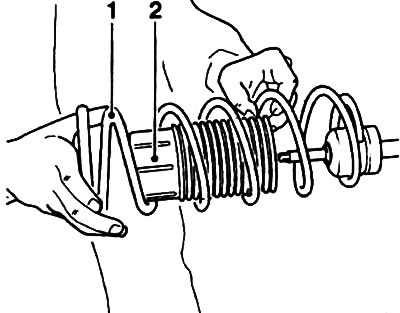
If only the spring needs to be replaced, slowly loosen the spring -1- and remove the bellows -2-. If only the shock absorber needs to be replaced, leave the spring compressed.
Remove the rubber buffer from the shock absorber rod.
Installation
Check shock absorber before installing see point 11.4.
If necessary, compress the spring again.
Attention! When buying a new spring, please note that they have different thicknesses depending on the car model.
Slide a rubber compression buffer over the shock absorber rod.
Install the dust collar.
Insert the shock absorber into the spring. Pay attention to the correct location of the spring in the stamping of the lower plate.
Install the upper spring plate so that the end of the spring is correctly positioned in the plate punching.
Put on the stop and stop cover. Tighten the nut with a torque of 50 Nm.
Slowly loosen the spring, making sure that the end of the spring and stop are properly seated in the spring seat mold.
Install the shock absorber see point 12.2.
Visitor comments