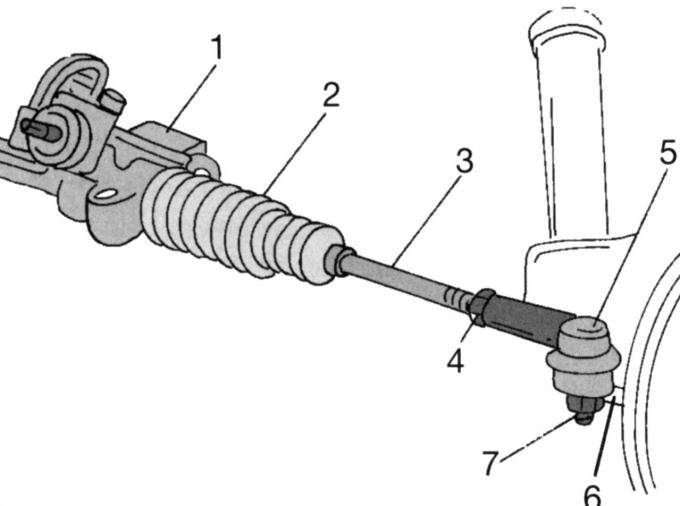
Fig. 241. Fastening the transverse tie rod to the steering gear and transverse tie rod arm: 1 — steering gear; 2 - cuff; 3 — lock nut; 4 — tie rod end; 5 — transverse steering rod arm
The tie rod joint is located between the tie rod and the tie rod arm of the hub (Fig. 241). Whereas previously slotted nuts with cotter pins were used to secure the tie rod joint, self-locking nuts are now used. A self-lubricating plastic insert envelops the steel ball head, and the cuff protects it from dirt and moisture. Tie rod ends with a damaged cuff or gap must be replaced immediately. Check as follows:
- check the tie rod joint seals for cracks;
- check if the joint has a gap, to check it is better to put the car on an inspection ditch;
- ask an assistant to briefly turn the steering wheel several times to the right and left, while doing this you will feel whether there is air in the joint of the transverse steering rod.
Note: Perform steering work very carefully and thoroughly - road safety depends on it.
Note: If cracks or damage are found on one of the cuffs, it can be replaced without removing the entire steering system, the same applies to a worn tie rod end.
Replace the tie rod joint cuff as follows:
- place the car on stands and remove the wheel;
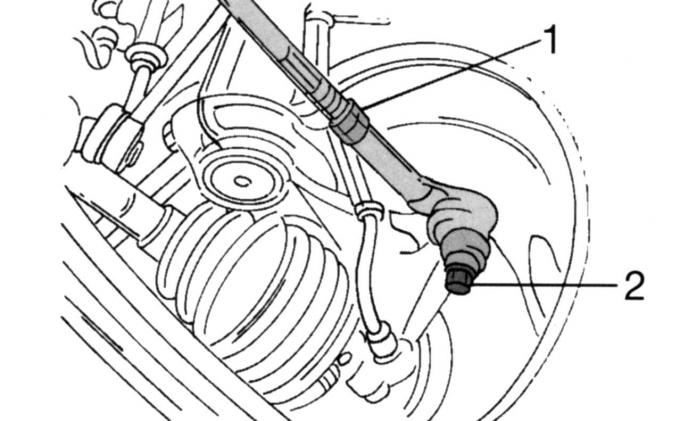
Fig. 242. Removing the transverse steering rod: 1 — lock nut; 2 - nut
- loosen lock nut 1 (Fig. 242) of the end on the cross rod;
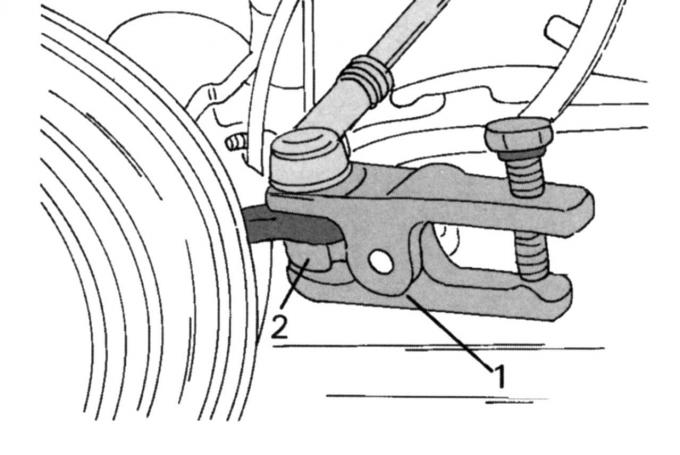
Fig. 236. Tie rod end remover
- unscrew nut 2 to the end of the thread and use a puller to push the joint away from the steering lever (see Fig. 236);
- unscrew the tip from the cross rod, counting the number of turns; write it down;
- unscrew the lock nut from the tie rod if it is necessary to replace the cuff;
- release the cuff from the transverse rod and steering mechanism, using a protective fastener on the outside and a plastic pressure tape on the inside;
- remove the ventilation pipe from the cuff and remove it from the cross rod;
- thoroughly clean all parts;
- insert a new cuff onto the cross rod and connect the ventilation pipe;
- use new parts to secure the cuff from the outside and inside;
- screw the tip to the required number of turns and in this position slightly tighten the lock nut without tightening it completely;
- connect the tip to the steering arm (do not lubricate the pin from the ball joint, replace the nut) and tighten the nut to a torque of 37 N·m;
- lower the vehicle onto its wheels (tighten the wheel nuts to 85 Nm) and check the wheel alignment as described in the section "Front suspension";
- tighten the lock nut of the transverse steering rod from the inside with a torque of 41 Nm.