WARNING: Before replacing bulbs in vehicle lighting devices, disconnect the cable from the negative terminal of the battery.
For replacement headlight bulbs perform the following operations.
NOTE: Shown is replacing the left headlight bulbs of a conventional type. The bulbs in the right headlight are arranged symmetrically and are replaced in the same way. The bulbs in the other two headlight types are replaced in the same way.
For clarity, the replacement is shown on a removed headlight.
1. Open the hood.
2. Disconnect the wire from the negative terminal of the battery.
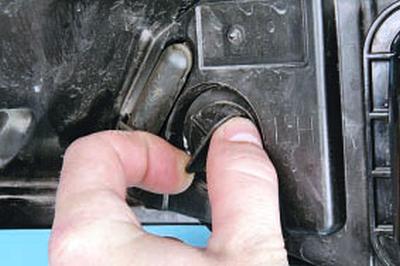
3. Turn the turn signal bulb socket counterclockwise…
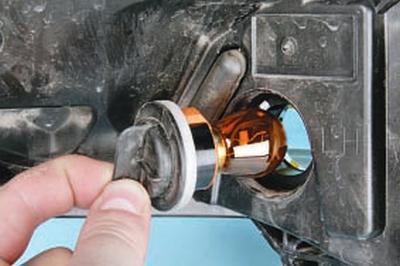
4….and remove it from the headlight unit.
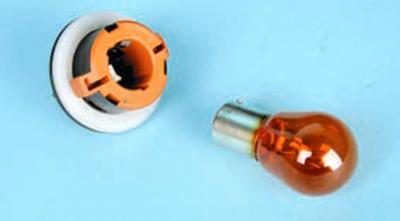
5. Press on the lamp, turn it counterclockwise and remove it from the socket.
6. Install the new bulb into the socket and the socket into the headlight.
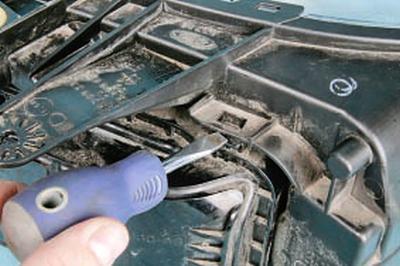
7. Use a screwdriver to press the two headlight cover fasteners…
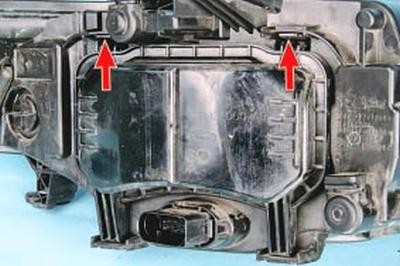
NOTE: This is how the headlight cover retaining clips are located.
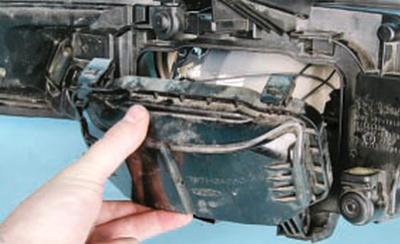
8….and remove the lid.
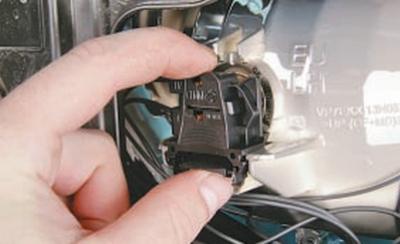
9. Press the low beam lamp wiring harness connector lock…
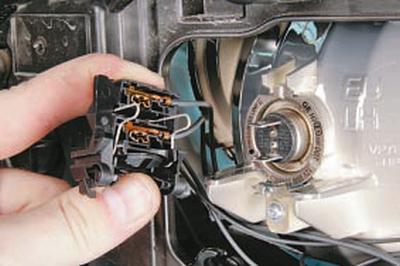
10….and disconnect the socket from the lamp socket.
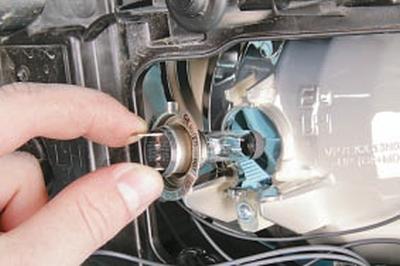
11. Remove the low beam bulb from the headlight reflector.
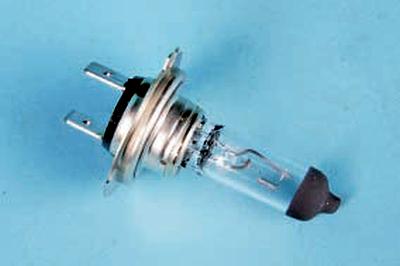
WARNING: Do not touch the bulb with your fingers, as the halogen bulb gets very hot and greasy stains on it will cause the bulb to darken. Handle the bulb only with clean gloves or a clean cloth. If there are still greasy stains on the bulb, remove them with alcohol.
12. Insert the new low beam bulb into the reflector and secure it by installing the wiring harness connector.
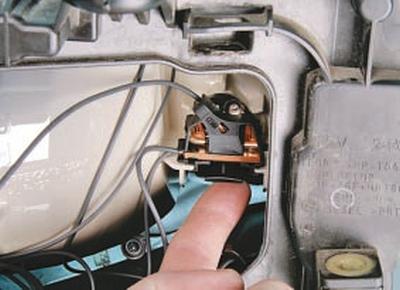
13. Press the high beam lamp wiring harness connector lock…
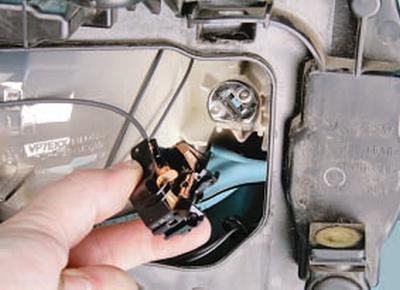
14….and disconnect the block from the lamp socket.
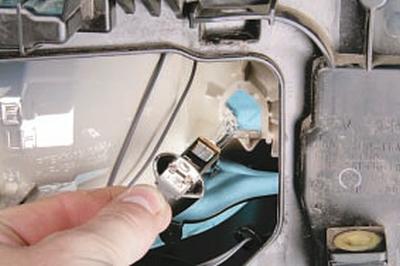
15. Remove the high beam bulb from the headlight reflector.
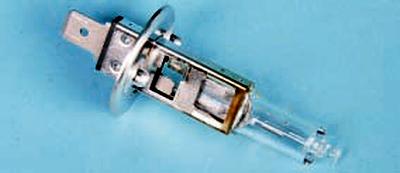
WARNING: Do not touch the bulb with your fingers, as the halogen bulb gets very hot and greasy stains on it will cause the bulb to darken. Handle the bulb only with clean gloves or a clean cloth. If there are still greasy stains on the bulb, remove them with alcohol.
16. Insert the new high beam bulb into the reflector and secure it by installing the wiring harness connector.
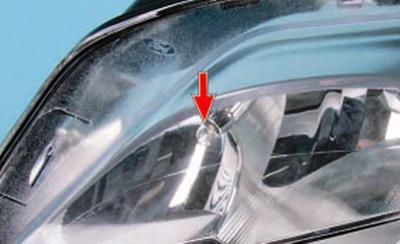
17. The baseless parking light bulb is installed in a socket, which in turn is installed with tension in the headlight reflector. Remove the bulb socket from the reflector hole, remove the bulb from the socket, insert a new bulb into the socket and install the socket into the headlight reflector.
For replacement side turn signal lamps perform the following operations.
1. Disconnect the wire from the negative terminal of the battery.
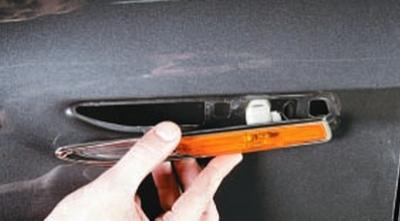
2. Remove the side turn signal lamp from the hole in the wing, overcoming the resistance of its spring retainer.
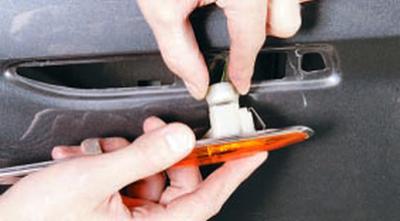
3. Rotate the lamp holder in any direction by 90°…
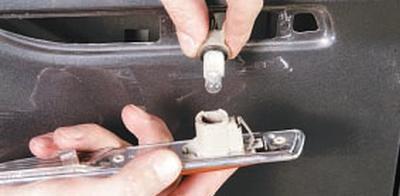
4….remove the socket from the side turn signal light housing…
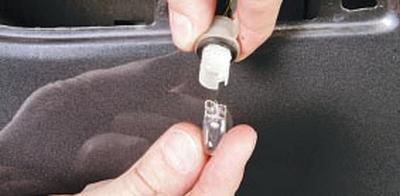
5….and remove the lamp from the socket.
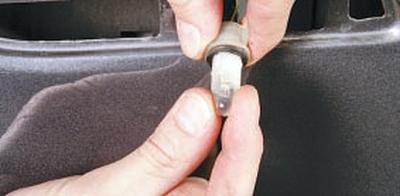
6. Insert the new bulb into the socket and the socket into the indicator lamp housing.
7. Install the side turn signal lamp in the reverse order of removal.
To replace any lamps in the rear light on the body, perform the following operations.
1. Disconnect the wire from the negative terminal of the battery.
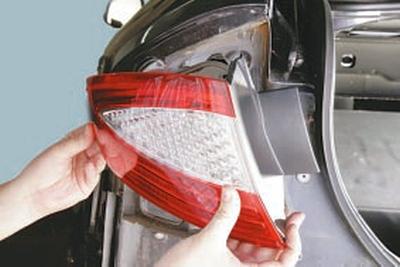
2. Remove the rear light from the body (see Replacing the rear light).
NOTE: It is necessary to remove the light because when the light is installed there is no access to the lamp board.
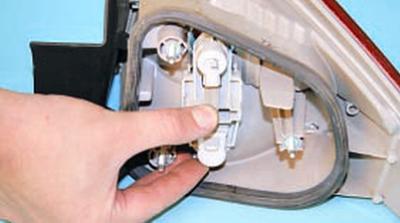
3. Squeeze the lamp board clips…
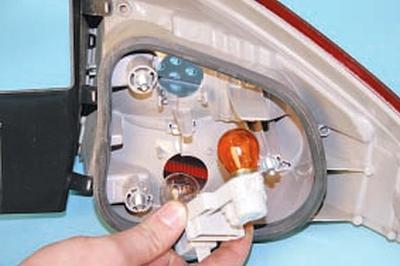
4….and remove the board from the flashlight housing.
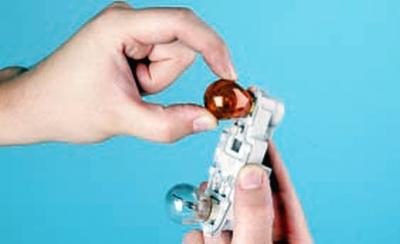
5. Press the turn signal lamp…

6….turn it counterclockwise…
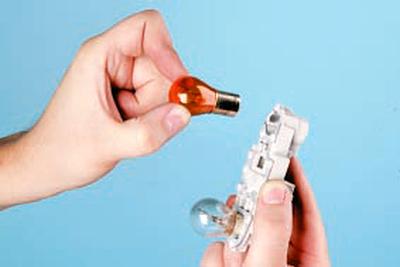
7….and remove it from the board.
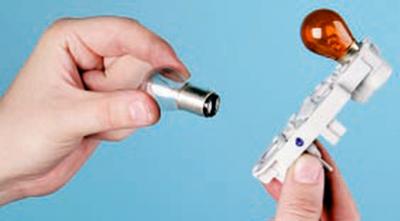
8. Remove the parking light/brake light bulb in the same way.
9. Install the new bulb by turning it clockwise until it locks into place in the socket.
10. Install the rear light.
For replacement lamps in the rear light on the trunk lidperform the following operations.
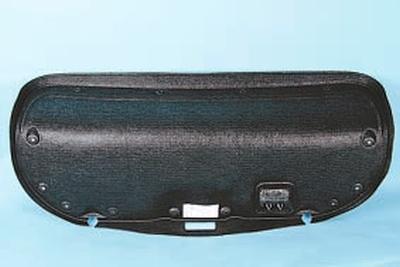
1. Remove the trunk lid trim by unscrewing the holes in the lid reinforcement and the trim fastening holders.
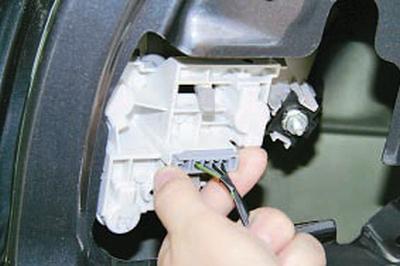
2. Squeeze the wiring harness connector clips…
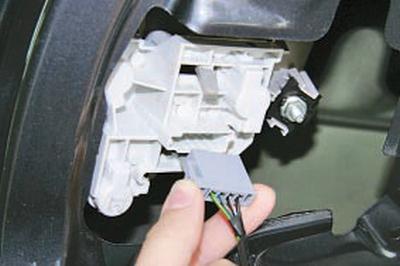
3….and disconnect the block from the light.
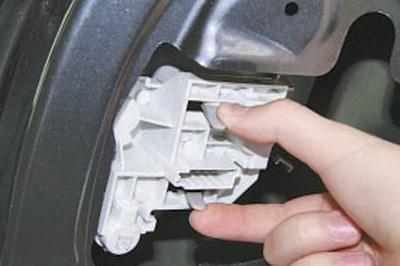
4. Squeeze the lamp board clips…
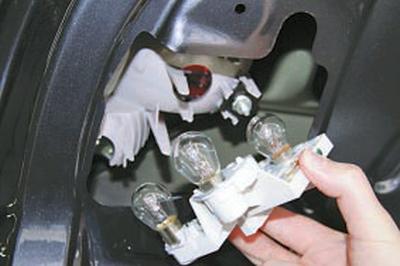
5….and remove the board from the flashlight housing.
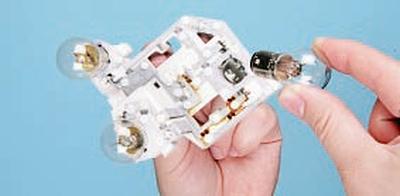
6. Press the lamp, turn it counterclockwise and remove it from the board.
7. Install the new bulb by turning it clockwise until it locks into place in the socket.
8. Replace the remaining lamps in the same way.
9. Install the trunk lid trim.
For replacement fog light bulbs perform the following operations.
1. Disconnect the wire from the negative terminal of the battery.
2. Remove the front wheel arch liner on the side of the fog lamp bulb being replaced (see Removing and installing wheel mudguards and fender liners).
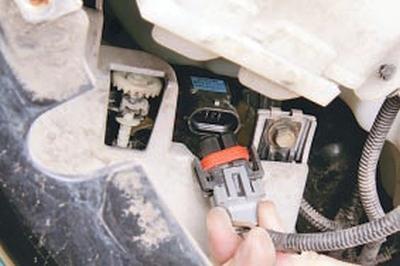
3. Disconnect the wiring harness connector from the lamp terminals by squeezing its mounting clamp.
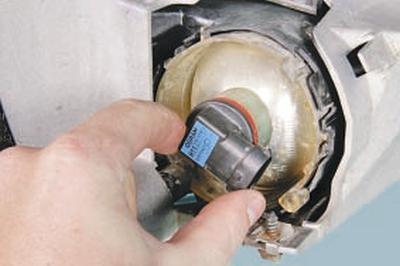
4. Turn the lamp base counterclockwise approximately 30°…
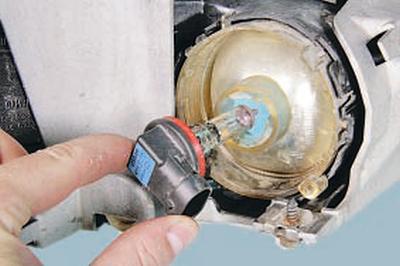
5….and remove the bulb from the fog light.
WARNING: Do not touch the bulb with your fingers, as the halogen bulb gets very hot and greasy stains on it will cause the bulb to darken. Handle the bulb only with clean gloves or a clean cloth. If greasy stains still remain on the bulb, remove them with alcohol.
6. Install the new bulb into the fog light in the reverse order of removal.
For replacement lamps in license plate lights perform the following operations.
1. Disconnect the wire from the negative terminal of the battery.
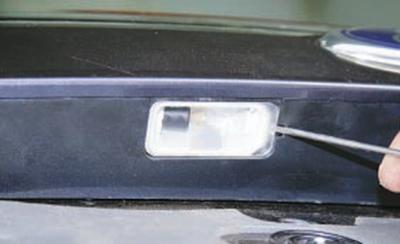
2. Using a screwdriver, press the spring clip of the license plate light…
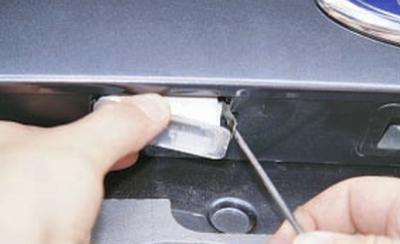
3….remove the light from the socket in the trunk lid trim (tailgate).
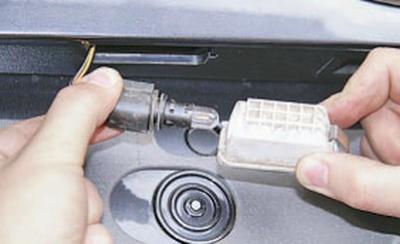
4. Remove the socket together with the lamp from the flashlight, overcoming the elastic resistance of its retainer…
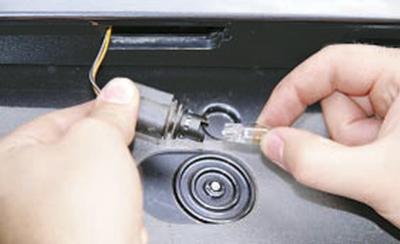
5….and remove the baseless lamp from the socket.
6. Install the new lamp in the reverse order of removal.
7. Replace the bulb in the remaining license plate lights in the same way.
For replacement lamps in the interior light shade do the following.
1. Disconnect the wire from the negative terminal of the battery.
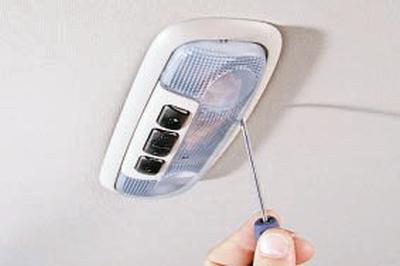
2. Pry up the diffuser with a screwdriver…
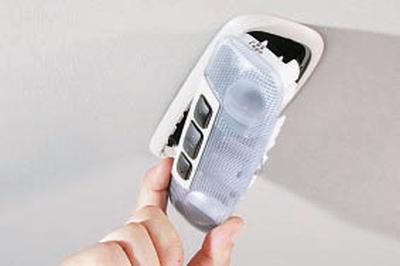
3….and remove it from the frame, overcoming the resistance of the clamps.
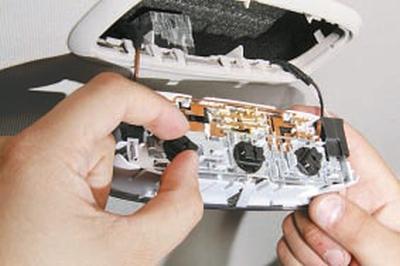
4. Turn the lamp base clockwise approximately 30°…
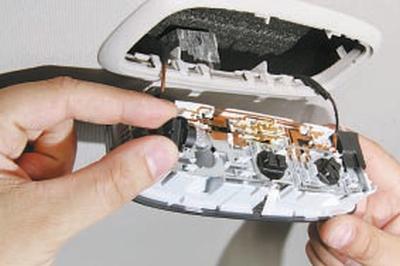
5….and remove the lamp from the flashlight housing.
6. Install the new lamp in the reverse order of removal.
7. Replace the remaining lamps in the ceiling in the same way.
For replacement lamps in additional brake light do the following.
1. Disconnect the wire from the negative terminal of the battery.
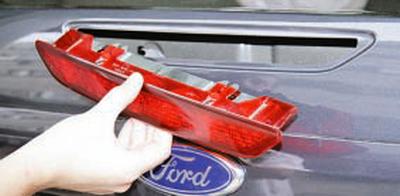
2. Remove the additional brake light (see Replacing an additional brake light).
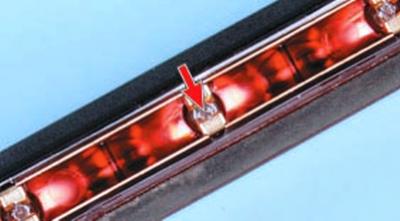
3. Remove the baseless lamp from the common lamp bus, overcoming the elastic resistance of the bus holders.
4. Install the new lamp in the reverse order of removal.
5. Replace the remaining additional brake light bulbs in the same manner.
(Content was created using data from this website: fordbook)