Contents: Front lights ↳ Interior lighting ↳
Front lights
1. On these models, the front lamps are located in a common housing to combine different lights.
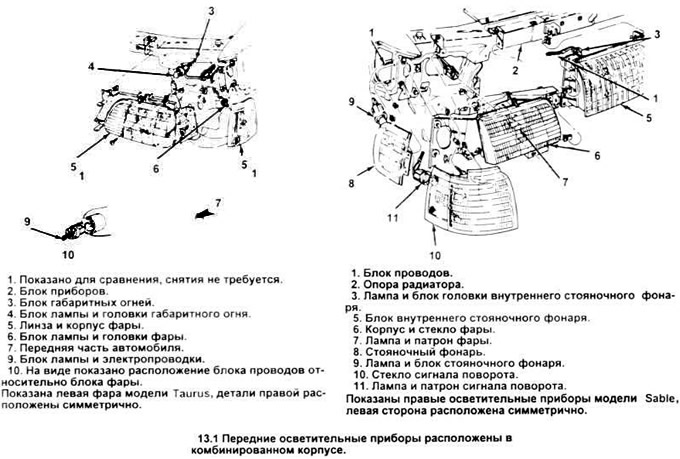
Parking signal/turn signal in Taurus model
2. Through a special opening in the radiator support, turn the lamp holder unit counterclockwise and disconnect it from the housing (see Figure 13.1).
3. Press the pump inward and turn it counterclockwise to remove it from the socket. Insert the new lamp and turn it clockwise to secure it.
4. Install the socket and lamp into the housing.
Parking light/turn signal for Sable model
5. Unscrew the two locking screws and pull out the parking light assembly (see Figure 13.1).
6. Grasp the bulb holder and twist it to remove it.
7. Remove the bulb from the socket and then install a new bulb.
8. Place the chuck back in place and turn it to secure it.
9. Install the light signal and screws.
Front marker lights for Taurus
10. Unscrew the nut and remove the washer from the attached stud located on top of the housing, turn the top of the housing outward until the tip of the stud comes out of the groove in the housing (see Figure 13.1).
11. Lift the light up to release the tabs on the housing and remove it.
12. To remove the lamp head, turn it counterclockwise. To replace the lamp, pull the old one out of the head and press the new one into its place.
13. Install the lamp head, lower the lamp to the tongues.
Sable model turn signal
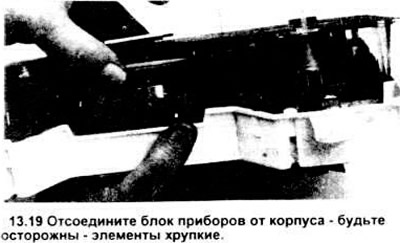
14. Remove the parking light and bulb as described in paragraphs 5 and b, then unscrew the two retaining screws and pull out the turn signal light.
15. When replacing a lamp, remove the old one from the head and press down to install the new one in its place.
16. Install the turn signal in place, tighten the locking screws.
17. Install the parking light.
Interior lighting
Instrument cluster lamps
18. Remove the instrument cluster (section 17).
19. Disconnect the instrument cluster frame from its housing (see figure).
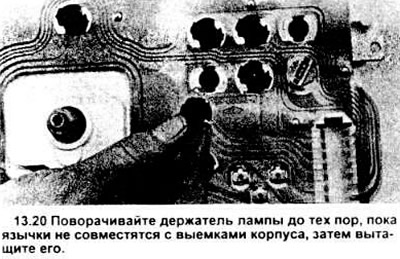
20. The instrument cluster bulbs can be removed after turning the holders and pulling them out (see figure). Pull the replacement bulb out of the holder and press in to install the new one in its place.
Inspection mirror illumination
21. Lower the mirrors down and use a small screwdriver to remove the glass (see figure).
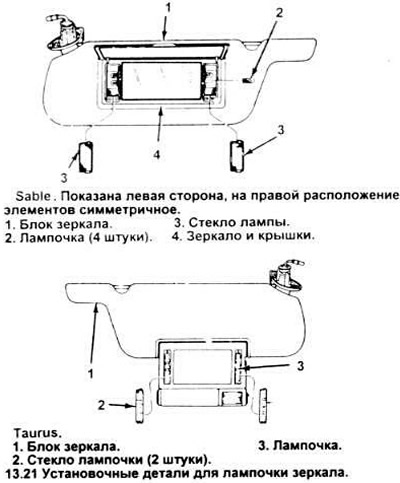
22. Grasp the pump and pull it out. Press down to install a new pump and insert the glass into place.
Glove compartment lighting
23. Open the glove compartment, grasp the bulb with your thumb and index finger and remove it from the socket (see figure).
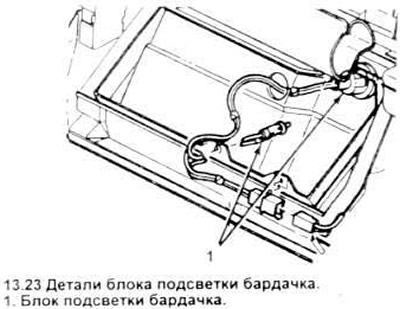
24. Press to install the new lamp.
Backlight of the inner cover of the watch
25. Using a screwdriver, pry up the glass cover lock tabs and push them away.
26. Release the lamp by grasping it firmly and pulling it out of the unit.
27. Press the new lamp into place and then the glass.
Clock/map backlight
28 Hook and press the glass tongue, remove the glass.
29. Unscrew the locking screws, lower the map clock backlight unit. Replace the pumps, starting with the last one in the unit.
30. Replace the backlight unit and glass of the upper brake light signal.
Sedan
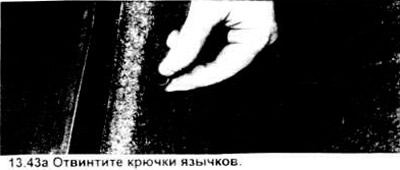
31. After hooking, remove the covers, unscrew the two locking screws and remove the light signal cover from the bracket.
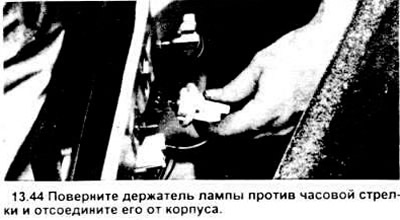
32. Remove the light assembly by pulling it up and back away from the front of the vehicle.
33. Unscrew the pump by turning it counterclockwise.
34. Install the new lamp, backlight unit and cover.
Station wagon
35. Using a small screwdriver, pry the trim panel out of the tailgate frame.
36. Unscrew the four cover nuts.
37. Push the light assembly out from the outside of the vehicle.
38. Push out the wire sealing ring, disconnect the wiring connector and disconnect the connecting clamp from the truck body.
39. Remove the old lamp from the head and press in the new one.
40. Connect the lighting wiring and install the locator on the truck bed.
41. Install the light block and cover.
Illumination of brake lights, tail light and license plate
Sedan
42. Open the trunk.
43. Remove the rear trunk panel (see figure).

44. Turn the lamp holders counterclockwise to remove them (see figure).
45. Turn the lamps counterclockwise to unscrew them from the holders.
46. Perform installation in reverse order.
Station wagon
47. Unscrew the screws and nuts of the parking light unit to gain access to the bulbs (see figure).

48. Grasp the bulb and pull it out of the socket.
49. Press the new bulb into the head and install the entire lighting unit.
License plate light
50. Remove the backlight unit, grab the lamp and pull it out of the socket (see figure).
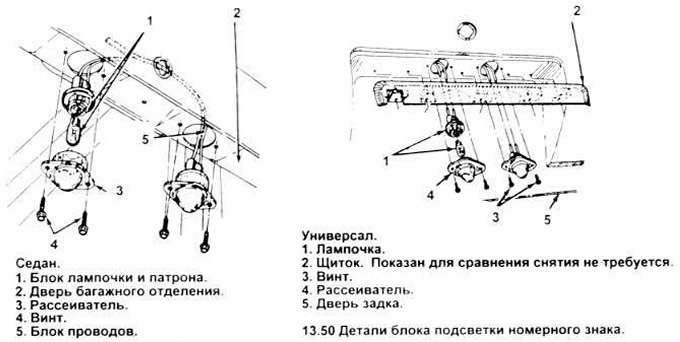
51. Press the new bulb into the socket and install the lighting unit.
The original article is posted at (FordBook.ru)