Radio
1. Disconnect the negative battery cable.
2. Remove the central decorative panel of the instrument panel (chapter 11).
3. Unscrew the locking screws (see figure).
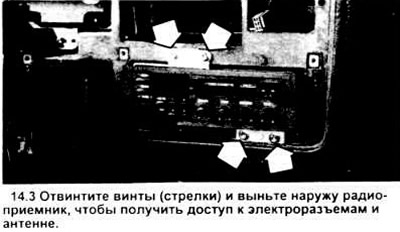
4. Remove the radio unit from the dashboard, disconnect the antenna and electrical connectors, and remove it from the vehicle.
5. Perform installation in reverse order.
Columns in the dashboard
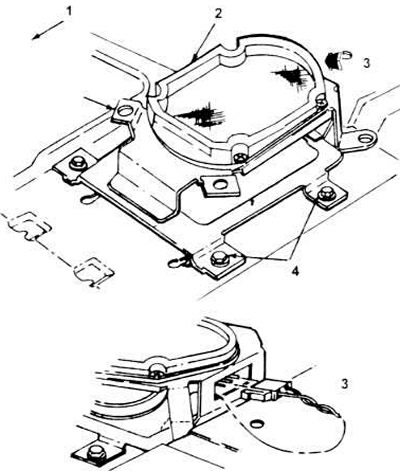
6. Remove the column cover.
7. Unscrew the fixing screws and pull out the speaker (see figure). Disconnect the electrical connector and remove the speaker.
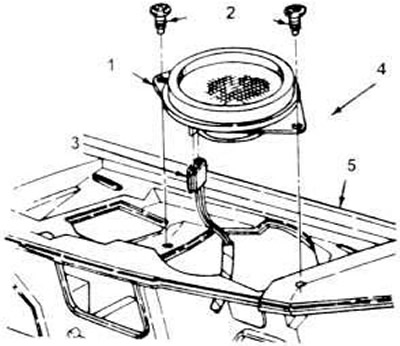
14.7. Fasteners for columns in the dashboard.
1. Speaker unit (2 pieces).
2. Screw.
3. Wire block.
4. Front of the car.
5. Instrument panel.
8. Perform installation in reverse order.
Speakers in the door
9. Remove the decorative door panel (chapter 11). Unscrew the mounting screws, disconnect the speaker, pull out the electrical connector and remove the speaker from the vehicle (see figure).
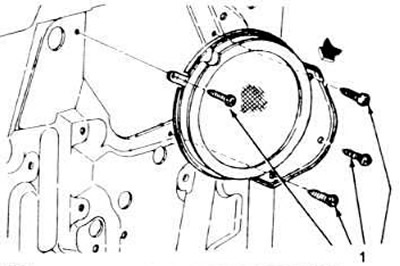
14.9. Details of the column mounted in the door.
1. Screw.
10. Perform installation in reverse order.
Rear speaker
Sedan (standard version)
11. Open the trunk lid.
12. From inside the luggage compartment, disconnect the electrical wiring from the column (see figure).
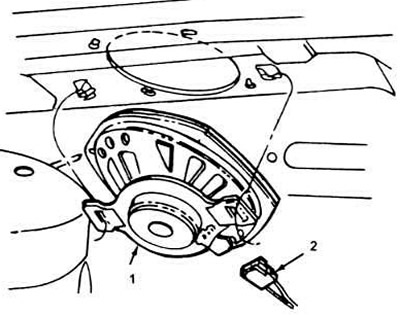
14.12. In the standard version of the sedan body, the rear speakers are mounted in the tray and held in place by a bracket.
1. Column assembly and its support bracket, 1 piece on each side.
2. Wire block.
13. Pull one end of the column support bracket to disengage it from the tab on the tray and remove the column.
14. To install, place the bracket and column in place so that one end of the bracket is over the tongue of the tray. Press down on the opposite end of the bracket until it is also positioned over the other tongue of the retaining device.
Sedan (optional)
15. Remove the speakers from the tray.
16. Unscrew the fixing screws, lift the column up, disconnect the electrical connector. Remove the column (see figure).
14.16. In the standard sedan body, the rear speaker column is secured with screws.
1. To the front of the car.
2. Column and bracket.
3. View A.
4. Screw.
17. Perform installation in reverse order.
Station wagon
18. Remove the rear upper corner trim panel.
19. Unscrew the three locking screws (see figure).

14.19. Fastening details of the rear loudspeaker speaker in the station wagon body.
1. To the front of the car.
2. Column and plate.
3. Screw.
4. The right side is shown, the left side is similar.
20. Disconnect the speaker wires and pull the end of the speaker bracket out from under the ceiling.
21. Perform installation in reverse order.
(The original version can be found on the website: «www.FordBook.ru»)