Note: Special tools are required to remove the radio.
Coding
1. If the vehicle is equipped with an audio unit with a special code, then if the unit and/or battery are disconnected, the unit will stop functioning after it is reconnected until the appropriate code is entered. Detailed information on this, depending on the unit and year of manufacture, is provided in the Ford Audio Systems Manual, which is supplied with the new vehicle, and the code itself is written in the radio registration document and/or code label. Before disconnecting the battery, make sure that you have the necessary code.
2. For safety reasons, this procedure is not described in this manual. If you do not have the code or procedure description, but you can prove your ownership and have legitimate reasons for obtaining this information, please contact your dealers who can help you.
3. Please note that code-protected blocks allow no more than ten attempts to enter the code. If the first three consecutive attempts to enter the code are unsuccessful, you must wait a pause (30 minutes) before making the next attempt. Each subsequent attempt can only be made after the same pause.
Removal
4. Disconnect the negative battery cable.
5. Remove the cover/trimming (if applicable) from the front of the audio unit. Note that the cover is not installed on all models.
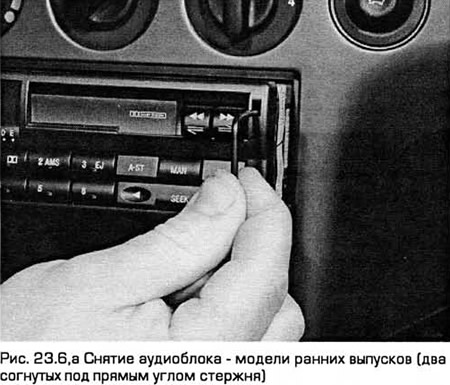
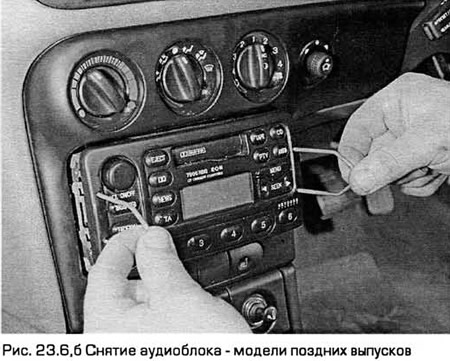
6. On models without a global orientation system, to release the audio unit from the clamps, you will need two rods bent at a right angle. They must be inserted into special holes located on each side of the unit (see Fig. 23.6, a, b). It is recommended to purchase such rods in a store.
7. On models with the global orientation system, to release the audio unit from the clamps, you will need two special keys - left and right, purchased from dealers.
8. Remove the unit from the opening without tilting it. If the unit is difficult to remove, remove the cassette tray or CD player (if applicable) from the bottom of the unit. Then pull the unit out from the rear.
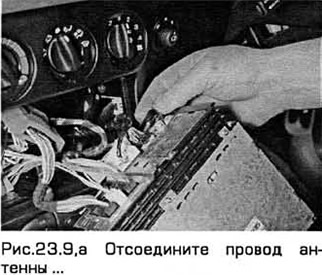
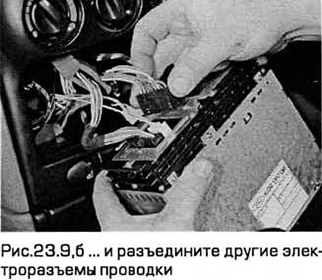
9. After the radio receiver has partially exited the opening, disconnect the power, ground, antenna and speaker wires (see Fig. 23.9, a, b). Disconnect and remove (if present) the plastic support bracket from the rear of the unit.
Installation
10. Installation - in the reverse order of removal. Connect the wires to the back of the unit and press it into place until the clips click into place. Enter the code according to the manufacturer's instructions.
[This article was borrowed from the website: Fordbook.ru]