- Place the car approximately 10 m from the garage door or a wall that can be used as a screen;
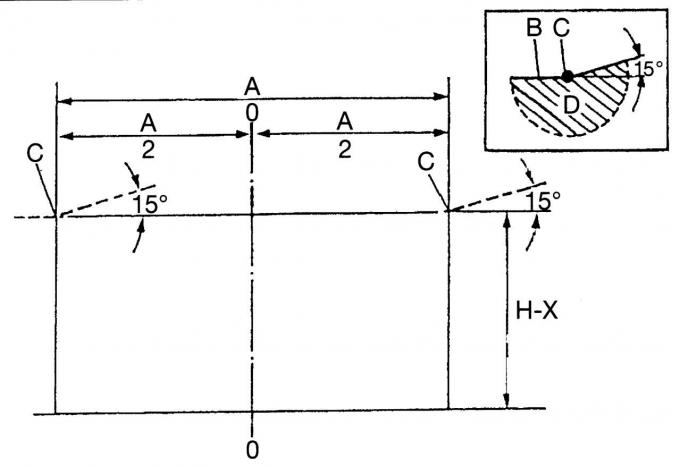
Fig. 298. Headlight adjustment diagram: A — distance between headlight centers; B - light and shadow boundary; C - headlight center, low beam; D - sample light pattern, low beam; H — height from the ground to the center of the headlight; X = 12 cm (for all models)
- the adjustment diagram shown in Fig. 298 is applied to the wall or door of the garage, while the corresponding dimensions are taken from the headlight, namely: the central point, the height of the headlight, etc;
- swing the suspension of the front and rear wheels several times;
- turn on the low beam and close the left headlight with the cover;
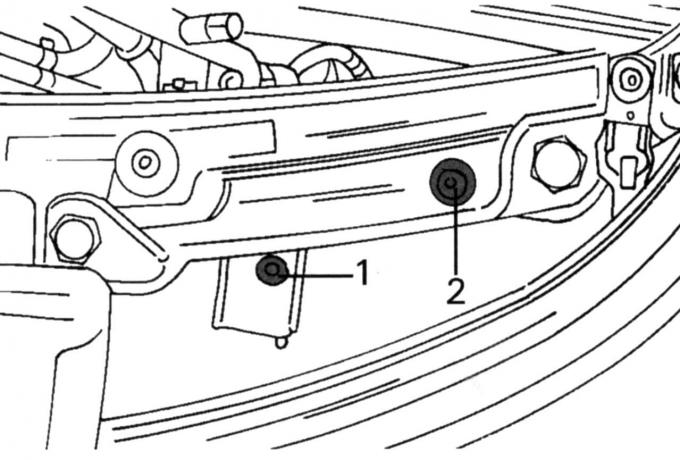
Fig. 299. Position of the two headlight adjustment bolts: 1 — height adjustment bolt; 2 - width adjustment bolt
- adjust the lateral position of the right headlight until the intersection point of the horizontal and inclined lines of sample "C" coincides with the vertical line of the adjustment plane (adjusting bolt 2 is in the place shown in Fig. 299);
- adjust the beams in height so that the light and shadow boundary on sample "B" coincides with the dashed line (adjusting bolt 1 is on the opposite side);
- adjust the other headlight in the same way.