Contents: Replacing brushes ↳ Replacing the solenoid ↳
Note: You should already have spare brushes before beginning this procedure. At the time of writing, alternator components were not available as spare parts. However, parts such as brushes can be purchased from auto electricians.
Note: The procedure below is for a Lucas/Magneti Marelli starter. The procedure is similar for a Bosch starter.
1. Remove the starter (paragraph 9) (see Fig. 10.1).
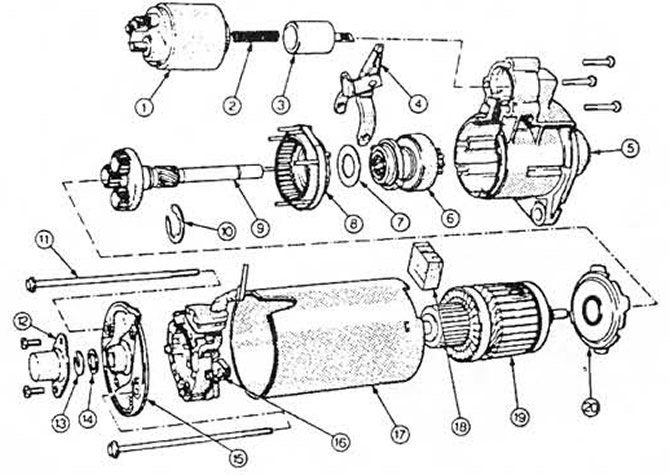 Fig. 10.1. Bosch DW starter (view with parts extended)
1. Solenoid
2. Spring
3. Plunger
4. Power lever
5. Drive end cover
6. Drive gear and clutch
7. Distance washer
8. Housing and gear with internal teeth
9. Output shaft with planetary gear unit
10. Elastic ring
11. Screw
12. End cap
13. Retaining ring
14. Adjusting washer
15. Collector body
16. Brush holder
17. Clip
18. Rotor
20 Locking disc
Replacing brushes
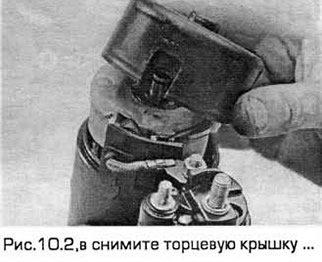
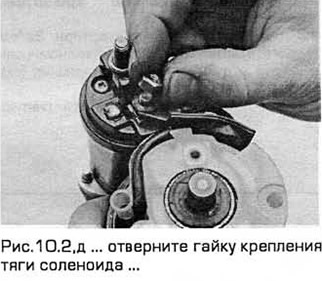
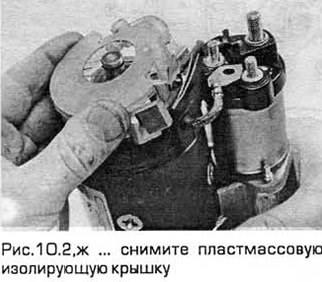
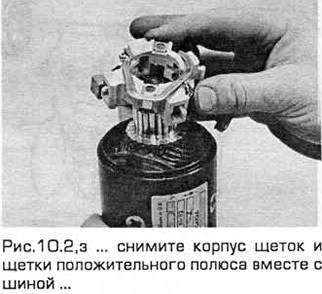
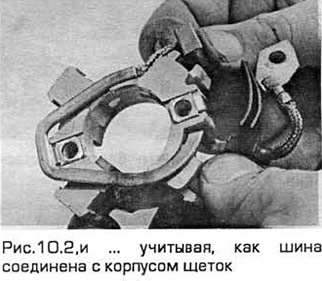
2. Remove the brushes (see Fig. 17.2, a-i).

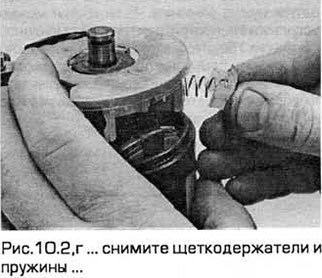
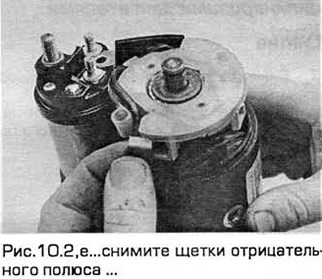
3. Sometimes the brushes have a wear limit mark in the form of a groove etched and located along the face of the brush. When the brushes are worn down to these marks, they must be replaced. If the brushes do not have marks, measure the height of each brush and compare the readings with the specified value. If any of the brushes are worn down to the limit, the entire set of brushes must be replaced. If the brushes are usable, wipe them with a rag soaked in gasoline. Make sure that the brushes are pressed securely and with equal force by the springs to the commutator. If you doubt the serviceability of the brushes and springs, compare them with new components.
4. Clean the manifold with a rag soaked in gasoline. Then check it for scoring, burning, excessive or point wear. If wear or damage is found, the manifold should be shown to an auto electrician.
5. Installation - in the reverse order of removal.
Replacing the solenoid
6. Remove the nut, paying attention to the lock washer(s). Disconnect the engine bus from the solenoid terminal.
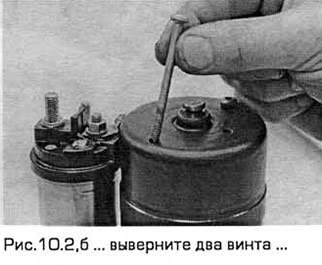
7. Remove the two bolts securing the solenoid to the end cover of the electric motor.
8. Release the solenoid plunger from the starter lever. Then remove the solenoid, paying attention to the springs.
9. Installation - in the reverse order of removal. Thoroughly clean the solenoid, its plunger and the mating surfaces of the electric motor/solenoid. Lubricate the plunger/starter lever with grease.
For more information, please visit the website FORDBOOK.RU