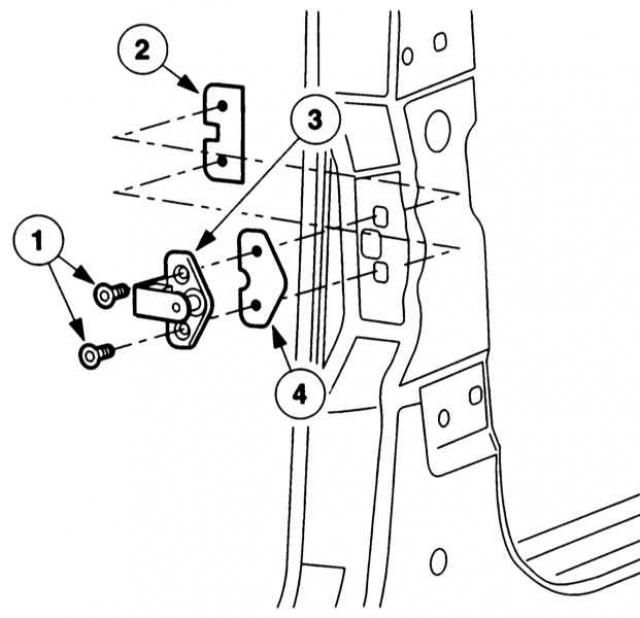
Axial adjustment with spacer washer: wedges for locking
Since these jobs are almost identical with all doors, we will consider the driver's door as an example here. Mondeo doors are hung almost as easily as interior doors - you only need to separate the hinges. When removing the door, be careful and cautious so as not to damage its paintwork. After emergency repairs or installation of used spare parts, you just need to adjust the size of the door gap according to the oversized hinge holes. Finally, adjust the gaps along the entire perimeter of the door opening vertically and horizontally, the axial gap is adjusted using a spacer washer.


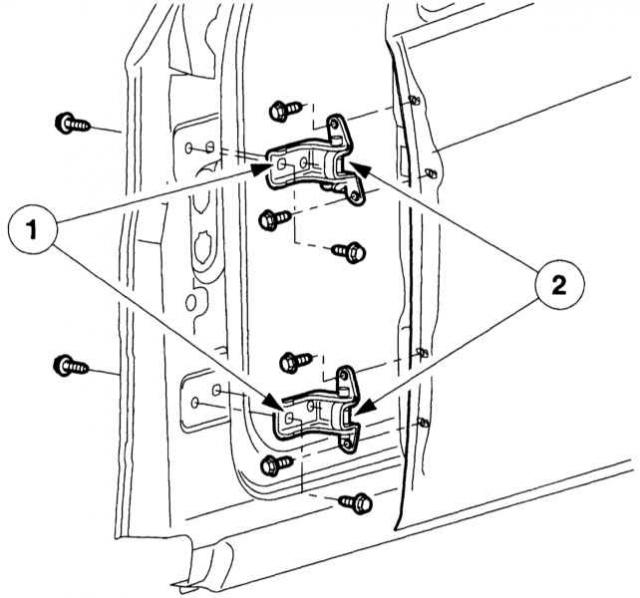
All door hinges are two-piece and are generally screwed to the door and the front and middle pillars with four screws. A separate bolt connects the two halves of the hinge. The screw holes in the halves have an allowance, so you can easily and conveniently match the door gaps.
|
ORDER OF EXECUTION |
- Disconnect the battery.
- Then unscrew the "door catch strip" from the A and B pillars and..
- …in the front door shaft, disconnect the multi-pin connector for the speaker, central locking system and electric window lifter. To do this, turn the connector's thumb screw all the way to the left and then separate the halves.
- Next, remove the safety ring from both hinge bolts.
- Before you remove the hinge bolts from the hinges, have an assistant hold the door.
- Remove the top hinge bolts first, then the bottom hinge bolts. If the bolts are tight, have an assistant lift and lower the door with force – if he does it correctly, this will relieve the "tension" from the bolts.
- Remove the door from its hinges and place it firmly on a proper base.
- Before installation, lightly lubricate the hinge bolts and grip tape. Then…
It consists of two parts and is screwed:
Door hinge. |
- …"hook" the two halves of the loop together and have an assistant insert the loop bolts.
- Before inserting the safety rings into the ring grooves, pay attention to their pre-tension: weak rings can eventually fall out of the groove, and the hinge bolts can, in turn, "go on a trip", and as a result: the door falls "towards them".
- Carry out the assembly in the reverse order. Make sure that the color marking (white dash) of the knurled screw matches the color marking (white dot) of the mating part. Tighten until it stops
|
|
(The original can be found on the specified resource: fordbook)