Attention! Do not use tools that could scratch the parts to be cleaned.
2. To replace the valve lever stud, unscrew the stud with a gas wrench or with a nut and locknut. If the stud does not unscrew when a torque of 35 Nm or less is applied, heat the top of the post with a blowtorch and unscrew the stud. Clean and degrease the threads in the cylinder head. The thread of the new studs has an adhesive coating that sticks together already in the process of screwing the stud, so the stud must be screwed in quickly and in one step.
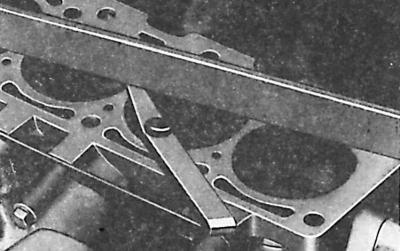
3. Using a ruler, check the flatness of the lower plane of the cylinder head along, across and diagonally. The maximum allowable flatness is 0.15 mm, otherwise it is necessary to regrind the head, while the thickness of the removed layer should not exceed 0.3 mm.
4. After processing the head, check the depth of the combustion chambers, which for engines with a displacement of 1.1 dm3 should be 18.22 mm, and for engines with a displacement of 1.6 dm3 > -19.6 mm.
5. Check the condition of the hydraulic valve lifters.
6. Check the condition of the valve guides.
7. Check the condition of the valve seats.
8. Check the condition of the valve drive levers and the surface of the levers in contact with the ends of the valve stems for wear and the presence of scratches and scratches.
9. Check the condition of the valve springs. Springs must be replaced after 80,000 km of vehicle run.
Checking the valve guides, processing the valve seats in the cylinder head and lapping the valves are described in subsection 3.1.2.2.3.
Visitor comments