Cylinder head
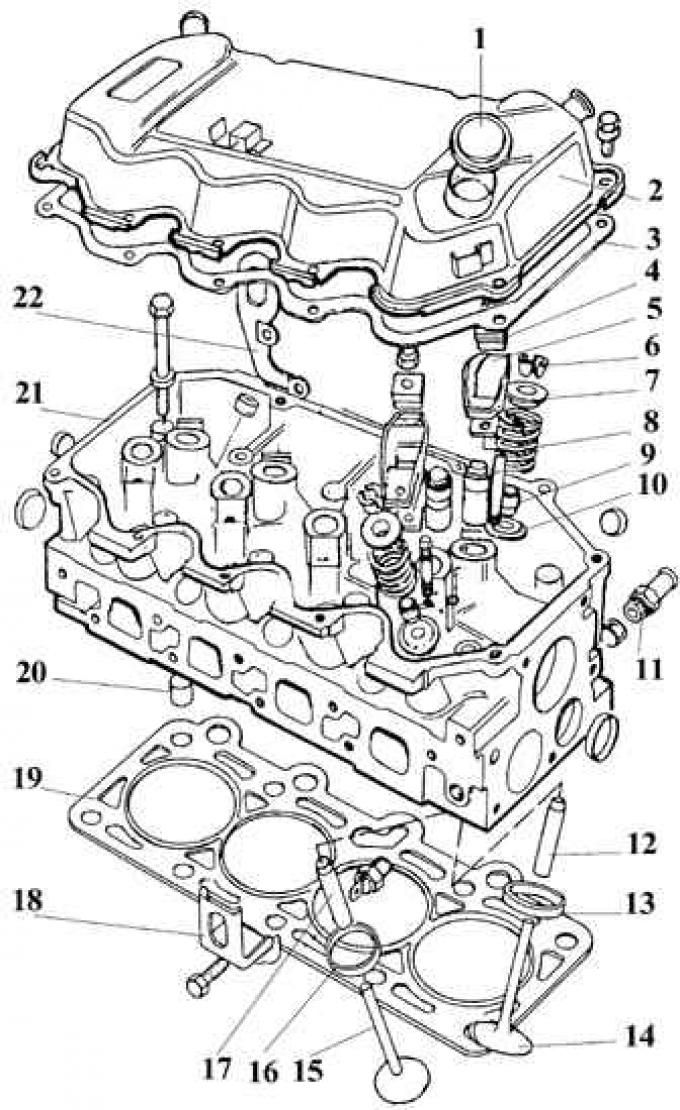
1 - oil filler plug; 2 – a cover of a head of the block of cylinders; 3 - gasket; 4 - guide plate; 5 - lever; 6 - cracker; 7 - top plate; 8 - spring; 9 – oil deflector cap; 10 - lower plate; 11 - branch pipe; 12, 17 - guide sleeve; 13, 16 - valve seat; 14, 15 - valve; 18, 22 - lugs for lifting the engine; 19 – laying of a head of the block of cylinders; 20 - guide pin; 21 - cylinder head
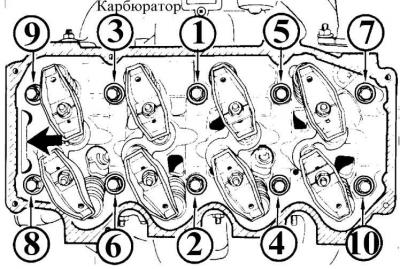
Cylinder head bolt tightening sequence
One of the reasons for removing the cylinder head may be the replacement of the gasket. The presence of defects in the gasket is indicated by a loss of engine power, a decrease in the coolant level with a simultaneous increase in the oil level, as well as the presence of air bubbles in the coolant, which are strongly manifested when the expansion tank cap is removed while the engine is running.
Attention! The cylinder head can only be removed when the engine is cold.
1. Remove ground wire from battery.
2. Remove air filter and disconnect hoses.
3. On engines with a fuel injection system, remove the air hose from the fuel distributor and throttle body, and then disconnect the wires from the fuel start switch, thermostat, cold start valve, metering device, and the ground wire from the retarder valve. Remove the fuel lines from the cold start valve and fuel distributor, and the hose from the retarder valve.
4. Drain the coolant from the cooling system and remove the hoses from the thermostat.
5. Remove the coolant supply hoses to the carburetor automatic choke control.
6. On fuel injected engines, remove the crankcase ventilation hoses from the intake manifold and cylinder head cover, and the coolant hoses from the injection valve flange and thermostat housing.
7. Remove the carburetor throttle cable by first unplugging the spring clip and unscrewing the bracket.
8. Remove the fuel line from the fuel pump.
9. Remove the brake booster hose from the intake manifold.
10. Disconnect the wires from the coolant temperature sensor, the ignition coil and the idle air solenoid valve.
11. In engines with a fuel injection system, remove the wires from the coolant temperature sensor and the ignition distributor.
12. Unscrew the exhaust pipe from the exhaust manifold.
13. Loosen the lower mounting bolts, unscrew the upper alternator tension bolt, tilt the alternator towards the engine and remove the drive belt.
14. Unscrew the 4 bolts securing the toothed belt cover and remove it.
15. On engine models made from 2/82, the timing belt cover consists of two parts. The bottom cover can only be removed after removing the pulley from the crankshaft.
16. Loosen the bolts securing the toothed belt tension roller and use a screwdriver to remove the tension roller from the belt, compressing the spring, and tighten the bolts.
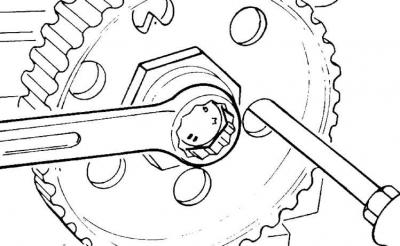
17. Remove the toothed belt from the camshaft pulley, holding the pulley from turning with a rod or screwdriver.
Attention! After removing the belt, it is strictly forbidden to turn the crankshaft and camshaft pulleys, as pistons may collide with open valves, which will lead to serious engine damage.
18. Remove the high voltage wires from the spark plugs and unscrew the spark plugs.
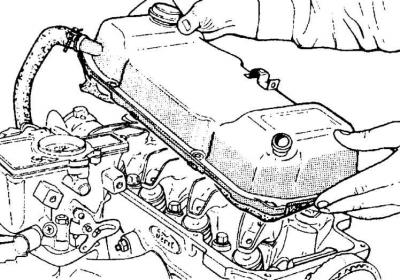
19. Remove the cylinder head cover.
20. Unscrew the cylinder head bolts in the reverse order of their tightening (see fig. Cylinder head bolt tightening sequence).
21. Remove cylinder head with manifolds.
Visitor comments