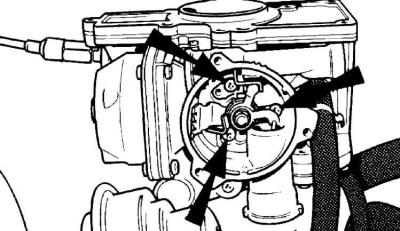
Removing the automatic starting device
Automatic starting device installation marks
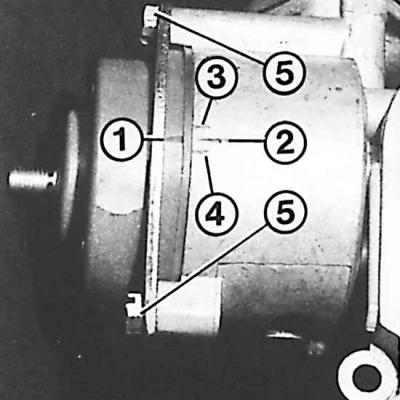
1 - mark on the lid; 2 – normal mixture mark; 3 – enriched mixture; 4 – lean mixture; 5 – mounting screws
The operation of the starting device is based on the control of the control valve by a bimetallic spring. When the engine is cold, the bimetallic spring is compressed and opens the valve, which results in enrichment of the mixture, which is necessary for normal engine operation. When the engine warms up, the bimetallic spring is heated by the coolant, expands and closes the valve.
Removal
1. Remove the ground cable from the battery and the air filter.
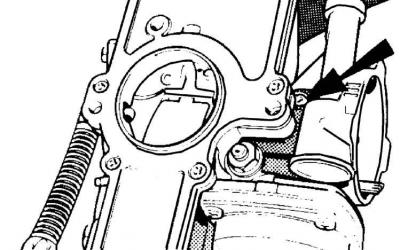
2. When the engine is hot, relieve the pressure in the engine cooling system by carefully unscrewing the cap on the expansion tank.
3. Unscrew the 3 bolts securing the automatic starting device cover and secure it to the engine using wire.
4. Unscrew the 3 bolts securing the automatic starting device to the carburetor.
Installation
1. Install the automatic starting device on the carburetor and secure it with bolts.
2. Check and, if necessary, adjust the starting device.
3. Install the gasket and bimetallic spring into the middle groove of the lever.
4. Install the starter cover without tightening the bolts.
5. Turn the cover to align the mark on the cover with the middle mark on the body. Aligning the mark on the cover with mark 4 on the body leads to a leaner mixture, and aligning with mark 3 leads to a richer mixture (see Fig. Automatic starting device installation marks).
6. Install the air filter and connect the ground wire to the battery.
7. If the engine runs unsteadily during warming up and even stops, align the mark on the cover with mark 4 on the body.
8. When delaying the starter shutdown, align the mark on the cover with mark 3 on the body.
Basic adjustment
1. Unscrew the 3 bolts securing the automatic starting device cover and remove the cover.
2. Turn the drive lever clockwise until the holes in the brass bushing and in the carburetor body are aligned.
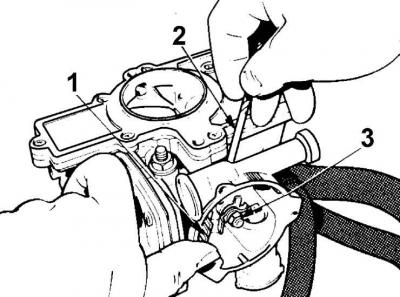
3. Insert a rod (2) of the appropriate diameter into the holes. Loosen the nut securing the drive lever (3), turn the lever (1) clockwise until it stops and tighten the nut.
The text was obtained in its entirety from the specified website: FORDBOOK