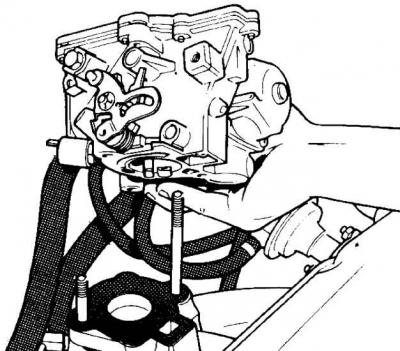
Removing the carburetor
1. Remove air filter.
2. With a hot engine, relieve pressure in the engine cooling system, for which, being careful, unscrew the plug on the expansion tank.
3. Remove the coolant supply hoses from the air damper housing, lift them up and plug them.
4. Disconnect the wire from the idle air solenoid valve.
5. Remove the starter cable.
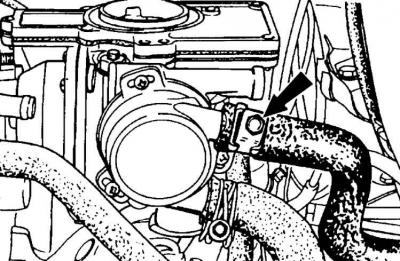
6. Remove the throttle cable by sliding the spring clip and removing the cable tip from the ball head on the throttle lever, and unscrewing the bracket.
7. Remove the fuel supply hose to the carburetor. If there are clamps on the hoses, bite them off and replace them with clamps that are clamped with a screw.
8. Remove vacuum hose.
9. Unscrew the nuts securing the carburetor to the intake manifold, remove it and cover the hole in the intake manifold with a clean rag.
Dismantling the carburetor
10. Remove carburetor from engine
11. Unscrew the 7 screws securing the carburetor cover and remove the cover with gasket.
12. Remove any remaining fuel from the float chamber.
13. Remove the plug of the mixture quality screw and unscrew the screw. The air valve must be closed.
14. Unscrew the 4 screws and remove the main fuel jet housing, ball and weight of the accelerator pump delivery valve, for which it is necessary to turn the carburetor over.
15. Remove the float, its shaft and needle valve.
16. Unscrew the 4 screws and remove the air valve control diaphragm housing, return spring, spring plate and, after removing the retaining ring, the diaphragm.
17. Turn the carburetor over, unscrew the 3 screws and remove the accelerator pump diaphragm.
18. Clean all channels and cavities of the carburetor with compressed air.
Carburetor purge
19. Remove the earth wire from the battery and the air filter.
20. Thoroughly wash the carburetor from the outside, unscrew the 7 screws and remove the carburetor cover.
21. Remove the gasoline remaining in the float chamber.
22. Blow out the float chamber with compressed air, being careful not to blow it directly into the spool control nozzle.
23. Install the carburetor cover.
24. Check idle speed and CO content.
25. Assembly is carried out in the reverse order of disassembly.
26. The carburetor is installed in the reverse order of removal.
27. After installation, adjust idle speed and CO content.
Visitor comments