Powertrain with drive
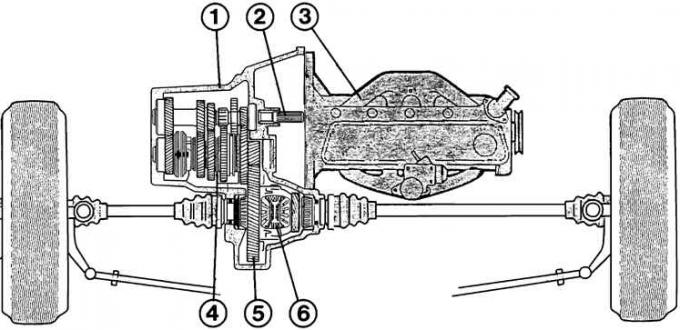
1 – gearbox housing; 2 – primary shaft; 3 – engine; 4 – secondary shaft; 5 – driven gear of the main transmission; 6 – differential
Four-speed gearbox
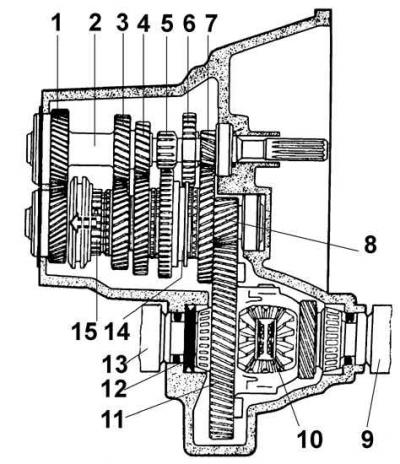
1 – 4th gear pinions; 2 – primary shaft; 3 – 3rd gear pinions; 4 – 2nd gear pinions; 5 – reverse gears; 7 – intermediate reverse gear; 8 – secondary shaft; 9, 13 – drive shafts; 10 – drive shaft retaining ring; 11 – driven gear of the main transmission; 12 – special convex spring washers; 14 – 1st/2nd gear synchronizer; 15 – 3rd/4th gear synchronizer
The gearbox is removed from under the vehicle.
1. Disconnect the ground wire from the battery.
Caution: To maintain the gearshift adjustment, engage fourth gear before removing the gearbox.
2. Use a lift to support the engine and lift it up slightly.
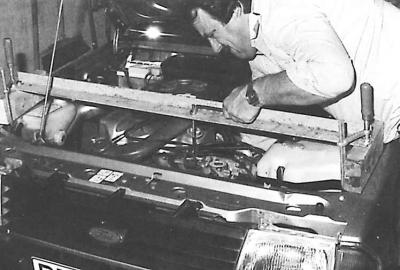
3. If there is no lift, install a beam over the engine compartment and support it on wooden blocks installed on the gutters of the front wings. Attach the engine to the beam with wire and tighten it.
4. Unscrew the union nut securing the speedometer drive and remove the cable.
5. Remove the clutch cable from the clutch release lever.
6. Remove the gearbox ventilation pipe from the side member.
7. Unscrew the 2 upper bolts from the gearbox mounting flange.
8. Disconnect the heater hose from the thermostat and hang it up with wire.
9. Raise the vehicle and place it on supports.
10. Disconnect the wires, unscrew the 3 bolts and remove the starter.
11. Remove the tensioner (1.6 dm³ engine only) between the engine and gearbox (7 bolts).
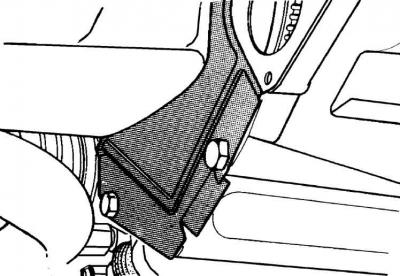
12. Unscrew 2 bolts and remove the clutch housing cover.
13. Disconnect the connector from the reverse light switch.
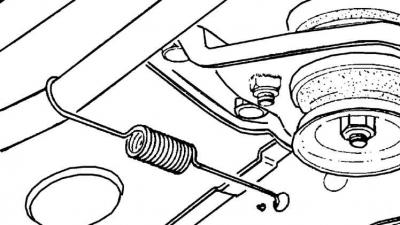
14. Remove the gear shift rod spring.
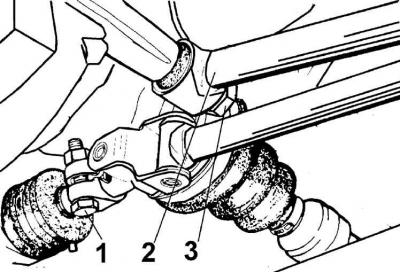
15. Loosen the clamp bolt (1) on the end of the gearshift rod and remove the rod from the gear selector shaft by sliding it away from the gearbox. Use a soft wire to hang the rod on the steering gear. Unscrew the bolt (3) securing the stabilizer (2) to the gearbox and use a soft wire to hang the stabilizer on the steering gear.
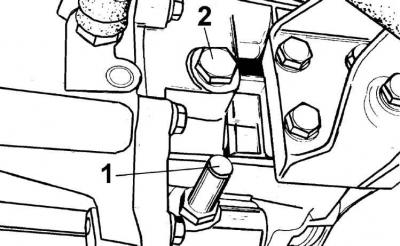
16. Drain the oil from the gearbox by carefully unscrewing the lock (1) of the gear selector shaft (2 – oil filler plug).
Caution! There is a locking pin and spring under the shaft lock that must be removed.
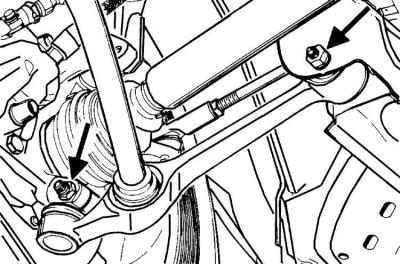
17. Remove both wishbones, first unscrewing the mounting bolt on the bracket, then the nut on the ball joint, holding the Torx bolt from turning with a wrench. The arrow indicates the connection point of the wishbone.
18. Remove the ball joint from the steering knuckle.
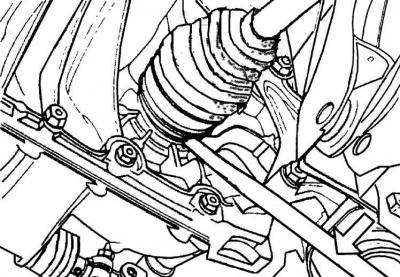
19. Remove both drive shafts from the gearbox and hang them on the steering rods using soft wire. To do this, insert a crowbar or screwdriver between the CV joint and the housing, and while the assistant is pulling the car wheel outward with force, knock the drive shaft out of engagement in the axle gear with a strong, sharp blow to the end of the crowbar.
20. Instead of the removed drive shafts, insert plastic or wooden plugs to secure the differential axle gears. The diameter of the plugs is 22 mm.
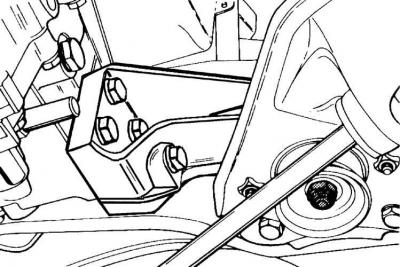
21. Unscrew the 4 bolts securing the front gearbox suspension bracket, unscrew the nut, remove the rubber support mounting bolt and remove the bracket.
22. Unscrew the nut securing the rear rubber support of the gearbox, unscrew the 3 nuts securing the support lining and remove the lining.
23. Raise the gearbox with a jack using a wooden block.
24. Unscrew the 2 lower bolts on the gearbox mounting flange, lift the gearbox slightly, move it away from the engine until the splines of the driven disk hub disengage from the input shaft, then lower it and remove it from under the car.
The original text is provided on an online resource FORDBOOK.ru