Contents: Removal ↳ Installation ↳
Ford ATX Automatic Transmission
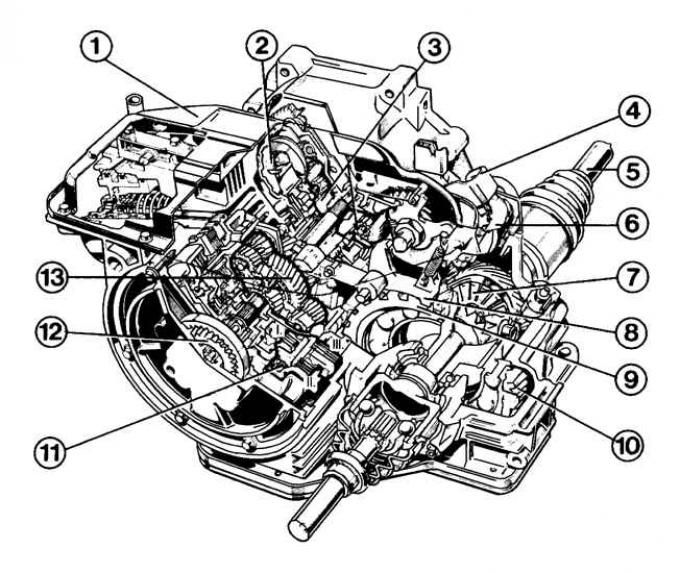
1 – control housing; 2 – torque converter; 3 – planetary gear of the torque converter; 4 – gear shift; 5 – drive shaft; 6 – centrifugal force regulator; 7 – differential; 8 – Parking brake; 9 – parking brake gear; 10 – drive; 11 – clutch; 12 – oil pump; 13 – planetary gear
Elements of hydrokinetic transmission
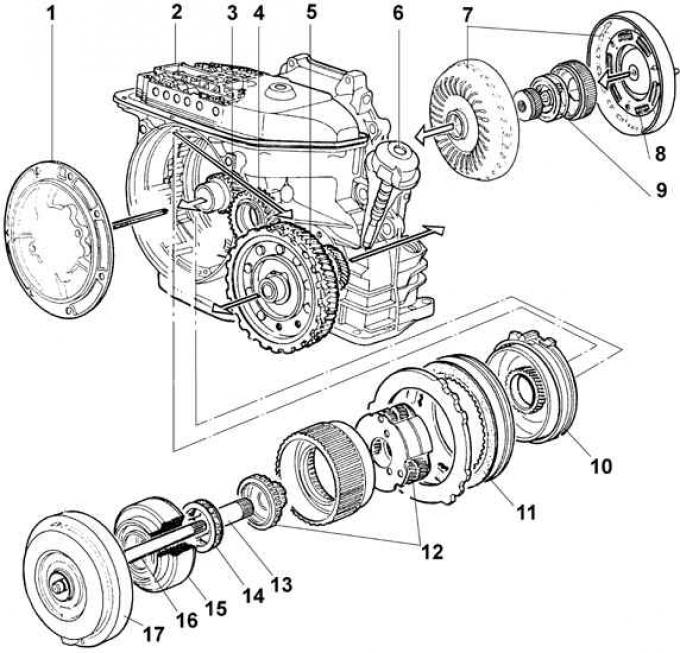
1 – oil pump; 2 – control valve bolt; 3 – main gear drive pinion; 4 – intermediate gear of the main transmission; 5 – driven gear of the main transmission; 6 – centrifugal regulator; 7 – torque converter; 8 – torsional vibration damper; 9 – planetary gears; 10 – brake band; 11 – reverse friction gear; 12 – planetary gears; 13 – intermediate shaft; 14 – friction gear; 15 – friction overdrive; 16 – second gear shaft; 17 – second gear clutch
Removal
1. Disconnect the ground from the battery.
2. Remove the hood, having first marked the position of the hood hinges.
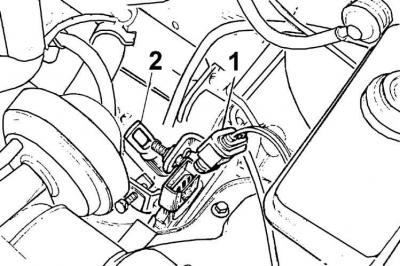
3. Remove the multi-pin connector (1) of the starting device, move the gear shift lever to position "D" and unscrew the nut connecting the rod (2) to the gear shift lever.
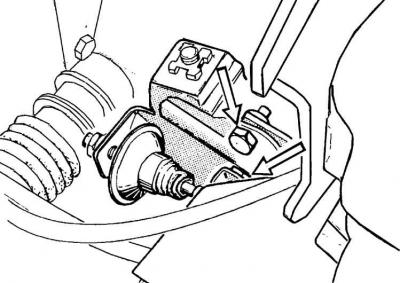
4. Remove the downshift mechanism bracket from the right side of the engine compartment, loosen the adjusting bolt, unscrew the mechanism mounting nut, disconnect it from the axle and remove the downshift mechanism (the fastening elements are indicated by arrows).
5. Unscrew the two upper bolts securing the gearbox to the engine.
6. Raise the front of the vehicle and secure it on stands.
7. Unscrew the speedometer drive cable from the gearbox.
8. Unscrew the gear shift rod bracket (2 bolts).
9. Remove the starter, having first disconnected the wires and unscrewed the 3 mounting bolts.
10. Remove the connector from the reverse light switch.
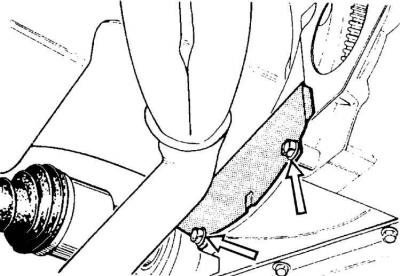
11. Remove the crankcase covers (the crankcase cover mounting bolts are indicated by arrows).
12. Unscrew the right wishbone from the steering knuckle, while securing the Torx bolt from turning with a wrench.
13. Remove the right drive shaft from the gearbox and hang it on the steering rod using a soft wire. To do this, insert a crowbar or screwdriver between the CV joint and the housing, and while the assistant is pulling the car wheel outward with force, knock the drive shaft out of engagement with a strong, sharp blow to the end of the crowbar.
14. Repeat the same steps when removing the left drive shaft.

15. Remove the front gearbox support, having first unscrewed the nut and four bolts (indicated by arrows).
16. Disconnect the oil hoses from the gearbox and plug them.
17. Remove the front gearbox support bracket.
18. Unscrew 5 bolts and 2 nuts and remove the rear gearbox support.
19. Gradually and sequentially unscrew the 4 nuts securing the drive plate to the torque converter, turning the crankshaft to gain access to the nuts.
20. Raise the gearbox slightly with a jack and remove the side gearbox mounting bolts.
21. Remove the gearbox, while preventing the torque converter from moving relative to the gearbox.
Installation
The steps for installing the gearbox are performed in the reverse order of removal. Before installing the drive shafts, check the presence and elasticity of the retaining rings on the ends of the shafts.